Posted on

The Angler’s Essential Guide: A Deep Dive into Fishing Reel Greases and Oils

The Great Divide: Grease vs. Oil

At the most basic level, the difference between grease and oil is viscosity and application. Think of it as the difference between a thick, protective balm and a thin, penetrating liquid.

Fishing Reel Grease: The Guardian of Gears

Grease is essentially a sponge-like structure. It consists of a base oil suspended in a thickener (typically a metallic soap or synthetic polymer) and fortified with additives. Its primary job is to stay put, providing a long-lasting, high-pressure lubricating film in areas that experience intense force and friction.

Key Properties of Grease:

  • High Viscosity and Adhesion: Grease is thick and sticky. It clings tenaciously to gear teeth and metal surfaces, resisting the centrifugal force that would fling a lighter lubricant away.
  • Corrosion Resistance: Quality reel greases are formulated with powerful anti-corrosion and anti-rust additives, creating a barrier that protects internal components from both freshwater and the ravages of saltwater.
  • Load-Bearing Capacity: It excels under the extreme pressure found between the main and pinion gears, preventing metal-on-metal wear that can lead to rough, noisy, and ultimately failed reels.

Where to Use Grease:

  • Main and Pinion Gears: This is the most critical application for grease. A thin, even coating on the teeth of these gears ensures a smooth and powerful retrieve.
  • Worm Gears (in Baitcasters): The level-wind mechanism relies on a worm gear that requires a durable lubricant that will stay in the tracks.
  • Shafts and Bushings: Any non-bearing surface where metal slides against metal benefits from a protective layer of grease.
  • Internal Surfaces: A light film of grease on the non-moving interior of the reel’s frame and side plates provides an excellent barrier against corrosion.

Fishing Reel Oil: The Elixir of Speed

Oil is the lifeblood of high-speed components. It is a much thinner lubricant designed to penetrate tight tolerances and create a slick, low-friction surface that allows parts to spin freely with minimal resistance.

Key Properties of Oil:

  • Low Viscosity: Oil flows easily, allowing it to coat parts that spin at thousands of revolutions per minute (RPMs).
  • Friction Reduction: The primary purpose of oil in a reel is to minimize friction, which is paramount for achieving maximum casting distance.
  • Penetration: Its thin consistency allows it to work its way into the tiny spaces within ball bearings and onto handle knobs and line rollers.

Where to Use Oil:

  • Spool Bearings: This is the most important use for oil. A single, small drop of high-quality, low-viscosity oil on the spool bearings of a baitcasting or spinning reel can dramatically increase casting distance.
  • Handle Knobs: A drop of oil will keep handles spinning freely and silently.
  • Line Roller Bearings: This crucial part of a spinning reel must spin freely to prevent line twist.
  • Bail Arm Joints: A touch of oil on the pivot points of a spinning reel’s bail ensures it opens and closes crisply.
  • Anti-Reverse Clutch: This is a special case. Many manufacturers recommend no lubrication on the anti-reverse bearing. If lubrication is needed, it must be an extremely thin, plastic-safe oil to prevent the clutch from slipping.

The Brand Battlefield: A Head-to-Head Comparison

While the principles of “grease for gears, oil for bearings” are universal, not all lubricants are created equal. Different brands formulate their products for different purposes, from all-around durability to outright casting performance.

Shimano: The Factory Standard

Shimano is renowned for its precision engineering, and its lubricants are formulated to maintain that factory-fresh feel.

  • Shimano Star Drag Grease (DG06): This is the quintessential workhorse grease. It is exceptionally smooth, durable, and provides a buttery feel to the gear train. It has excellent water resistance and is the go-to choice for maintaining the main and pinion gears in the vast majority of Shimano reels.
  • Shimano Permalube Grease: A slightly thicker, more tenacious grease often used in larger saltwater reels where corrosion resistance and durability under heavy loads are paramount.
  • Shimano Bantam Oil: A high-grade, light-viscosity synthetic oil. It is perfect for spool bearings, handle knobs, and line rollers. It provides excellent lubrication without bogging down high-speed parts, making it ideal for anglers who prioritize casting distance and a “free” feel.

Daiwa: Precision and Specialization

Daiwa often engineers its reels with highly specific lubrication requirements, particularly with its advanced drag and sealing systems.

  • Daiwa Ultimate Tournament Drag Grease (ATD): This is not a gear grease. It’s a specialized, medium-viscosity lubricant designed specifically for Daiwa’s carbon drag washers. It allows for a low-inertia startup, preventing jerky drags and protecting lines. Using the wrong grease on these drags can severely compromise their performance.
  • Daiwa Reel Guard Grease (Blue Grease): This is Daiwa’s primary gear grease. It’s a synthetic blend known for its excellent adhesion and saltwater corrosion protection. It is slightly more viscous than Shimano’s offering, providing a very protected and “dampened” gear feel.
  • Daiwa Reel Oil: A fine, synthetic oil suitable for all high-speed applications. Daiwa places a strong emphasis on its Magsealed reels, which use a special magnetic oil to form a seal. These reels should only be serviced by authorized technicians, but Daiwa’s standard oil is perfect for lubricating the spool bearings and handles on their non-Magsealed models.

Penn: The Saltwater Sentinel

Penn has built its reputation on creating reels that can withstand the brutal saltwater environment. Their lubricants reflect this philosophy of toughness and durability.

  • Penn Precision Reel Grease (Blue Grease): This is one of the most iconic lubricants in fishing. It is a proprietary synthetic blend renowned for its incredible tenacity and corrosion resistance. It is thicker and stickier than many other greases, making it the top choice for anglers who subject their gear to heavy surf, spray, and punishing battles. While it provides unparalleled protection, it can feel slightly heavier on the retrieve compared to a Shimano grease.
  • Penn Reel Oil: A high-quality synthetic oil that is corrosion-resistant. It’s an excellent all-purpose oil for bearings and handles, formulated to hold up in the saltwater environment where Penn reels thrive.

Abu Garcia: The All-Around Performer

Abu Garcia, famous for its legendary baitcasting reels, offers reliable, no-nonsense lubricants that get the job done.

  • Abu Garcia Reel Grease: Often sold in a convenient tube, this is a Silicote-based grease that provides good lubrication and corrosion protection. It’s a solid, all-around performer that works well for a wide variety of reels and applications, striking a good balance between smoothness and durability.
  • Abu Garcia Reel Oil: A light-viscosity oil that is a staple for many baitcaster enthusiasts. It’s perfectly suited for the spool bearings on Ambassadeur and Revo reels, promoting long, smooth casts.

Rocket Fuel: The Pursuit of Pure Speed

Rocket Fuel is a UK-based brand that has achieved cult status among surf casters and tournament anglers. Their focus is singular: maximizing spool speed for ultimate casting distance. Their products are primarily oils, offered in different viscosities.

  • Rocket Fuel Yellow Label: A very low-viscosity “super-fast” oil. This is for the angler seeking every last yard of distance. It makes spools incredibly free-spinning, but because it is so thin, it requires more frequent application than thicker oils.
  • Rocket Fuel Red Label: A slightly higher viscosity oil that offers a bit more protection and longevity than the Yellow Label. It’s a popular choice for anglers who want a significant boost in casting performance without having to re-oil after every trip.
  • Rocket Fuel Tournament Formula: An even faster, lower-viscosity version of Yellow Label, designed for the competitive casting circuit where performance is measured in inches.

Deuthlon: The High-Tech Contender

Deuthlon is a modern, technology-driven brand that brings advanced chemistry to the reel lubrication market. They focus on synthetic formulations with additives like ceramics and polymers to achieve specific performance goals.

  • Deuthlon Cast Lube (Ceramic): This is an advanced synthetic bearing oil infused with sub-micron ceramic particles. The ceramics act like microscopic ball bearings, further reducing friction and providing a slicker, more durable lubricating film than oil alone. It is a direct competitor to high-performance oils like Rocket Fuel.
  • Deuthlon Power Drag Grease: A fully synthetic grease formulated for extreme temperature and pressure stability. It’s designed to provide consistent performance in carbon fiber drag systems during long, drag-screaming runs from powerful fish.
  • Deuthlon Semi-Fluid Grease: An innovative product that bridges the gap between grease and oil. It’s designed for components like worm gears and bushings where the adhesion of grease is needed, but the fluidity of oil helps reduce friction.

The Application: Less is Always More

Regardless of the brand you choose, the single most important rule of reel lubrication is less is more. Over-lubricating a reel is just as harmful as under-lubricating it.

  • Grease Application: Never “pack” the gearbox with grease. Use a small brush to apply a thin, even layer only to the teeth of the main and pinion gears. The goal is for the teeth to be coated, not for the entire gearcase to be filled. Excess grease will be flung to the sides, where it does nothing but collect dirt and add resistance to the retrieve.
  • Oil Application: For a spool bearing, one single, small drop from a needle-point applicator is sufficient. Too much oil will create “hydraulic resistance,” actually slowing the bearing down and impeding casting distance.

Conclusion: The Right Lube for the Right Job

There is no single “best” fishing reel lubricant, only the best lubricant for a specific application and a specific angler’s goal.

  • For the angler seeking ultimate saltwater protection and durability, the thick, tenacious formula of Penn’s Blue Grease is hard to beat.
  • For the angler who prizes a buttery-smooth, factory-fresh retrieve in their high-end spinning or baitcasting reel, Shimano Star Drag Grease is the benchmark.
  • For the baitcaster or surf angler obsessed with achieving the absolute maximum casting distance, the ultra-low viscosity oils from Rocket Fuel or the advanced ceramic-infused lube from Deuthlon are the clear choices.
  • For the all-around angler who maintains a variety of reels for different applications, the reliable and balanced performance of Abu Garcia or Daiwa lubricants provides a fantastic solution.

Properly cleaning your reel and then carefully applying the correct high-quality grease to the gears and the right oil to the bearings is the most critical maintenance you can perform. It is the secret to a long-lasting, reliable, and high-performing reel that won’t let you down when the fish of a lifetime is on the line.

Posted on

Beyond the Box: A Comprehensive Guide to Super Tuning Your Baitcasting Reel

A baitcasting reel is more than just a tool; it’s a precision instrument. While modern reels are remarkably capable straight out of the box, a process known as “super tuning” can unlock a new level of performance, tailoring the reel to your specific needs and preferences. This detailed guide will walk you through the various aspects of super tuning, from intricate bearing upgrades to ergonomic handle swaps, transforming your stock reel into a high-performance casting machine.

The Foundation: A Meticulous Cleaning and Lubrication

Before embarking on any performance upgrades, a thorough cleaning and proper lubrication are paramount. A clean reel is a smooth reel, and this process alone can significantly enhance performance.

Disassembly and Cleaning:

Begin by carefully disassembling your reel. It is advisable to have a schematic for your specific model on hand. As you remove parts, lay them out in the order they were removed on a clean, lint-free cloth. This will simplify the reassembly process.

Use a quality degreaser and small brushes to meticulously clean all old grease, oil, and accumulated grime from the gears, frame, and all other internal components. Pay close attention to the main gear, pinion gear, and the worm gear of the levelwind system. A toothbrush or a specialized reel cleaning brush can be very effective for this task. For stubborn deposits, a soak in the degreaser may be necessary. Ensure all parts are thoroughly dried before proceeding.

Strategic Lubrication:

Over-lubrication is a common mistake that can hinder performance by attracting dirt and creating unnecessary resistance. The key is to use the right lubricant in the right place, and to use it sparingly.

  • Grease: A quality reel grease should be applied to the teeth of the main gear and the pinion gear. A light coat is all that is needed; the movement of the gears will distribute it evenly.
  • Oil: A light, high-quality reel oil should be used on bearings, the spool shaft, and the worm gear of the levelwind system. For bearings, a single drop is usually sufficient.

The Heart of the Cast: Upgrading Your Bearings

The spool bearings are the most critical component for casting distance and the ability to effectively cast lighter lures. Upgrading from standard stainless steel bearings to higher-quality aftermarket options can yield dramatic results.

Types of Bearings:

  • Stainless Steel Bearings: These are the standard in most factory reels. While functional, their performance can be inconsistent.
  • Ceramic Hybrid Bearings: These are a popular upgrade, featuring ceramic balls with stainless steel races. They are lighter, harder, and smoother than stainless steel balls, resulting in less friction and longer spin times. This translates to longer, more effortless casts.
  • Full Ceramic Bearings: For the ultimate in performance, full ceramic bearings with ceramic balls and races offer the least resistance. They are also impervious to corrosion, making them an excellent choice for saltwater anglers.

The Upgrade Process:

Replacing spool bearings is a relatively straightforward process. The spool can typically be removed after taking off the side plate. The bearings are often held in place by a small retaining clip or are press-fit into the side plate and spool. A specialized bearing removal tool can be very helpful for this task.

When installing new bearings, it’s crucial to decide on lubrication. Many high-performance ceramic bearings are designed to be run dry, offering the most “free spin.” However, a single drop of light oil can quiet them down and provide a small amount of protection without significantly impacting performance.

Taming the Beast: Optimizing Your Drag System

A smooth and reliable drag system is essential for fighting fish effectively. Stock drag washers, often made of felt or other materials, can become compressed and jerky over time. Upgrading to carbon fiber drag washers is a significant improvement.

The Carbon Fiber Advantage:

Carbon fiber drag washers, often referred to by brand names like Carbontex, offer several advantages:

  • Smoothness: They provide a much smoother and more consistent drag pressure, reducing the risk of line breakage from a jerky drag.
  • Durability: Carbon fiber is highly durable and less prone to compression than other materials.
  • Increased Drag Pressure: In many cases, upgrading to carbon fiber washers can increase the maximum drag pressure of your reel.

Installation and Lubrication:

Upgrading the drag system involves disassembling the handle and star drag mechanism to access the gear stack where the drag washers are located. Carefully replace the old washers with the new carbon fiber set, ensuring they are installed in the correct order.

A very light coating of a specialized drag grease, such as Cal’s Drag Grease or Deuthlon Drag Grease, is highly recommended. This grease protects the washers and ensures a smooth, consistent startup. Apply a thin film to each washer before reassembly.

The Angler’s Interface: Customizing Your Handle

The handle is your direct connection to the reel, and customizing it can improve both comfort and performance.

Handle Length and Material:

  • Longer Handles: A longer handle provides more leverage, making it easier to crank on powerful fish and retrieve large lures. This is a popular upgrade for anglers using deep-diving crankbaits or swimbaits.
  • Carbon Fiber Handles: These handles are lighter than their aluminum counterparts, reducing the overall weight of the reel and increasing sensitivity.

Knob Upgrades:

The handle knobs themselves can also be upgraded for improved grip and comfort. Options include:

  • EVA Foam Knobs: These are lightweight and comfortable, providing a good grip even when wet.
  • Cork Knobs: Offering a classic look and feel, cork is also very lightweight and provides excellent grip.
  • Power Knobs: Larger, round or T-shaped knobs provide a more substantial grip for increased cranking power.

Many aftermarket handles come as complete kits with new knobs, bearings for the knobs, and the necessary hardware for installation.

Ensuring Flawless Line Management: Tuning the Levelwind System

The levelwind system is responsible for distributing line evenly across the spool during the retrieve. A properly functioning levelwind is crucial for preventing line dig-in and ensuring smooth casting.

Cleaning and Lubrication:

The worm gear is the heart of the levelwind system and is a magnet for dirt and debris. Regular cleaning with a degreaser and a small brush is essential. After cleaning, apply a light coat of quality reel oil to the worm gear. A single drop on the pawl (the small pin that travels within the worm gear’s groove) will also ensure smooth operation.

Polishing for Performance:

For the truly dedicated tuner, polishing the worm gear and the pawl can reduce friction and create an even smoother line lay. This can be done with a very fine-grit polishing compound and a Dremel tool with a felt polishing bit. The goal is to create a mirror-like finish, but care must be taken not to remove too much material.

By systematically addressing each of these areas, you can transform a standard baitcasting reel into a super-tuned machine that is a joy to fish with. The increased casting distance, smoother retrieve, and improved ergonomics will not only make you a more effective angler but will also deepen your appreciation for the intricate engineering of these incredible tools.

Posted on

The Dual-Threat Dynamo: A Deep Dive into 2-Speed Fishing Reels and How to Choose Your Champion

For the dedicated angler, the fishing reel is more than just a winch; it’s a finely tuned instrument of battle, a direct connection to the raw power of the fish at the end of the line. In the realm of conventional reels, a significant evolution has been the advent of the 2-speed mechanism, a feature that has revolutionized how anglers target and fight big game. This article will provide a lengthy, detailed exploration of the 2-speed fishing reel, its inner workings, and a comprehensive guide on how to choose between a trusty single-speed and a versatile 2-speed reel.

Unmasking the Machine: What is a 2-Speed Reel and How Does it Work?

At its core, a fishing reel’s “speed” is determined by its gear ratio. This ratio, expressed as a number like 6.1:1, signifies how many times the spool rotates for every single turn of the handle. A higher first number indicates a faster retrieve. A 2-speed reel, as the name implies, offers the angler two distinct gear ratios in a single housing, typically a high gear and a low gear.

Think of it like the gearing on a bicycle. The high gear allows you to cover a lot of ground quickly with each pedal, ideal for flat stretches or when you need to pick up speed. The low gear, while slower, provides significantly more torque, making it easier to climb a steep hill. A 2-speed reel applies this same principle to fighting fish.

The High Gear: This is your “speed” setting. It’s designed for rapid line retrieval. This is crucial for several scenarios:

  • Clearing Lines: When a fish strikes and takes off, you often need to reel in other lines quickly to avoid tangles.
  • Gaining on a Fish Swimming Towards You: Big fish will sometimes charge the boat. A high-speed gear allows you to pick up slack line rapidly and maintain pressure on the hook.
  • Jigging: Many jigging techniques require a fast, erratic retrieve to impart the desired action on the lure.
  • Checking Baits: When you want to quickly bring your bait up from the depths to check it or re-rig, the high gear is a time and energy saver.

The Low Gear: This is your “power” setting. Engaging the low gear provides a significant increase in cranking power, or torque. This becomes invaluable when:

  • Fighting a Stubborn Fish at Depth: When a large tuna or marlin goes deep and settles into a “tuna-tug” or “death circle,” trying to winch it up with a high-speed gear can be exhausting and, in some cases, nearly impossible. The low gear allows you to make steady, powerful gains on the fish.
  • Lifting Heavy Fish: The final stages of the fight often involve lifting a heavy, defeated fish towards the boat. The low gear acts as a powerful winch, reducing strain on the angler.
  • Deep Dropping: For anglers targeting species in very deep water, the low gear can be a back-saver simply for retrieving heavy sinkers and rigs from the abyss.

Switching between these two gears is typically accomplished via a button on the handle side of the reel. A simple push engages the low gear, and often a lever or another press will re-engage the high gear. This seamless transition is a key element of the 2-speed’s effectiveness.

Beyond the gear ratio, it’s also important to consider the “Inches Per Crank” (IPT). This measurement tells you exactly how much line is retrieved with one full rotation of the handle. While closely related to the gear ratio, the IPT can also be influenced by the size of the spool and how much line is on it. A reel with a taller, narrower spool will generally have a higher IPT.

The Tale of the Tape: Single-Speed vs. 2-Speed Reels

The decision to invest in a 2-speed reel is not always clear-cut. Both single-speed and 2-speed reels have their distinct advantages and disadvantages.

The Single-Speed Stalwart: The Epitome of Simplicity and Reliability

For decades, the single-speed reel has been the workhorse of the fishing world, and for good reason.

Advantages:

  • Lighter Weight: With fewer internal components, single-speed reels are noticeably lighter than their 2-speed counterparts of the same size. This reduces angler fatigue during long days on the water.
  • Simpler Mechanics: Fewer moving parts mean there is less that can go wrong. This translates to increased durability and easier maintenance.
  • Lower Cost: Generally speaking, a single-speed reel will be significantly less expensive than a 2-speed model from the same manufacturer and of similar quality.
  • Sufficient for a Wide Range of Applications: For the vast majority of fishing scenarios, from inshore casting to light offshore trolling, a single-speed reel is more than adequate.

Disadvantages:

  • Limited Power: When faced with a truly powerful fish that fights deep and stubbornly, a single-speed reel can leave an angler feeling under-gunned. The lack of a low-end gear can make it a grueling, and sometimes losing, battle.
  • Increased Angler Fatigue: In situations that require significant cranking power, such as deep-dropping or fighting a large fish for an extended period, a single-speed reel will take a greater toll on the angler’s stamina.

The 2-Speed Titan: Unleashing Power and Versatility

The 2-speed reel is a testament to angling innovation, providing a solution to the age-old problem of needing both speed and power in a single package.

Advantages:

  • Incredible Cranking Power: The ability to switch to a low gear provides an immense mechanical advantage, allowing anglers to move fish that would be nearly impossible to budge with a single-speed reel.
  • Versatility: A single 2-speed reel can effectively cover a wider range of fishing techniques and target species. It can be used for high-speed trolling one day and deep-dropping for bottom dwellers the next.
  • Reduced Angler Fatigue: During prolonged fights with powerful fish, the low gear does the heavy lifting, allowing the angler to conserve energy and fight more effectively.
  • Quick Line Retrieval: The high gear is not just a bonus; it’s a critical tool for managing the fight and presenting lures effectively.

Disadvantages:

  • Increased Weight: The additional gearing and more robust internal components make 2-speed reels heavier than their single-speed siblings.
  • Mechanical Complexity: With more moving parts comes a greater potential for mechanical issues. Proper maintenance is even more critical for 2-speed reels.
  • Significant Cost: The engineering and materials required to create a reliable 2-speed mechanism come at a price. These reels represent a considerable investment.

The Ultimate Showdown: Making the Choice for Your Angling Arsenal

Choosing between a single-speed and a 2-speed reel boils down to a careful consideration of your specific angling needs. Here’s a breakdown of the key factors to guide your decision:

Target Species: The Defining Factor

More than any other variable, the fish you intend to catch will dictate your reel choice.

  • Prime Candidates for 2-Speed Reels:
    • Tuna (Yellowfin, Bluefin, Bigeye): These fish are notorious for their blistering initial runs followed by deep, stubborn fights. A 2-speed reel is almost a necessity for consistently landing larger tuna.
    • Marlin and Sailfish: While some anglers prefer single-speeds for their lighter weight when chasing billfish, a 2-speed can be a lifesaver when a large marlin sounds and engages in a deep-water tug-of-war.
    • Large Sharks: The immense power and dogged fighting style of large sharks make a 2-speed reel a highly recommended tool.
    • Goliath Grouper and Other Large Bottom Dwellers: The low-end torque of a 2-speed is essential for pulling these behemoths away from structure on the seafloor.
    • Wahoo: Known for their incredible speed, the high gear on a 2-speed is perfect for keeping up with a wahoo’s initial run.
  • Situations Where a Single-Speed Shines:
    • Most Freshwater Species: Bass, walleye, pike, and musky are powerful fighters, but they typically don’t engage in the prolonged, deep battles that necessitate a 2-speed.
    • Inshore Saltwater Species: Snook, redfish, and striped bass can be effectively targeted with quality single-speed reels.
    • Bottom Fishing for Snapper, Grouper (smaller varieties), and Cod: While a 2-speed can be helpful for deep-dropping, a single-speed with a powerful drag system is often sufficient.

Fishing Techniques: How You Fish Matters

Your preferred fishing methods will also influence your choice.

  • Offshore Trolling: This is the quintessential application for 2-speed reels. The combination of high-speed line retrieval and low-gear power is perfectly suited for the challenges of big-game trolling.
  • Deep-Dropping and Bottom Fishing: If you frequently fish in depths exceeding 300 feet, a 2-speed reel can make a world of difference, even just for retrieving your rig. The low gear significantly reduces the effort required.
  • Jigging: For vertical jigging, especially for powerful species like amberjack and tuna, a 2-speed reel is a game-changer. The high gear allows for aggressive jigging actions, while the low gear provides the power to fight the fish once it’s hooked.
  • Live Baiting: While a single-speed can certainly get the job done, a 2-speed offers the versatility to handle a wider range of scenarios that can unfold when live baiting for large predators.

Budget and Experience: A Reality Check

It’s crucial to be realistic about your budget and experience level. A top-of-the-line single-speed reel from a reputable manufacturer will almost always outperform a cheaply made 2-speed reel. If you are new to offshore fishing, it may be wise to start with a high-quality single-speed and gain experience before making the significant investment in a 2-speed.

Furthermore, the added complexity of a 2-speed reel requires a commitment to regular and proper maintenance. If you are not inclined to meticulously clean and service your gear, the simpler mechanics of a single-speed might be a more reliable long-term choice.

The Final Verdict: Is a 2-Speed Reel Your Next Investment?

The decision to purchase a 2-speed fishing reel is a significant one. It represents a commitment to targeting larger, more powerful fish and employing techniques that demand both speed and torque.

You should seriously consider a 2-speed reel if:

  • You regularly target big game species like tuna, marlin, and large sharks.
  • Your primary fishing methods include offshore trolling, deep-dropping, or vertical jigging for powerful fish.
  • You find yourself frequently exhausted or outmatched by the fish you are hooking.
  • You have the budget for a high-quality model and are committed to its proper maintenance.

A single-speed reel is likely the better choice if:

  • You primarily fish inshore or freshwater.
  • Your target species are generally smaller and less powerful.
  • You prefer a lighter, simpler setup.
  • Your budget is a primary concern.

Ultimately, the choice is a personal one based on your angling ambitions. For the dedicated big-game angler, the 2-speed reel is an indispensable tool, a force multiplier that can turn the tide in the most demanding of battles. For many other anglers, the elegant simplicity and proven reliability of a high-quality single-speed reel will continue to be the key to countless successful days on the water. Choose wisely, and you’ll have a trusted companion for years of angling adventures to come.

Posted on

Beyond the Basics: Decoding Trolling Reel Gear Ratios for Peak Performance

For the discerning angler, a trolling reel is far more than just a line holder; it’s a precision instrument. While drag systems and line capacity often grab the spotlight, truly mastering your trolling game requires a deep understanding of a fundamental yet often overlooked specification: the gear ratio. This seemingly simple number holds the key to optimizing your retrieve speed, power, and ultimately, your success on the water.

What’s in a Ratio? The Core Concept

At its heart, a trolling reel’s gear ratio indicates how many times the spool rotates for every single turn of the reel handle. Expressed as a ratio like 5.0:1 or 2.5:1, the first number represents the spool rotations, and the second (always ‘1’) represents one full revolution of the handle. So, a reel with a 5.0:1 ratio means the spool spins five times for every one turn of the handle, while a 2.5:1 ratio means the spool rotates two and a half times.

This seemingly small difference translates into a significant impact on two critical aspects of your fishing: retrieve speed and cranking power. Higher ratios mean faster line retrieval, while lower ratios deliver increased torque and pulling power. Understanding when to leverage each is crucial for advanced trolling strategies.

The Need for Speed: High-Speed Gear Ratios

Trolling reels with high gear ratios (typically 5.0:1 and above, sometimes reaching into the 6.0:1 range) are built for rapid line retrieval.

When to Choose High-Speed:

  • Covering Water Quickly: If you’re constantly checking lines, repositioning lures, or moving from one spot to another, a high-speed reel allows you to pull in vast amounts of line in a hurry, minimizing downtime.
  • Keeping Up with Fast Runners: For highly acrobatic or incredibly fast-swimming pelagic species like tuna, wahoo, or even some salmon species when they make blistering runs towards the boat, a high-speed retrieve can be essential for taking up slack line rapidly and maintaining tension. Losing tension, even for a moment, can lead to pulled hooks.
  • Striking and Hook Setting: While less about the fight itself and more about the initial reaction, a quick retrieve can help ensure a solid hook set on a subtle bite by rapidly taking up any initial slack.
  • Trolling with Planer Boards or Kites: When using these expansive setups, having the ability to quickly retrieve and reset lines that are far from the boat is a distinct advantage.

Impact on Lure Presentation: High-speed reels generally mean you’ll be imparting more action to your lure with each crank, or you’ll need to be mindful of blowing out a lure’s natural action if trolling at high boat speeds. Conversely, if trolling slowly, a high-speed reel can still impart a good amount of lure action even with minimal handle turns.

The Powerhouse: Low-Speed Gear Ratios

Conversely, low gear ratios (often in the 2.0:1 to 3.5:1 range) prioritize brute strength and torque over speed. These reels are designed for battling heavyweights and operating at significant depths.

When to Choose Low-Speed:

  • Deep-Water Applications: When you’re dropping heavy weights (like those associated with downriggers or heavy divers) to extreme depths, a low-ratio reel provides the necessary mechanical advantage to crank them back up without undue strain on the angler.
  • Battling Powerful, Stubborn Fish: Species known for their sheer pulling power and unwillingness to budge, such as large halibut, grouper, or massive lake trout, are best tackled with low-ratio reels. The increased torque allows you to relentlessly pump and wind, gaining line even against immense resistance.
  • Winishing Heavy Tackle: Pulling heavy copper or lead core lines, or large, deep-diving crankbaits that create significant drag, is made far more manageable with a low-speed reel.
  • Slow, Consistent Retrieves: Sometimes, the most effective retrieve is a slow, steady pull. Low-ratio reels excel at this, allowing for deliberate, powerful movements without overworking the lure.

Impact on Lure Presentation: Low-speed ratios allow for a more deliberate, slower retrieve, which can be ideal for lures that perform best with minimal, consistent movement or for targeting lethargic fish. They also minimize the likelihood of “washing out” a lure’s action if you’re trying to maintain a very slow presentation.

The Versatile Workhorse: Mid-Range Gear Ratios

Many popular trolling reels feature mid-range gear ratios, typically falling between 3.8:1 and 4.9:1. These reels strike a balance between speed and power, offering a highly versatile option for a wide array of trolling scenarios.

When to Choose Mid-Range:

  • General Purpose Trolling: For anglers targeting diverse species or fishing in varied conditions without needing extreme specialization, a mid-range ratio provides a good all-around performance.
  • Mixed Tactics: If your day might involve both relatively shallow trolling with lighter gear and then transitioning to deeper water or heavier baits, a mid-range reel can adapt effectively.
  • Learning and Exploration: For intermediate anglers looking to expand their trolling repertoire, a mid-range reel offers the flexibility to experiment with different techniques before committing to specialized high-speed or low-speed setups.

Real-World Applications and Strategic Choices

Let’s put theory into practice with some common scenarios:

  • Salmon Trolling: For Chinook and Coho salmon, a mid-range to slightly higher ratio (4.5:1 to 5.5:1) is often preferred. This allows for quick retrieval of gear when changing spots or re-baiting, while still offering enough power to handle a feisty chrome rocket. When using lighter gear or targeting smaller Coho, a higher ratio can be beneficial for keeping up with their speed.
  • Offshore Tuna and Billfish: High-speed reels (5.0:1 to 6.0:1+) are paramount here. These fish are incredibly fast, and the ability to rapidly take up slack after a screaming run is critical to preventing lost fish.
  • Great Lakes Muskie/Lake Trout (Deep Trolling): When targeting these powerful fish in deep water with heavy lines (like copper or lead core) and large crankbaits, a lower ratio (3.0:1 to 4.0:1) offers the necessary torque for retrieving heavy setups and grinding out a powerful fish.
  • Halibut and Bottom Fish: For the ultimate in deep-water power, especially when using heavy sinkers and battling large, stubborn bottom dwellers, dedicated low-ratio reels (2.0:1 to 3.0:1) are indispensable.

Conclusion

Understanding trolling reel gear ratios moves you beyond merely owning a reel to truly mastering your craft. By matching the right gear ratio to your target species, fishing conditions, and preferred techniques, you not only make your angling more efficient but also significantly increase your chances of landing that trophy fish. So, the next time you’re eyeing a new trolling reel, look beyond the shiny exterior and delve into the numbers; your fishing success just might depend on it.

Posted on

The Baitcaster Journey: From First Cast to Pro Techniques!

Ever watched a pro angler cast with effortless precision, their lure landing perfectly in a tiny pocket of cover? Chances are, they were wielding a baitcasting reel – a tool of power, precision, and ultimate control. But for many, especially those used to spinning gear, the baitcaster can seem intimidating, shrouded in myths of dreaded “bird’s nests” and complicated settings.

Fear not, aspiring angler! This comprehensive guide is your roadmap to mastering the baitcasting reel, whether you’re taking your very first cast, looking to refine your technique, or seeking advanced insights to elevate your game. Get ready to unlock the true potential of this incredible fishing machine and discover a whole new world of angling possibilities!


For Beginners: The Lure of the Baitcaster – Your First Cast to Confidence!

Welcome to the exciting world of baitcasting! Many anglers are drawn to these reels for their incredible advantages, and with a little patience, you’ll soon understand why.

Why Baitcasters Rule (and Why You’ll Love Them): Baitcasters offer unparalleled precision for hitting tight spots under docks or into heavy cover. They provide immense power for hauling in bigger fish, especially when battling a strong fish or a stubborn bass. Crucially, they offer an incredible feel or connection to your lure and any subtle bites, making you a more responsive angler.

Anatomy of Your New Toy: Understanding the Parts: Before your first cast, let’s get acquainted with your reel:

  • Spool: This is where your fishing line is stored. Unlike a spinning reel, it spins freely during a cast.
  • Drag: This adjustable mechanism allows line to peel off the spool under pressure, preventing your line from breaking when a big fish pulls hard.
  • Brakes (or Cast Control System): This is your anti-backlash hero! It applies resistance to the spool during the cast to prevent it from spinning faster than your line is leaving. You’ll find magnetic brakes (external dials) or centrifugal brakes (internal pins).
  • Handle: For retrieving your lure and fighting fish.
  • Thumb Bar (or Thumb Button): Pressing this disengages the spool for casting.

Getting Started Smoothly: Your First Steps to Success:

  1. Spooling Line: While it might seem daunting, properly spooling your line is crucial. Many tackle shops will do it for you, or watch a quick online tutorial. For beginners, a slightly heavier monofilament or fluorocarbon line (12-17 lb test) is often more forgiving than braid.
  2. Tension Knob Taming (The “Lure Drop” Test): This small knob (often on the side opposite the handle) controls initial spool tension. Attach a medium-weight lure (like a 1/2 oz jig). Press the thumb bar. Now, slowly tighten the tension knob until, when you gently shake your rod, the lure slowly drops to the ground, and the spool stops spinning immediately when the lure hits. This is your starting point.
  3. Brake Basics (Start with Training Wheels!): If your reel has external magnetic brakes, start at a higher setting (e.g., 7 or 8 out of 10). If it has internal centrifugal brakes, engage most of the pins. These higher settings provide more control and prevent backlashes, building your confidence.

Busting the “Bird’s Nest” Myth (and How to Avoid It!): The dreaded “bird’s nest” or backlash happens when the spool spins faster than your line is going out, creating a tangled mess. Reassure yourself: every pro angler has gotten backlashes!

  • Key Tip: Your Thumb is Your Best Friend! After pressing the thumb bar, as your lure sails through the air, keep a light, consistent pressure with your thumb on the spool. As the lure approaches your target or hits the water, gently apply more thumb pressure to stop the spool completely. This “feathering” action is the secret!
  • Pro Tip for Practice: Start by practicing in an open area like a backyard or local park. Attach a casting plug (a weighted practice lure without hooks) or a heavier jig (e.g., 1/2 oz or 3/4 oz) as heavier lures are easier to cast accurately and prevent backlashes. Cast with a smooth, controlled motion, not brute force.

For Intermediate Anglers: Mastering the Mechanics – Beyond the Basics!

You’ve got the basics down, now let’s refine your technique and dive deeper into the mechanics that will truly elevate your casting game.

Brake Breakdown – Magnetic vs. Centrifugal Explained: Understanding your reel’s braking system helps you adapt to different conditions:

  • Magnetic Brakes: These are external dials, easy to adjust on the fly. They use magnets to slow the spool. Ideal for changing wind conditions, lure weights, or when you need quick adjustments.
  • Centrifugal Brakes: These are internal pins (often located under the side plate). As the spool spins, the pins are pushed outwards, creating friction. They offer very consistent braking once set. You typically set these before fishing and adjust them less frequently.

Gear Ratios Demystified: The Power of RPMs! The gear ratio (e.g., 6.4:1) tells you how many times the spool rotates with one full turn of the handle. Choosing the right ratio is crucial for specific lure presentations:

  • Low Ratios (e.g., 5.x:1): These reels prioritize power and a slower retrieve. Perfect for deep-diving crankbaits, large swimbaits, or big rigs where you need to grind a lure through the water with minimal effort.
  • Medium Ratios (e.g., 6.x:1): Your versatile workhorse! Great for spinnerbaits, chatterbaits, topwater lures, and general-purpose fishing. Most anglers will find a reel in this range to be an excellent all-around choice.
  • High Ratios (e.g., 7.x:1 and up): These reels are all about speed and quick line pick-up. Ideal for pitching and flipping into heavy cover, quickly reeling in slack after a bite, or when working fast-moving topwater lures.

The Perfect Casting Stroke: Smoothness Over Strength: Forget the idea of “heaving” your lure. Baitcasting is about fluid motion:

  • Wrist Snap is Key: Most of the casting power comes from a crisp, controlled wrist snap, not your entire arm.
  • Load the Rod: As you bring the rod back (typically to the 10 or 11 o’clock position), you’ll feel the rod tip “load” or bend with the weight of the lure.
  • Smooth Forward Motion & Follow-Through: Accelerate smoothly forward, releasing the thumb bar at the 1 or 2 o’clock position. Allow your rod to follow through naturally towards your target.
  • Refining Your Touch: Remember to use your thumb as a “feathering” device during the cast, not just a full stop. It’s about slowing the spool just enough to prevent overrun as the lure sails.

Pitching and Flipping – Surgical Strikes in Tight Cover: These are advanced techniques that allow for incredibly precise lure placement:

  • Pitching: A quiet, underhand cast where you swing the lure like a pendulum, propelling it forward with a subtle rod tip movement. The lure stays low to the water, minimizing splash and maximizing stealth. Perfect for targeting specific spots under overhanging trees.
  • Flipping: A very short-range technique. You pull line directly from the reel, swing the lure underhand, and use the rod to guide it gently into dense cover (like lily pads or thick brush). It’s incredibly accurate and allows for silent entries into fishy hideouts.

For Experienced Anglers: Advanced Tactics & Troubleshooting – Fine-Tuning Your Edge!

You’ve put in the hours, you’ve battled the backlashes, and now you’re ready to squeeze every ounce of performance out of your baitcaster.

Beyond Basic Casting – Specialized Techniques:

  • Skipping: Making your lure skip across the water’s surface, like a stone, to reach fish hiding deep under docks, boat covers, or overhanging trees. It requires a low, sharp cast angle and precise thumb control.
  • Roll Casting: Ideal for tight quarters where an overhead cast is impossible. It’s a smooth, circular rod motion that “rolls” the line off the rod tip, propelling the lure forward.
  • Long-Distance Bombing: Achieving maximum casting distance with minimal effort. This involves perfectly loading your rod, finding the optimal release point, and fine-tuning your brakes to allow maximum spool speed without overrun. Line choice (like thin braid) plays a huge role here.

Lure-Specific Retrieves & Your Reel: Optimize for Success: Your baitcaster’s gear ratio and feel can enhance specific lure presentations:

  • Crankbaits: Pair deep-diving crankbaits with lower gear ratio reels (5.x:1 to 6.x:1). This allows you to maintain consistent pressure and feel the lure’s subtle wobble and deflection off structure, without tiring yourself out.
  • Jigs & Worms: High gear ratio reels (7.x:1 to 8.x:1) are perfect for these bottom-contact baits. The fast retrieve allows you to quickly pick up slack line after detecting a bite, crucial for powerful hooksets.
  • Topwater Baits: While medium ratios work, higher ratios can help with “walking the dog” retrieves on stickbaits, allowing you to quickly take up slack between twitches and keep the lure dancing.

On-the-Water Troubleshooting: Quick Fixes for Common Issues:

  • Sudden Backlashes: Check for changing wind conditions (especially a headwind!), a loose spool tension knob, or too little thumb pressure. Sometimes, a slight adjustment to your brakes is all it takes. Remember to consider wind direction and humidity when making adjustments – these subtle changes can make a big difference in casting performance.
  • Lure Not Casting Far: Examine your line for wear or memory, clean and lubricate your spool bearings, and ensure no debris is impacting the spool. Also, reassess your casting motion for efficiency.
  • Sticky Drag: This usually means dirt, sand, or old grease has gotten into your drag washers. It requires disassembling the drag stack, cleaning the washers, and applying a thin layer of drag grease.

Reel Longevity & Peak Performance: Beyond a Quick Rinse! A little care goes a long way in ensuring your baitcaster performs flawlessly for years:

  • Post-Trip Rinse: A quick spray with fresh water (never direct blast into bearings!) after each trip, especially if in saltwater, helps remove corrosive elements.
  • Regular Cleaning: Periodically, gently remove the side plate, clean out any grit or old grease with a Q-tip, and use a reel cleaning spray designed for fishing tackle.
  • Lubrication is Key: Apply a tiny drop of high-quality reel oil to the spool bearings and worm gear. Use a very light coating of reel grease on the main gears. Less is more – over-lubricating can attract dirt.
  • Bearing Care: The heart of a smooth reel! If your bearings feel rough, they might need a deep clean with a dedicated bearing cleaner or even replacement. Smooth bearings mean longer, smoother casts. For the ultimate edge, some experienced anglers explore aftermarket bearings designed for ultimate smoothness.

Conclusion: Your Baitcaster Adventure Begins!

You now have the knowledge and tools to confidently pick up a baitcasting reel and truly elevate your angling experience. Mastering the baitcaster is a journey, not a destination, and every cast offers an opportunity to learn and refine your skills.

From those first tentative casts to surgically accurate presentations, the world of baitcasting is now open to you. So, rig up your favorite lure, find your sweet spot, and prepare to feel the exhilarating precision and control that only a baitcasting reel can deliver.

Happy casting, and tight lines!

Posted on

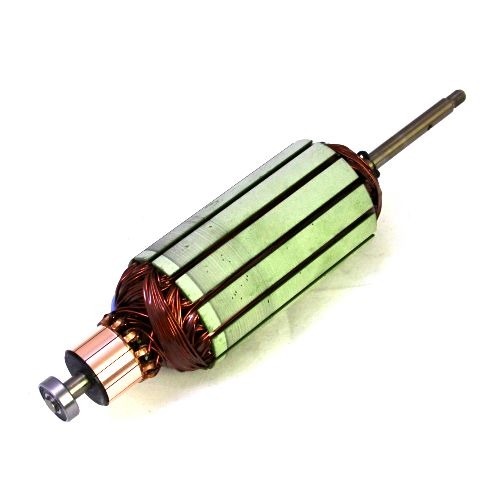
Advanced Armature Testing for Electric Trolling Motors: A Comprehensive Diagnostic Guide

The transition to high-performance, electronically commutated brushless DC (BLDC) motors in modern electric trolling motors has fundamentally changed the requirements for armature diagnostics. The armature, or more accurately the stator in these outrunner designs, is a complex assembly of precision windings, high-grade insulation, and integrated position sensors. Its health is paramount to achieving the silent operation, efficiency, and high thrust demanded by today’s anglers. This article provides a detailed, technical guide to advanced armature testing, moving beyond simple continuity checks to encompass a suite of sophisticated diagnostic procedures. We will cover insulation system analysis, winding integrity verification using surge and resistance tests, and functional testing of integrated Hall effect sensors, providing a complete methodology for identifying and diagnosing armature faults before they lead to catastrophic failure on the water.


1. Introduction: The Evolving Role of the Trolling Motor Armature

In the context of modern BLDC trolling motors, the term “armature” typically refers to the stationary component, the stator, which houses the copper windings. The rotor, containing the permanent magnets, spins around this stator (an “outrunner” configuration). This is a critical distinction from traditional brushed DC motors where the armature rotates.

The BLDC stator is not merely a set of coils; it is an engineered system responsible for generating a precise, rotating magnetic field. Its failure can manifest in several ways:

  • Loss of Power/Torque: Caused by shorted windings or poor electrical connections.
  • Erratic Operation or “Cogging”: Often linked to sensor failures or shorts between phases.
  • Excessive Noise and Vibration: A symptom of winding shorts or electrical imbalances.
  • Tripped Breakers or Blown Fuses: Indicative of a direct short to ground.
  • Complete Motor Failure: The result of a catastrophic insulation breakdown.

Standard multimeter tests can sometimes detect a dead short, but they are insufficient for identifying the subtle, incipient faults that degrade performance and precede total failure. Advanced testing is required to assess the two primary aspects of armature health: the integrity of the insulation system and the condition of the winding conductors.

2. Pre-Test Considerations and Safety

Before initiating any test, several preparatory steps are crucial for ensuring accurate results and personal safety.

Safety First: All tests involving high voltage (Insulation Resistance, Hi-Pot, Surge) must be conducted with the motor disconnected from its power source and controller. The testing area should be secure, and the operator should use appropriate Personal Protective Equipment (PPE), including high-voltage gloves. Always ensure the windings are fully discharged after testing.

Preparation and Cleaning: The armature should be clean and dry. Contaminants like moisture, salt residue, and oil can create conductive paths on the surface of the windings, leading to misleadingly low insulation resistance readings. If the motor has been recently submerged or exposed to heavy moisture, it should be thoroughly dried in a low-temperature oven or with forced air before testing.

Temperature Correction: The resistance of copper windings and the effectiveness of insulation are temperature-dependent. For accurate, repeatable results, especially for trending motor health over time, all measurements should be temperature-corrected to a standard of 40°C. Many modern testers have a built-in temperature probe and perform this correction automatically. The formula for correcting winding resistance is:

R_c=R_ttimesfrac234.5+T_c234.5+T_t

Where:

  • R_c = Corrected Resistance at standard temperature (T_c)
  • R_t = Measured Resistance at test temperature (T_t)
  • T_c = Standard Temperature (e.g., 40°C)
  • T_t = Winding Temperature at time of test (°C)
  • 234.5 is the temperature constant for copper.

Test Sequencing: Always perform low-voltage tests (winding resistance, sensor checks) before high-voltage tests. Applying high voltage to a motor with a confirmed short can cause further damage.


3. The Test Battery: A Multi-Faceted Diagnostic Approach

No single test can reveal all potential faults. A comprehensive armature analysis involves a battery of tests, each designed to investigate a specific failure mode.

3.1. Winding Resistance Test (Low Voltage)

This is the most fundamental test, used to verify the uniformity of the windings in each of the three phases (U, V, W) of the BLDC motor.

  • Objective: To detect dead shorts, open circuits, or significant imbalances between phases caused by mis-wound coils, poor internal connections, or turn-to-turn shorts that have evolved into a major short.
  • Procedure: A digital low-resistance ohmmeter (DLRO) or a quality winding analyzer is used to measure the resistance between each pair of phase leads: U-V, V-W, and W-U.
  • Interpretation:
    • Good: The three resistance readings should be very low (typically less than 1 ohm) and balanced to within 1-2% of each other.
    • Bad (Open): An infinite resistance reading on any phase indicates a broken winding or a failed connection.
    • Bad (Short/Imbalance): A resistance reading that is significantly lower than the others or a phase imbalance greater than 3-5% points to a short circuit or a winding error. A significant imbalance creates an uneven magnetic field, leading to vibration and inefficient operation.

3.2. Insulation Resistance (IR) / Megohmmeter Test (High Voltage)

This is the primary test for assessing the integrity of the groundwall insulation—the barrier between the copper windings and the steel stator core (ground).

  • Objective: To detect weaknesses, moisture contamination, or cracks in the groundwall insulation that could lead to a phase-to-ground short.
  • Procedure: A megohmmeter applies a DC voltage (typically 500V or 1000V for low-voltage motors) between all three shorted-together phase leads and the stator core. The instrument measures the resulting leakage current and displays it as a resistance value in megohms (MΩ).
  • Interpretation:
    • Pass/Fail Value: A common rule of thumb is that the insulation resistance should be at least 1 MΩ for every kilovolt (kV) of the motor’s operating voltage, plus 1 MΩ. For a 36V trolling motor, a reading below 2 MΩ is considered poor. In reality, a healthy, dry motor should read well in excess of 100 MΩ, often into the gigohm (GΩ) range.
    • Polarization Index (PI) and Dielectric Absorption Ratio (DAR): These are advanced IR tests that provide deeper insight into the insulation’s condition.
      • PI: The ratio of the 10-minute IR reading to the 1-minute IR reading. A PI value below 2.0 suggests that the insulation is contaminated (e.g., with moisture) or aged.
      • DAR: The ratio of the 60-second IR reading to the 30-second IR reading. It provides a quicker check, with a value below 1.25 being questionable. A low PI or DAR reading indicates that the leakage current is not decreasing over time as the insulation polarizes, a sign of contamination that provides a conductive path for current.

3.3. Hi-Pot (High Potential) Test (High Voltage, Proof Test)

The Hi-Pot, or dielectric strength test, is a stress test for the insulation system. While the IR test diagnoses insulation health, the Hi-Pot test confirms its integrity up to a specific voltage level.

  • Objective: To determine if the groundwall insulation can withstand a voltage spike without breaking down. This is a go/no-go test.
  • Procedure: An AC or DC voltage is applied between the shorted windings and the stator core. The test voltage is typically set to twice the motor’s operating voltage plus 1000V (for new motors). For maintenance testing, this is often reduced to 60-80% of that value. The test measures the leakage current, and if it exceeds a preset trip level, the test fails.
  • Interpretation:
    • Pass: The insulation withstands the test voltage for the specified duration (usually 60 seconds) without the leakage current exceeding the trip level.
    • Fail: A sudden, large rush of current indicates the insulation has broken down and an arc has occurred between the winding and the stator core. This test is potentially destructive and should only be performed when a high degree of assurance is required. It is often performed after a rewind or major repair.

3.4. Surge Test (High Voltage, High Frequency)

The surge test is the only test that can reliably detect issues in the turn-to-turn insulation within a single coil—the most common point of initial winding failure.

  • Objective: To find weak turn-to-turn, coil-to-coil, and phase-to-phase insulation.
  • Procedure: The tester injects a series of very fast rise-time, high-voltage pulses into two phases at a time, leaving the third phase as a reference. This creates a voltage potential between adjacent turns of the windings. The resulting ringing frequency waveform is captured on an oscilloscope and compared between the phases.
  • Interpretation: This is a comparative test. The principle is that all three phases of the motor are identical, so their electrical signatures should be as well.
    • Good: The three resulting waveforms (U-V, V-W, W-U) lie perfectly on top of each other. They are identical in shape, frequency, and amplitude.
    • Bad (Turn-to-Turn Short): If one phase has a short between turns, the inductance of that winding changes. This will cause its waveform to shift to the left (a lower inductance results in a higher resonant frequency) and have a lower amplitude (due to the energy dissipated in the short). Modern testers calculate the percentage difference in the area under the curves, known as the Error Area Ratio (%EAR), to quantify the imbalance. Even a 1-2% deviation can indicate an incipient fault.

(Conceptual image: A diagram showing two perfectly overlaid ‘good’ surge waveforms and a third, left-shifted and lower-amplitude ‘bad’ waveform indicating a short.)

3.5. Hall Effect Sensor Testing (Low Voltage)

BLDC motors rely on rotor position sensors to time the commutation of the windings. In most trolling motors, these are Hall effect sensors. If the sensors fail or provide incorrect signals, the motor will run erratically or not at all.

  • Objective: To verify the correct operation of the integrated Hall effect sensors.
  • Procedure:
    1. Static Test: Power the sensors using a low-voltage DC supply (typically 5V). Connect a voltmeter to the signal output of each of the three sensors (H1, H2, H3). Manually and slowly rotate the motor’s propeller/rotor. As the rotor magnets pass each sensor, the sensor’s output voltage should switch cleanly between a low state (near 0V) and a high state (near 5V).
    2. Dynamic Test (Oscilloscope): Connect the three sensor outputs to a 3-channel oscilloscope. While rotating the motor at a slow, steady speed, you should observe three square wave patterns. These patterns should be evenly spaced, with a 120° electrical phase shift between them, and should not have any dropouts, glitches, or noise.
  • Interpretation:
    • Good: Each sensor switches cleanly between high and low states, and the dynamic oscilloscope pattern shows three balanced, 120°-shifted square waves.
    • Bad: A sensor that is stuck high or low, or a waveform that is missing or noisy, indicates a failed sensor or a problem with its wiring or connections.

4. Integrated Diagnostic Workflow

For a comprehensive armature analysis, these tests should be performed in a logical sequence.

  1. Visual Inspection & Cleaning: Check for obvious signs of overheating (discolored varnish), physical damage, or contamination. Clean and dry the armature.
  2. Sensor Checks (Static & Dynamic): Verify the core commutation control system first.
  3. Winding Resistance Test: A quick, low-voltage check for gross imbalances or opens.
  4. Insulation Resistance (IR) Test: Assess the health of the groundwall insulation. Perform a PI or DAR test for a more detailed diagnosis of contamination.
  5. Surge Test: The definitive test for winding insulation integrity. This will find the turn-to-turn weaknesses that other tests miss.
  6. Hi-Pot Test (Optional): Use only when required as a final proof test after a repair or rewind.

5. Conclusion: From Reactive Repair to Predictive Maintenance

Advanced armature testing transforms trolling motor repair from a reactive, part-swapping exercise into a precise, scientific process. By understanding and applying this battery of tests, technicians can pinpoint the exact failure mode within an armature, whether it be moisture in the insulation, a short between turns, or a faulty Hall sensor. Furthermore, by recording these measurements over the life of a motor, it becomes possible to trend the degradation of the insulation and winding systems. This data-driven approach enables predictive maintenance, allowing for faults to be identified and addressed during routine service before they cause a critical failure, ensuring that the angler’s investment remains reliable, efficient, and ready for the water.

Posted on

A Detailed Guide to Deciphering Fish Arches

To the untrained eye, the screen of a modern fishfinder can look like a chaotic mess of colors, lines, and blobs. But within that digital display lies a rich and detailed language, one that tells the story of the hidden world beneath your boat. The fundamental “word” in this language is the fish arch. Learning to read these arches—in all their forms—is the single most important skill an angler can develop to transform a fishfinder from a simple depth gauge into a powerful fish-finding tool.

This comprehensive guide will take you deep into the science and art of deciphering fish arches, moving you beyond simply seeing them to truly understanding what they reveal about the size, number, and behavior of the fish you seek.

The Science: Why a Fish Looks Like an Arch

First, we must understand why a fish, which is long and straight, appears as an arc on a two-dimensional screen. The answer lies in the shape of the sonar beam and the relationship between the fish and the boat’s movement.

Imagine your transducer sends out not a straight line, but a cone-shaped sonar beam, like the beam of a spotlight. It is narrowest near the boat and gets progressively wider as it travels deeper. Your fishfinder screen scrolls from right to left, displaying the newest information on the right edge.

Now, let’s visualize a fish’s journey through this cone as your boat passes over it:

  1. Entering the Cone: As the fish first enters the leading edge of the sonar cone, the distance between it and the transducer is at its greatest. The sonar return signal is relatively weak. On the screen, this appears as the beginning of a line on the far right, starting the upward slope of the arch.
  2. Passing Through the Center: As the fish moves directly under the transducer—into the center of the cone—the distance is now at its shortest. The sonar signal is at its strongest and most direct. This plots the highest point, or the peak, of the arch on your screen.
  3. Exiting the Cone: As the fish leaves the center and moves toward the trailing edge of the cone, the distance again increases, and the signal weakens. This plots the final downward slope of the arch as it moves left across the screen.

The result of this entire interaction is a perfect, symmetrical arch. The arch, therefore, is not a picture of the fish itself, but a graphical representation of the fish passing through the cone of sound.

The Anatomy of an Arch: What It Tells You

Once you understand why an arch forms, you can begin to analyze its specific characteristics. Each attribute provides a vital clue.

Full Arches vs. Half Arches

This is the first and most basic interpretation.

  • A Perfect, Symmetrical Arch: This is the gold standard. It tells you that the fish passed directly through the center of your sonar cone. Your boat went right over top of it. This is a high-confidence mark.
  • A Half Arch or a Streak: If you only see the first half of an arch, or just a long, fading streak, it means the fish only clipped the edge of your sonar cone, or the boat turned away before passing completely over it. While it’s still a fish, it’s not directly below you. This is crucial information for positioning your cast.

Length of the Arch (Horizontal) – The Great Misconception

It is a common mistake to believe that a longer arch equals a longer fish. This is incorrect. The horizontal length of an arch indicates the amount of time a fish spent inside the sonar cone.

  • A long, drawn-out arch can mean two things: either the fish is moving very slowly, or your boat is moving very slowly (or is stationary). A fish sitting still directly under a stationary boat will paint a long, flat, horizontal line across the screen.
  • A short, steep arch indicates that the fish passed through the cone quickly, which is more typical when you are moving at a steady trolling speed.

Thickness of the Arch (Vertical) – The True Size Indicator

The vertical thickness of the arch is a much better indicator of a fish’s size. A larger fish has a bigger body and, most importantly, a larger air bladder. The air bladder is the primary organ that reflects sonar signals.

  • A Thick, Bold Arch: This signifies a strong return signal. It was created by a larger object with a significant air bladder, indicating a bigger fish.
  • A Thin, Wispy Arch: This represents a weak return signal, suggesting a smaller fish with a smaller air bladder.

Color and Density

Modern color fishfinders add another critical layer of information. Sonar returns are assigned colors based on the strength of the signal. While color palettes vary by brand, the principle is the same: warmer, brighter colors (like red and yellow) represent the strongest signals, while cooler colors (like blue and green) represent weaker signals.

When you see a thick arch with a bright yellow or deep red core, surrounded by a bit of blue or green, you are looking at a very strong return—almost certainly a large fish. The bright core is the strongest signal reflected from the center of the fish, while the cooler colors represent the weaker returns from its edges.

Beyond the Single Arch: Deciphering Groups and Behavior

Fish are rarely alone. Understanding how groups of fish appear on the screen is key to finding active fisheries.

  • Schools of Fish (Clumped): When fish like bass, crappie, or perch are tightly schooled, they often appear as a large, singular mass or a dense “clump” of intertwined arches and blobs. Using a CHIRP sonar, which offers better target separation, you may be able to distinguish the individual arches within the larger mass. Without CHIRP, it may look more like a single, irregularly shaped object.
  • Stacked Fish (Predators): Often, larger predator fish like trout or salmon will suspend at different depths in the water column. This will appear as multiple, distinct arches “stacked” vertically above one another. This is a classic sign of multiple large targets in one area.
  • Bait Balls: A school of baitfish looks very different from a school of game fish. It typically appears as a dense, often circular or cloud-like mass with a fuzzy texture. Individual arches are rarely visible. The most exciting screen you can see is a large bait ball with several thicker, distinct predator arches marking around its edges or slashing through it. This is an active feeding frenzy.

How Your Settings and Boat Control Shape the View

What you see on the screen is not just a reflection of what’s below; it’s also a reflection of your settings and how you are operating your boat.

  • Sensitivity (or Gain): This is your most important adjustment. Too little sensitivity, and you will miss smaller fish or fish on the outer edges of the sonar cone. Too much sensitivity, and your screen will be filled with “clutter” or “noise,” making it impossible to distinguish targets. The best practice is to increase the sensitivity until your screen is lightly speckled with noise, then back it off just slightly until it clears up.
  • Boat Speed: As mentioned, your speed has a dramatic effect. To get clean, textbook arches, a slow, steady trolling speed is ideal. If you are moving quickly with your main engine, fish will appear as sharp vertical streaks or slashes, not arches. Understanding this helps you interpret marks when running from one spot to another.
  • Frequency and CHIRP: Traditional sonar uses a single frequency. Modern CHIRP (Compressed High-Intensity Radar Pulse) sonar sweeps across a range of frequencies. The result is dramatically higher resolution and superior target separation. On a CHIRP unit, you can clearly see two or three individual predator arches sitting tight to a rock pile, whereas on an older unit, they might have blended into a single, ambiguous blob.

By mastering the language of the fish arch, you elevate your angling game. You are no longer fishing blind, but making informed decisions based on a clear understanding of the world below. You can identify not just the presence of fish, but their likely size, their relationship to structure, and their behavior. It is a skill that takes practice and time on the water, but once learned, it will forever change the way you see the water and the fish that swim within it.

Posted on

The Effortless Angler: A Guide to Mastering the Minn Kota Ulterra

In the world of angling technology, few innovations have so dramatically reduced physical effort and increased on-the-water efficiency as the Minn Kota Ulterra. This isn’t just a trolling motor; it’s a robotic fishing partner designed to handle the strenuous tasks of deployment, stowage, and depth adjustment with the simple push of a button. For anglers with mobility challenges, those who frequently fish alone, or anyone who values seamless boat control, the Ulterra represents a paradigm shift.

This lengthy, detailed guide will explore every facet of using the Minn Kota Ulterra, from its groundbreaking core features and control options to advanced fishing strategies empowered by its i-Pilot Link integration. By understanding its full capabilities, you can transform your boat control and focus solely on what matters most: catching fish.

Part 1: The Ulterra Revolution – Understanding the Core Features

What sets the Ulterra apart from every other trolling motor on the market are its three signature automated functions. These features eliminate the need to ever physically handle the motor during a fishing trip.

1. Auto Stow and Deploy

This is the feature that defines the Ulterra. Gone are the days of leaning precariously over the bow, heaving a heavy, wet motor out of the water, or wrestling it back onto its mount.

  • Deployment: With a double-tap of the deploy button on your remote or foot pedal, the Ulterra gracefully lifts itself from its horizontal stowed position, pivots vertically, and lowers itself into the water to a pre-set depth.
  • Stowage: A single press of the stow button initiates the reverse sequence. The motor automatically trims up to its highest position, lifts itself vertically out of the water, and powers itself down into its secure cradle on the bow mount, ready for the run back to the dock.

This hands-free operation is a game-changer in rough water, when fishing solo, or when a fish is on the line and you need to quickly stow the motor to move.

2. Power Trim

Traditionally, adjusting the depth of your trolling motor required manually loosening a collar and sliding the heavy shaft up or down. The Ulterra’s Power Trim automates this process entirely.

Using the up and down arrows on the remote or foot pedal, you can raise or lower the motor’s depth with precision. This is invaluable for:

  • Navigating Shallow Water: Instantly raise the motor to clear submerged logs, rocks, or shallow flats without ever leaving the console.
  • Adapting to Chop: In rough conditions, you can lower the motor deeper into the water to prevent the propeller from cavitating (coming out of the water) on wave crests, ensuring consistent thrust.
  • Fine-Tuning Presentation: Maintain the perfect depth for optimal performance of features like MEGA Down Imaging, which is often integrated into the motor’s lower unit.

3. i-Pilot and i-Pilot Link: The GPS Brain

While Auto Stow/Deploy and Power Trim are the physical “muscle,” the i-Pilot or i-Pilot Link system is the “brain.” This GPS-powered navigation system unlocks a suite of automated boat control features that are the cornerstone of modern angling.

  • Spot-Lock: The most revered feature in all of trolling motor technology. When you find a piece of structure or a school of fish, pressing the Spot-Lock button turns your motor into a virtual anchor. The GPS receiver will automatically keep your boat positioned on that exact coordinate, compensating for wind, waves, and current. You can fish with your hands and feet completely free, without ever drifting off your spot. The Ulterra also features “Jog,” which allows you to move your Spot-Lock location five feet in any direction with the simple push of a button.
  • AutoPilot: This function allows you to point the motor in a desired direction and it will automatically maintain that heading, correcting for wind and current. It’s the modern equivalent of a compass heading.
  • Cruise Control: Set a specific speed and the motor will maintain it, automatically adjusting propeller power to compensate for wind or current. This is essential for precise trolling presentations.
  • iTracks: Record a fishing path (up to two miles long) and save it to the system’s memory. You can then command the motor to automatically retrace that path later, perfectly replicating a successful trolling run.

Part 2: Your Command Center – Controlling the Ulterra

You have three primary methods for controlling your Ulterra, each suited to different fishing styles.

1. The Wireless Remote (i-Pilot or i-Pilot Link)

This is your master control. The modern touch-screen i-Pilot Link remote is like a smartphone for your trolling motor. From this remote you can access every function:

  • Stow and Deploy: Dedicated buttons for hands-free operation.
  • Power Trim: Up and down arrows for depth adjustment.
  • Steering: Left and right arrows to manually steer the motor.
  • Prop Speed: Plus and minus buttons to increase or decrease speed.
  • Spot-Lock and AutoPilot: One-touch activation buttons.
  • High Speed Bypass: Instantly puts the prop at full power (level 10) for quick maneuvers.

2. The Wireless Foot Pedal

For the angler who prefers hands-free control while casting from the bow, the wireless foot pedal is indispensable. It offers a unique “heel/toe” steering system and dedicated buttons for critical functions.

  • Heel/Toe Steering: Press the toe down to turn right, the heel down to turn left.
  • Constant On/Momentary: A side button toggles between momentary mode (prop only spins while you have your foot on the pedal) and constant mode (prop stays on at the set speed).
  • Spot-Lock Button: A dedicated button to instantly engage your virtual anchor.
  • Auto Stow/Deploy Button: A user-programmable button that can be set to either stow/deploy the motor or activate AutoPilot.

3. i-Pilot Link and Your Humminbird Fish Finder

This is where the Ulterra reaches its full potential. When you link your motor to a compatible Humminbird fish finder, you unlock a new level of integration and control. You can now command the Ulterra directly from your fish finder’s screen. This opens up revolutionary fishing strategies:

  • Follow the Contour: Select a specific depth contour line from your Humminbird’s LakeMaster or CoastMaster chart. The Ulterra will automatically follow that line, keeping your boat a set distance from it. This is arguably the most powerful tool for structure fishing ever created.
  • Go To: Select a waypoint on your map, or even just touch a spot on the screen, and command the Ulterra to take you there automatically.
  • Circle Mode: Command your boat to circle around a waypoint at a set distance, perfect for repeatedly casting to a specific piece of offshore structure.

Part 3: On-the-Water Scenarios and Strategies

Let’s put it all together. How does the Ulterra enhance a typical day of fishing in Chilliwack, BC?

Scenario 1: Casting for Bass at Cultus Lake You arrive at your first spot, a known underwater point.

  1. Deploy: While still at the console, you double-tap the deploy button on your remote. The Ulterra seamlessly enters the water.
  2. Navigate: Using the foot pedal, you steer the boat towards the point, using the Power Trim to keep the motor high as you cross a shallow flat.
  3. Spot-Lock: You see a school of fish on your Humminbird. You tap the Spot-Lock button on the foot pedal. The boat instantly holds position, fighting the afternoon breeze while you are free to stand on the casting deck and make precise casts to the school.
  4. Jog: After catching a few, you use the “Jog” feature on your remote to move your boat 15 feet to the left to explore the edge of the school, all without ever taking your foot off the pedal or stopping your cast.

Scenario 2: Trolling for Salmon on the Fraser River The powerful current of the Fraser River requires precise boat control to effectively troll for salmon.

  1. Deploy and Trim: You deploy the Ulterra and use Power Trim to lower the motor deep into the water, ensuring it stays engaged in the turbulent current.
  2. Set the Path: You engage AutoPilot to maintain a perfect heading downstream along a current seam.
  3. Set the Speed: You activate Cruise Control and set it to 2.5 mph. The Ulterra will now fight the current, constantly adjusting its propeller output to maintain that exact speed over ground, ensuring your flasher and lure are working perfectly.
  4. Fish On!: When a salmon hits, you need to act fast. You press the Stow button on your remote. The Ulterra automatically lifts and stows itself while you grab the rod, clearing the bow so you can fight the fish without fear of the line tangling in the trolling motor prop.

Part 4: Essential Considerations

  • Battery Power: The Ulterra is a powerful machine, and its automated features draw significant power, especially during stow/deploy cycles. It is critical to pair it with a robust battery system. A 36-volt system using high-quality deep-cycle marine or lithium (LiFePO4) batteries is highly recommended for all-day performance.
  • Proper Setup: During the initial on-land setup, you must teach the Ulterra its proper depth and stow position. This involves manually positioning the motor and telling the system to save those positions. This is a one-time setup outlined clearly in the owner’s manual.
  • Clearing the Deck: Before stowing or deploying, always ensure the area is clear of fishing rods, ropes, life jackets, or anything else that could obstruct the motor’s movement.

The Minn Kota Ulterra is more than a convenience; it is a strategic advantage. It reduces fatigue, allows for unparalleled boat control, enables anglers to fish effectively alone, and opens up automated fishing strategies that were the stuff of science fiction just a few years ago. By taking the time to understand and master its features, you are not just buying a trolling motor—you are investing in a more efficient, more enjoyable, and ultimately more successful fishing experience.

Posted on

The Okuma Makiara – A Battle Ready Tool

Of all the gear an offshore angler relies on, the reel is the critical link, the winch that must perform flawlessly under the immense pressure of big game fishing. In this demanding arena, few names command as much respect as the Okuma Makaira. Forged from cutting-edge materials and precision engineering, the Makaira lever drag series has, in a relatively short time, built an ironclad reputation for power, durability, and a level of refinement that challenges the industry’s most established players. This is not just another reel; it is a purpose-built machine for battling the ocean’s most powerful inhabitants.

This lengthy, detailed article will explore every facet of the Makaira Lever Drag Reel, from its core design philosophy and groundbreaking technology to the specific models and their applications, helping you understand why this reel has become a go-to choice for serious anglers worldwide.

The Genesis of a Titan: Design and Construction

The Makaira was born from a collaboration between Okuma and Tiburon Engineering, a California-based company renowned for its high-performance aftermarket reel components. The goal was ambitious: to create a reel that could not only compete with but exceed the performance of the most expensive and revered big game reels on the market. This objective informed every design choice, starting with the foundation.

The Frame: A Monocoque Masterpiece

Unlike many reels that use a multi-piece frame, the Makaira is built around a fully machined, one-piece 6061-T6 aluminum frame and left-side sideplate. This monocoque design, known as the “Machined Rigid Frame” (MRF), eliminates flex and twist under heavy drag loads. When you are hooked into a 500-pound bluefin tuna and the drag is screaming, the last thing you want is for the frame to distort, causing the gears to bind or fail. The Makaira’s rigid frame ensures that all internal components remain in perfect alignment, delivering smooth, consistent power. The right-side sideplate is also forged and machined aluminum, completing a virtually indestructible housing. All aluminum surfaces are then Type-II anodized for superior corrosion resistance against the harsh saltwater environment.

The Heart of the Beast: Gearing and Two-Speed Functionality

Inside the frame lies a drivetrain built for brute force and longevity. The Makaira features oversized, 17-4 grade stainless steel helical cut gears. The helical design allows for greater surface area contact between the main and pinion gears compared to traditional straight-cut (spur) gears. This results in three key advantages:

  1. Increased Torque: More gear engagement means more power is transferred from the handle to the spool.
  2. Smoother Operation: The angled teeth engage more gradually, resulting in a noticeably smoother and quieter retrieve.
  3. Enhanced Durability: The load is distributed over a larger area, reducing stress and wear on the gear teeth.

Most Makaira models are two-speed reels, offering both a high-speed gear ratio for quickly retrieving line and a low-speed, high-torque ratio for muscling stubborn fish from the depths. Switching between gears is elegantly simple, accomplished via a small, secure button on the handle shank that is easy to engage even during the heat of battle.

The Crown Jewel: The Dual Force Drag (DFD) System

Perhaps the most lauded feature of the Makaira is its patented Dual Force Drag system. A traditional lever drag reel applies drag pressure to only one side of the spool. Under extreme settings, this can create side-load pressure on the spool bearings, leading to binding and potential failure.

Okuma’s DFD system completely re-engineered this concept. It applies pressure to both the left and right sides of the spool. A custom-designed thrust bearing, located on the right side of the spool, absorbs the majority of the side load, preventing the frame from being stressed. This is combined with a proprietary Carbonite drag washer on the right side and a full-greased Carbonite washer stack on the left.

The result is a perfectly equalized and immensely powerful drag system. The Makaira’s drag is not only incredibly strong, with larger models capable of producing over 100 pounds of drag pressure, but it is also exceptionally smooth and consistent across the entire range of the lever. It’s designed to dissipate heat efficiently and to virtually eliminate drag-induced binding, giving anglers unparalleled control and confidence.

Key Features at a Glance

  • Machined Rigid Frame (MRF): One-piece, fully machined 6061-T6 aluminum frame.
  • Dual Force Drag (DFD): Patented system applies pressure to both sides of the spool for maximum power and smoothness.
  • Helical Cut Gears: Oversized 17-4 stainless steel gears for smoothness and strength.
  • Two-Speed Gearing: Easy-to-use system for switching between high speed and high power.
  • Custom Thrust Bearing: Alleviates side load under heavy drag.
  • Carbonite Drag System: Greased for exceptionally smooth performance and longevity.
  • Silent Anti-Reverse: A proprietary 17-4 stainless steel, double-dog system provides silent, instant engagement.
  • CRC (Corrosion Resistant Coating): A specialized coating process on all internal and external components.
  • Open-Top Design (SEa Models): Special Edition models feature an open-top frame ideal for casting and live-bait fishing.

Choosing Your Weapon: Makaira Models and Applications

The Makaira series is extensive, with sizes designed to tackle nearly any pelagic species. Choosing the right size is critical for balancing power, line capacity, and angler comfort.

  • Makaira 8, 10, 15: These are the lightweights of the series, perfect for light-tackle trolling, kite fishing, and stand-up battles with species like sailfish, dolphin (mahi-mahi), kingfish, and smaller tuna. They offer the refinement of their larger brethren in a more compact and manageable package.
  • Makaira 16, 20: These are arguably the most versatile sizes in the lineup. They are the workhorses for the majority of offshore trolling and live-baiting applications. They are perfectly suited for targeting wahoo, yellowfin tuna, white marlin, and sharks. The Makaira 20, in particular, has become a favourite among the long-range fleet out of Southern California.
  • Makaira 30, 50: Now we are entering true big game territory. These reels have the line capacity and the stopping power needed for blue and black marlin, larger yellowfin, and Allison tuna. The Makaira 50 and its wide-spool variant, the 50W, are the standard for trolling heavy lures and horse ballyhoo in the world’s premier marlin destinations.
  • Makaira 80, 130: These are the apex predators of the reel world. Built for the heaviest tackle and the largest fish, the 80W and 130 are designed for targeting giant bluefin tuna, grander marlin, and monster sharks. These reels are most often used in a fighting chair or from a heavy-duty swivel rod holder, where their incredible drag output can be fully utilized.

Special Edition (SEa) “Gunsmoke” Models

Okuma also produces Special Edition (SEa) models, easily identified by their gunsmoke and black anodizing. The most significant functional difference is the open-top frame design (on sizes up to the 50). This design is favoured by live-bait anglers and those who cast to feeding fish, as it allows for better thumb control on the spool. SEa models also often come standard with a “T-Bar” handle for improved ergonomic comfort during long fights.

Rigging and Maintenance for Peak Performance

Spooling: The Makaira’s design is optimized for use with modern braided lines. The recommended method is to spool the reel with a main line of high-quality braid (typically 80-200 lb test, depending on the reel size) and then attach a monofilament or fluorocarbon “topshot” appropriate for your target species. This provides the incredible capacity and low stretch of braid combined with the shock absorption and abrasion resistance of monofilament.

Drag Setting: One of the most critical aspects of using a lever drag reel is setting the drag correctly before you go fishing. Using a quality scale, set your drag at the “Strike” position to be approximately one-third of the breaking strength of your line or leader, whichever is weaker. This provides a safe and effective starting point, allowing you to move the lever to “Full” for extra pressure when needed, without risking a snapped line.

Maintenance: The Makaira is built to last, but the saltwater environment is unforgiving.

  • After Every Trip: Rinse the reel thoroughly with fresh water. It’s best to do this with the drag lever in the “Free” position to prevent water from being forced into the drag stack.
  • Regular Servicing: At least once a season, or more if used heavily, the reel should be professionally serviced. This involves a full teardown, inspection of all components, cleaning, and re-lubrication of bearings and gears. The Carbonite drag system should be cleaned and re-greased with a high-quality drag grease like Cal’s Universal Reel & Drag Grease.

In a sport where the difference between the fish of a lifetime and a story of the one that got away can come down to a single component failure, the Okuma Makaira Lever Drag Reel provides unparalleled peace of mind. It represents a masterful blend of intelligent design, robust materials, and precision manufacturing. For the angler unwilling to compromise on performance, the Makaira is more than just a tool; it is a declaration of intent to challenge the biggest and baddest fish in the sea.

The Apex Predator of Big Game Reels: A Detailed Look at the Okuma Makaira

In the demanding world of offshore big game fishing, where the connection to a fish of a lifetime is measured in pounds of drag and line capacity, equipment failure is not an option. Here, giants test the limits of angler and tackle alike. For decades, this high-stakes arena was dominated by a handful of legacy brands. Then, Okuma, in a landmark collaboration with California-based Tiburon Engineering, unleashed the Makaira. More than just a reel, the Makaira was a statement—a meticulously engineered marvel of power and precision that redefined expectations and established a new benchmark for performance in the offshore lever drag market.

This lengthy, detailed article explores every facet of the Okuma Makaira Lever Drag Reel, from the advanced engineering principles that drive its performance to the practical applications that have made it a global favorite among tournament crews, long-range anglers, and serious private boaters.

A Foundation of Strength: The Machined Rigid Frame (MRF)

The story of the Makaira begins with its backbone. Unlike reels that use die-cast or multi-piece frames, every Makaira is built upon a Machined Rigid Frame (MRF). The entire frame is precision-machined from a solid block of 6061-T6 bar-stock aluminum. This process, while more complex and costly, creates a one-piece housing with unparalleled strength and exacting tolerances.

Why is this important? Under the immense pressure of heavy drag settings and the torque of a powerful fish, lesser frames can flex. This “frame flex” can cause crucial internal components, like gears and bearings, to fall out of alignment, leading to binding, increased wear, and catastrophic failure. The Makaira’s MRF construction eliminates this weakness, ensuring that all internal parts remain in perfect alignment, even when the drag is pushed to its limits. The frame is then finished with a Type-II anodizing process, providing exceptional corrosion resistance against the harsh saltwater environment.

The Heart of the Beast: The Dual Force Drag (DFD) System

Perhaps the most significant innovation within the Makaira is its patented Dual Force Drag (DFD) system. To understand its brilliance, one must first understand a common limitation of traditional lever drag reels. Most designs utilize a “push bar” system, where pressure is applied to the left side of the spool. This creates an uneven side load on the spool bearings and can contribute to frame flex, compromising drag smoothness and consistency.

The Makaira’s DFD, designed by Tiburon, is a “pull bar” system. The entire drag pack is ingeniously housed on the right side of the spool, within the handle-side sideplate. This design pulls the spool evenly, keeping all mechanical forces in precise alignment and placing virtually no pressure on the reel’s frame. This is complemented by a custom-designed thrust bearing that is engineered to absorb and alleviate side load, ensuring the spool remains stable and spins smoothly even under punishing drag pressures.

The drag itself is a “wet” system, featuring two proprietary Carbonite drag washers that sandwich a fiberglass core. These high-output carbon washers are coated with a thin layer of Cal’s Universal Drag Grease. This combination delivers two critical benefits:

  1. Extremely low start-up inertia: When a fish takes the bait, the drag engages with buttery smoothness, preventing the sudden jolt that can pull hooks or snap light leaders.
  2. Exceptional heat dissipation: During long, blistering runs, the greased carbon washers dissipate heat efficiently, maintaining consistent pressure and preventing drag fade.

The result is a drag system that is not only immensely powerful—with some models generating over 100 pounds of pressure—but is also incredibly smooth and reliable from the moment of the strike to the final moments of the fight.

Power and Speed: Two-Speed Helical Cut Gearing

The challenge of fighting big game fish is one of duality. You need high speed to quickly recover line when a fish runs towards the boat, and you need immense torque and power to lift a stubborn tuna from the depths. The Makaira’s two-speed mechanism provides both.

With the simple push of a button on the handle shank, the angler can seamlessly switch between a high-speed and a low-speed gear ratio.

  • High Gear: Offers rapid line retrieval, perfect for keeping up with fast-moving fish or clearing lines quickly.
  • Low Gear: Provides the raw, winch-like power needed to gain line during a stalemate or lift a deeply sounding fish.

Further enhancing this system are the helical cut gears. Unlike standard spur gears which have straight-cut teeth that can mesh harshly, helical gears feature angled teeth. This gradual engagement provides a noticeably smoother and quieter retrieve. More importantly, the increased surface area of the meshing teeth allows for greater load distribution, resulting in increased torque and durability. All gears are machined from 17-4 grade stainless steel, ensuring a long life of fighting the ocean’s toughest predators.

Refinements and Angler-Centric Features

Beyond the core engineering, the Makaira is packed with features that demonstrate a deep understanding of the needs of the offshore angler:

  • Silent Anti-Reverse: The proprietary 12-point double-dog anti-reverse system provides a rock-solid and instantaneous engagement with virtually none of the “back-play” or clacking noise found in other reels. This results in a smoother feel and immediate power transfer.
  • Patented T-Bar Handle: The ergonomic T-Bar handle is designed to fit the natural dynamics of the human hand, wrist, and forearm, providing maximum leverage and reducing angler fatigue during prolonged battles.
  • Ratcheting Drag Lever and Pre-Set: The drag lever clicks into place with authority, allowing for precise and repeatable drag settings. The pre-set knob allows anglers to fine-tune their desired “Strike” drag pressure before ever leaving the dock.
  • Open Top Design: On most trolling sizes (e.g., MK-16, MK-20, MK-50), the open-top frame design provides excellent thumb access to the spool for controlling line during the drop-back or while fighting a fish.
  • Corrosion Resistance: Okuma’s CRC (Corrosion Resistant Coating) process is applied to all internal and external parts, creating a barrier that significantly enhances long-term protection against saltwater intrusion.

Choosing Your Weapon: Makaira Models and Applications

The Makaira series is not a one-size-fits-all solution. The reels come in a wide range of sizes and two primary editions, each tailored for specific fisheries.

Standard “Gold” Makaira vs. Special Edition (SEa)

  • Standard (Gold): These are the workhorses of the fleet. Their spool bearings are packed with grease, providing excellent longevity and performance, making them ideal for trolling applications where maximum freespool is not the primary concern.
  • Special Edition (SEa – Gunmetal/Silver/Black): The SEa models are purpose-built for the live-bait and long-range communities. Their key difference lies in the oiled spool bearings (using TSI-301 oil), which dramatically increases freespool performance—up to 2.5 times that of the standard models. This is critical when fly-lining a live bait or casting a jig to surface-feeding tuna. SEa models also often feature larger handles for increased leverage and lower, more powerful low-gear ratios.

A Guide to Sizes:

  • MK-10/15/16: These are the light-tackle cannons of the family. Perfect for stand-up fishing for school-sized yellowfin and bluefin tuna, sailfish, white marlin, and powerful kingfish. They are often spooled with 50-80lb braided line. The MK-16 is a particularly popular choice for its balance of power and manageable size.
  • MK-20/30: Stepping into the realm of true all-around offshore performers. These reels have the line capacity and drag power for larger yellowfin, wahoo, and smaller marlin. They are a favorite among private boaters who need a versatile reel that can handle a wide variety of bluewater targets. An MK-20 is often considered a legitimate 80lb class reel.
  • MK-50/50W: The standard for heavy-tackle trolling and stand-up fishing for big fish. These reels are built to battle large blue and black marlin, giant bluefin tuna, and big sharks. The “W” denotes a wide spool, offering increased line capacity, which is crucial when fishing with heavier monofilament top shots.
  • MK-80W/130: These are the apex predators of the reel world, designed for the giant class of fish. Primarily used from a fighting chair, the MK-80W and the colossal MK-130 are the tools of choice for commercial giant bluefin fishermen and grander marlin hunters, capable of holding immense lengths of 130lb+ line and producing drag pressures that can stop the strongest fish in the sea.

Owning and Operating a Makaira

Setting the Drag:

  1. With the reel in freespool, tighten the pre-set knob on the handle side.
  2. Attach the line to a scale and pull until you reach your desired “Strike” setting (typically one-third of the line’s breaking strength).
  3. Move the lever to the “Strike” position. The detent will stop it perfectly.
  4. Pushing the lever past “Strike” towards “Full” will apply increasing pressure for when you need to turn a fish’s head.

Maintenance:

  • After Every Trip: Thoroughly rinse the reel with fresh, low-pressure water. Pay special attention to the reel foot, clamp, and drain holes.
  • Drag Care: After rinsing, back the drag lever off completely to the “Freespool” position. This relieves pressure on the drag washers, prolonging their life.
  • Annual Service: While user maintenance can keep a Makaira running smoothly, an annual professional teardown, cleaning, and re-lubrication is highly recommended, especially for reels that see heavy use.

The Okuma Makaira is a testament to what is possible when innovative design, premium materials, and precision manufacturing converge. It has earned its place in the pantheon of the world’s greatest big game reels not through marketing, but through proven, on-the-water performance. For the angler unwilling to compromise, the Makaira offers the power, refinement, and unwavering reliability to confidently face any challenge the ocean can present.

Posted on

A Guide to Using a Scotty Electric Downrigger

For anglers looking to consistently target fish holding at specific, often deep, water columns, the downrigger is an indispensable tool. It offers unparalleled precision in depth control, allowing you to present your lure exactly where the fish are. Among the most trusted names in the game is Scotty, whose electric downriggers are renowned for their robust construction, reliability, and user-friendly design.

This comprehensive guide will walk you through every aspect of using a Scotty Electric Downrigger, from initial setup and rigging to advanced on-the-water techniques, maintenance, and safety. By the end of this article, you’ll have the knowledge to master this powerful fishing tool and unlock new depths in your angling success.

Part 1: Anatomy of a Scotty Electric Downrigger

Before diving into the “how-to,” it’s crucial to understand the key components of your Scotty downrigger. Familiarizing yourself with these parts will make operation intuitive and troubleshooting easier.

  • The Boom: This is the long arm, typically made of stainless steel or composite material, that extends out over the water. Booms come in various lengths, with longer booms offering more separation from the boat to avoid spooking fish. Many models feature telescopic booms for adjustable length.
  • The Spool and Cable: The spool holds the downrigger cable, which is most commonly braided stainless steel or, increasingly, a heavy-test braided fishing line (which eliminates hum and static). This cable is what carries your weight and fishing line down to the desired depth.
  • The Motor and Gear System: Housed within the main body, the powerful electric motor drives the gear system, allowing for the effortless retrieval of the heavy downrigger weight with the simple press of a button.
  • The Depth Counter: This mechanical or digital counter is a critical component, displaying the exact amount of cable you have paid out. This allows for pinpoint accuracy when targeting fish you’ve marked on your sonar.
  • The Clutch/Brake System: This is one of the most important operational controls. The brake allows you to control the speed of the weight’s descent. A smooth, consistent drop is key to preventing line tangles. It should be tight enough to hold the weight in place but loose enough to allow for a controlled drop when you want it.
  • The Base and Mount: Scotty offers a variety of mounting options, from permanent pedestal mounts to versatile track and gimbal mounts. The tilt-up feature on many models is a significant convenience for docking, trailering, or clearing the deck.
  • The Swivel Head: The boom pivots on the base, allowing you to swing the downrigger in for easier rigging and then out into its fishing position.
  • The Auto-Stop System: A hallmark of Scotty electrics, this feature automatically stops the weight’s retrieval just below the water’s surface, preventing the weight from crashing into the boom tip (a common and damaging operator error). This is achieved via beads on the cable that trip a switch on the pulley.
  • The Pulley/Snubber: Located at the end of the boom, the pulley ensures the cable runs smoothly. Often, a rubber “snubber” is attached between the cable and the weight. This acts as a shock absorber, protecting the cable from the jarring stress of wave action and boat movement.
  • The Release Clip: This is the crucial link between your fishing line and the downrigger cable. It’s designed to hold your fishing line securely as it’s lowered but to “release” it when a fish strikes, allowing you to fight the fish directly on your rod and reel, free from the heavy weight.

Part 2: Rigging Your Downrigger from Scratch

Proper rigging is the foundation of effective and trouble-free downrigging.

Step 1: Spooling the Cable

If you’re starting with an empty spool, you’ll need to load it with either stainless steel wire or heavy-test braid (200-250 lb test is common).

  1. Feed the Line: Feed the end of the cable through the fairlead or pulley at the end of the boom first, then bring it back to the spool. This prevents having to un-spool everything if you forget.
  2. Secure to Spool: Securely tie the cable to the spool using a robust knot.
  3. Apply Tension: Spool the cable onto the reel under firm tension. This is a two-person job. One person should operate the downrigger’s retrieve switch (or manually crank if it’s a manual model) while the other holds the cable with a heavy glove or cloth, ensuring it lays tightly and evenly across the spool. A loose wrap can cause the cable to dig into itself, leading to jams and kinks.

Step 2: Terminating the Cable

Once spooled, you need to set up the terminal end.

  1. Slide on Auto-Stop Beads: Slide your auto-stop beads onto the cable.
  2. Attach the Stopper/Crimps: Feed the cable through the sleeves of your terminal fastener (this is often a series of crimps and a snap).
  3. Attach the Snubber: Clip a high-quality rubber snubber onto the snap at the end of your cable. The snubber is critical for absorbing shock and should not be omitted.
  4. Attach the Weight: Connect your downrigger weight (or “cannonball”) to the other end of the snubber. Weights typically range from 8 to 15 pounds, depending on the depth you’re fishing and your trolling speed. Heavier weights track more vertically with less “blowback.”

Step 3: Choosing and Attaching the Release Clip

Your release clip attaches to the downrigger cable, usually just above the snubber or weight. Scotty offers several types:

  • Standard Pinch-Pad Releases: These are simple and effective. You pinch your fishing line between two pads. Tension is adjusted by how deep you set the line in the pads.
  • Stacker Releases: These clips have a loop or snap that allows them to be attached anywhere on the main downrigger cable, enabling you to fish multiple lines off a single downrigger (a technique called “stacking”).

Part 3: On-the-Water Operation: A Step-by-Step Guide

With your boat at trolling speed and your gear ready, here’s how to deploy and use your Scotty Electric Downrigger.

Step 1: Get to Trolling Speed. Before deploying anything, get your boat moving at your desired trolling speed. This is crucial as it creates tension and separation, preventing tangles.

Step 2: Let Out Your Lure. With your fishing rod in hand, let out your lure behind the boat. A standard setback is 100 feet, but this can vary greatly depending on water clarity, fish species, and lure type.

Step 3: Attach the Line to the Release Clip.

  1. Hold your fishing rod high to create a belly of line.
  2. Grab the fishing line and create a small loop by twisting it.
  3. Place this loop into the release clip. For pinch-pad style clips, set it just deep enough to hold securely.

Step 4: Deploy the Downrigger Weight.

  1. Ensure the boom is swiveled out to its fishing position.
  2. Hold your fishing rod with one hand to manage slack.
  3. With your other hand, turn the clutch/brake knob counter-clockwise just enough to allow the weight to begin a smooth, controlled descent. Do not let it free-spool, as this can cause tangles and puts unnecessary stress on the system.
  4. As the weight descends, it will pull your fishing line down with it. Pay close attention to your rod tip; it will bend over and start to throb as the lure works.

Step 5: Set the Depth.

  1. Watch the depth counter. When it reaches your target depth (e.g., the depth you marked fish on your sonar), tighten the clutch/brake by turning it clockwise until the weight stops descending.
  2. Place your fishing rod in a holder. Reel in any slack until the rod has a moderate, steady bend in it. This pre-load is critical for ensuring a clean release when a fish strikes.

Step 6: The Strike and the Release. When a fish hits your lure, its weight and struggle will pop the line out of the release clip. Your rod, which was bent over under tension, will snap straight up. This is your signal to grab the rod and fight the fish! The fish is now completely free from the downrigger system.

Step 7: Retrieving the Weight. After landing your fish (or if you simply want to check your lure), retrieve the downrigger weight.

  1. Simply press and hold the “UP” switch on your Scotty.
  2. The motor will engage and bring the weight up.
  3. Thanks to the auto-stop feature, the retrieval will automatically cease once the stopper bead reaches the switch, leaving your weight just under the surface, ready to be re-rigged.

Part 4: Advanced Techniques and Strategies

  • Understanding Blowback: At trolling speeds, water resistance pushes the weight back and up, meaning your lure is not as deep as your counter indicates. This effect, known as “blowback,” increases with speed and depth. Heavier weights minimize blowback. Experience and observing your lure’s true depth on a quality sonar are the best ways to learn to compensate for it.
  • Stacking Lines: This technique allows you to fish two (or even more) lines off a single downrigger. You attach your first line to the primary release clip near the weight. Then, you lower the weight 10-20 feet. You then attach a “stacker” release clip directly to the downrigger cable, attach your second fishing line to it, and continue lowering both to your final target depth. This allows you to present lures at two different depths simultaneously.
  • Targeting Temperature (Thermocline): Many game fish, like salmon and trout, relate heavily to specific water temperatures. Use a fish finder with a temperature sensor to locate the thermocline (the transition layer between warmer surface water and cooler deep water) and use your downrigger to precisely target your lures in this productive zone.

Part 5: Maintenance and Safety

  • Freshwater Rinse: Always rinse your downrigger, especially the cable and electrical connections, with fresh water after every use in saltwater.
  • Check Electrical Connections: Periodically inspect your power cable and plug for corrosion. A light coat of dielectric grease can help prevent this.
  • Inspect the Cable: Regularly check your downrigger cable for kinks or frays, which can weaken it significantly. Replace a damaged cable immediately.
  • Safety First: Never wear loose clothing, necklaces, or have loose line on the deck that could get caught in the moving cable or spool. When the downrigger is operating, keep your hands clear of the spool and cable.

By integrating a Scotty Electric Downrigger into your fishing arsenal and mastering its operation, you are no longer limited to the upper layers of the water. You have the power to explore the deep, to place your offering on the doorstep of fish that were previously out of reach, and to become a far more precise and successful angler.

Posted on

A Guide to Humminbird Side Imaging for Enhanced Fishing

For the modern angler, the water’s surface only tells a fraction of the story. Beneath lies a world of structure, contour, and, most importantly, fish. Humminbird’s Side Imaging technology has revolutionized how anglers interpret this submerged landscape, offering a panoramic, picture-like view of the world beneath their boats. This detailed guide will explore the intricacies of Humminbird Side Imaging, from its fundamental principles to advanced techniques, empowering you to find and catch more fish.

Understanding the Technology: How Side Imaging Works

Traditional 2D sonar provides a conical view directly beneath the boat, which is useful but limited in its scope. Humminbird’s Side Imaging, however, utilizes a razor-thin, high-frequency sonar beam that scans out to the left and right of your boat, covering a much wider area. These sonar returns are then processed and displayed on your fish finder’s screen as a highly detailed, three-dimensional image of the bottom.

Think of it as creating a detailed underwater map in real-time. The center of your screen represents the water column directly under your boat, while the areas to the left and right of this central column depict the bottom on either side. This allows you to see structure, such as weed beds, rock piles, submerged timber, and drop-offs, with remarkable clarity and to identify fish holding to these features.

A key element in interpreting Side Imaging is understanding sonar shadows. Just as an object in the sun casts a shadow, underwater objects block the sonar beam, creating a “shadow” on the display. The length and darkness of this shadow can indicate the size and height of the object off the bottom. Fish, being suspended in the water column, will also cast a distinct shadow, a tell-tale sign that separates them from bottom-hugging structure.

MEGA Imaging: A Leap in Clarity

Humminbird has further advanced this technology with the introduction of MEGA Imaging. Operating in the megahertz frequency range, MEGA Imaging provides an even higher level of detail and clarity than standard Side Imaging. This allows for the identification of individual fish within a school, the distinction between different types of vegetation, and a clearer picture of bottom composition. For anglers who demand the most precise underwater intelligence, MEGA Imaging is a game-changer.

Setting Up Your Humminbird for Success

Before you can effectively use Side Imaging, it’s crucial to optimize your unit’s settings. While default settings can provide a decent starting point, fine-tuning them to your specific conditions will dramatically improve your results.

  • Frequency: Humminbird units offer different frequencies, typically 455 kHz, 800 kHz, and the MEGA (1.2 MHz) frequency.
    • 455 kHz: Offers the greatest range, allowing you to scan out to 400 feet on either side of the boat. This is ideal for covering large, open water areas to find structure or schools of fish.
    • 800 kHz: Provides a sharper, more detailed image than 455 kHz but with a reduced range. This is a good all-around frequency for most fishing situations.
    • MEGA Imaging: Delivers the most detailed and crystal-clear images, but with the shortest range. This is best used when you have located an area of interest and want to dissect it with the highest possible resolution.
  • Range: This setting determines how far out to the side your unit will scan. A good rule of thumb is to set your range to three to four times the depth of the water you are in. For example, in 20 feet of water, a range of 60-80 feet on each side is a good starting point. Setting the range too wide in shallow water can make it difficult to discern detail.
  • Sensitivity: This controls the level of detail displayed on the screen. A higher sensitivity will show more returns, including smaller fish and baitfish, but can also lead to a cluttered screen in dirty or turbulent water. A lower sensitivity will provide a cleaner image but may miss some of the finer details. It’s best to start with the default setting and adjust it based on the water clarity and your personal preference.
  • Chart Speed: This setting controls how fast the sonar image scrolls across the screen. For the clearest images, your chart speed should match your boat speed. If you are moving slowly, a slower chart speed is ideal. If you are moving faster, increase the chart speed accordingly. A mismatch between chart speed and boat speed can result in distorted images.
  • Color Palette: Humminbird offers a variety of color palettes to suit different lighting conditions and personal preferences. Experiment with different palettes to find the one that allows you to best distinguish between fish, structure, and the bottom.

Interpreting the Image: What You’re Seeing

Learning to interpret the images on your Side Imaging display is the most critical skill. Here’s a breakdown of what to look for:

  • Structure:
    • Rock Piles and Boulders: Appear as bright, hard returns, often with distinct shadows that indicate their size and shape.
    • Weed Beds: Show up as softer, more textured returns. You can often distinguish between different types of vegetation based on the density and height of the returns.
    • Submerged Timber (Laydowns and Stumps): Appear as distinct lines or shapes with long shadows, clearly outlining the branches and trunk.
    • Drop-offs and Ledges: Will be visible as a distinct change in the bottom contour. The transition from a lighter to a darker shade can indicate a change in depth.
  • Fish:
    • Individual Fish: Typically appear as small, bright white dots or dashes. The key to confirming it’s a fish is the presence of a distinct sonar shadow a short distance away from the bright return. The farther the shadow is from the fish, the higher the fish is suspended in the water column.
    • Schools of Fish: Will appear as a cluster of bright dots or a large, irregularly shaped bright area, often with a collective shadow. Baitfish schools will look like a “cloud” or a “ball” of less distinct returns.
    • Identifying Species: While it’s difficult to definitively identify fish species on Side Imaging, you can make educated guesses based on size, shape, and location. For example, a large, solitary mark near the bottom in a deep hole could be a catfish, while a group of smaller, suspended marks over a rock pile might be crappie or bass.

Effective Fishing Techniques with Side Imaging

Once you’ve mastered the basics of setup and interpretation, you can start applying Side Imaging to specific fishing techniques to significantly boost your catch rate.

  • Casting to Structure: This is where Side Imaging truly shines. As you idle through an area, you can scan for promising structure like a submerged stump field or a rock pile. Once you identify a target, don’t drive directly over it and spook the fish. Instead, use your Side Imaging to see its exact location to the side of your boat. Then, you can:
    1. Mark a Waypoint: Use your cursor to move over the structure on your screen and mark a waypoint. This will save the GPS coordinates of the target.
    2. Position Your Boat: Circle back around, keeping an eye on your GPS map. Position your boat a comfortable casting distance away from the waypoint, ensuring your cast will land on or near the structure.
    3. Cast with Precision: With your boat properly positioned, you can make a precise cast to the unseen structure, presenting your lure directly to where the fish are holding.
  • Trolling: Side Imaging is an invaluable tool for trollers. Instead of blindly dragging lures, you can use Side Imaging to:
    • Follow Contour Lines: Identify and follow specific depth contours or the edges of weed beds where fish are likely to be cruising.
    • Target Suspended Fish: Locate schools of suspended fish and adjust your trolling depth and path to run your lures directly through them.
    • Identify Baitfish Concentrations: Find large schools of baitfish and troll the surrounding areas, as predator fish will likely be nearby.
  • Vertical Jigging: For targeting fish holding tight to deep structure, Side Imaging is essential for precise lure presentation.
    1. Locate the Target: Use Side Imaging to find deep rock piles, humps, or other vertical structures holding fish.
    2. Position Directly Above: Maneuver your boat directly over the top of the structure, using your 2D sonar in conjunction with your Side Imaging view.
    3. Drop with Confidence: You can now drop your jig vertically, knowing that you are presenting it directly into the strike zone.

Troubleshooting Common Issues

Even with the best technology, you may encounter issues. Here are some common problems and their solutions:

  • Poor Image Quality:
    • Check Transducer Installation: Ensure your transducer is mounted correctly and is not obstructed by the boat’s hull, motor, or other accessories.
    • Clean the Transducer: Marine growth or debris on the transducer face can interfere with the sonar signal. Clean it regularly with a soft cloth and water.
    • Adjust Settings: Experiment with your sensitivity and chart speed settings to find the optimal combination for your current conditions.
  • Interference:
    • Electrical Noise: Other electronics on your boat can sometimes interfere with your fish finder. Try turning off other devices to see if the interference disappears. Ensure your fish finder has a clean power source.
    • Other Sonar Units: If you are fishing near other boats with sonar, you may experience interference. Try changing your sonar frequency to one that is not being used by nearby anglers.
  • Inaccurate Depth Readings:
    • Transducer Angle: Make sure your transducer is level. A tilted transducer can result in inaccurate depth readings and distorted Side Imaging returns.
    • Turbulence: At high speeds, water turbulence can interfere with the sonar signal. Slow down for the clearest readings.

The Future is Clear

Humminbird’s Side Imaging technology has fundamentally changed the way anglers approach fishing. By providing a clear and detailed picture of the underwater world, it empowers fishermen to move beyond simply guessing where fish might be and allows them to make informed decisions based on real-time data. Whether you are a seasoned tournament professional or a weekend warrior, mastering Humminbird Side Imaging will undoubtedly make you a more successful and efficient angler, unlocking the hidden potential of any body of water. So, get out on the water, start scanning, and see what you’ve been missing.

Posted on

From Stock to Custom: The Ultimate Guide to Changing Your Baitcast Reel Handle

For many anglers, a baitcasting reel is more than just a tool; it’s a finely tuned extension of their own hands. Every component plays a role in the feel and performance, and none more so than the handle. Whether you’re seeking better ergonomics, a reduction in weight, a splash of custom color, or replacing a damaged original, changing the handle on your baitcast reel is one of the most impactful and straightforward upgrades you can make.

This detailed guide will walk you through every step of the process, from understanding the components and choosing a new handle to the final tightening of the screws. By the end, you’ll have the confidence to pop open that small parts bag and give your favorite reel a significant, personalized upgrade.

Why Change Your Baitcast Reel Handle?

Before you start turning screws, it’s helpful to understand the benefits of this popular modification.

  • Enhanced Ergonomics and Comfort: The most common reason for an upgrade. Longer handles provide increased leverage and torque, making it easier to grind in big fish with large baits like deep-diving crankbaits and swimbaits. Custom knobs made from materials like cork, oversized EVA foam, or contoured aluminum can provide a much better grip and reduce hand fatigue over a long day of casting.
  • Weight Reduction: Upgrading from a stock aluminum handle to a high-quality carbon fiber model can noticeably reduce the overall weight of your reel. This small change can improve the balance of your entire rod and reel combo, leading to increased sensitivity and less strain on your wrist.
  • Performance in Adverse Conditions: Wet and cold weather can make standard plastic or metal knobs slippery. Specialized knobs, particularly those made from tacky materials like cork or specific types of EVA, can provide a superior grip when the elements turn against you.
  • Aesthetics and Customization: Let’s be honest—it looks cool. A custom handle is one of the easiest ways to personalize your gear. With a vast array of anodized colors, carbon fiber weaves, and unique knob shapes available, you can make your reel stand out from the crowd and match it to your rod’s color scheme.
  • Replacement of Damaged Parts: Handles and knobs take a lot of abuse. A drop on the rocks or years of hard use can bend a handle or break a knob. Being able to swap it out yourself is a crucial maintenance skill.

Anatomy of a Baitcast Handle Assembly

The handle on a modern baitcasting reel is a simple, robust system. Understanding its parts is the key to a smooth installation.

  1. The Handle Assembly: This is the main arm, complete with the knobs.
  2. The Handle Nut: This is the primary nut that secures the handle to the reel’s drive shaft. It is typically right-hand or left-hand threaded, depending on the retrieve direction of your reel.
  3. The Retaining Plate (or “Keeper”): This is a small metal or plastic plate that fits over the handle nut. Its only job is to prevent the handle nut from backing off and loosening during use.
  4. The Retaining Plate Screw: A tiny screw that holds the retaining plate in place, fastening it to the body of the handle itself.
  5. The Tension Cap (or “Spool Tension Knob”): This is the cap located directly under the handle and star drag. While not technically part of the handle assembly, it often needs to be removed or loosened to provide clearance for tools.

Tools and Materials You’ll Need

You don’t need a professional workshop for this job. Most handle swaps can be done with a few simple tools.

  • Small Phillips Head Screwdriver: For the retaining plate screw.
  • Small Wrench or Nut Driver: Typically 8mm, 10mm, or 11mm. Most aftermarket handles come with a small, stamped metal tool that serves this purpose.
  • Your New Handle: Ensure it is compatible with your reel brand (e.g., Shimano, Daiwa, Abu Garcia) and retrieve direction. Most aftermarket handles come with a kit including shims and different sized nuts to fit various models.
  • A Small Tray: A magnetic parts tray or even just a small bowl is essential for keeping the tiny screws and nuts from getting lost.
  • A Soft Cloth: To protect the reel’s finish while you work.
  • Blue Loctite (Optional): For adding extra security to the retaining plate screw.

Step-by-Step Installation Guide

Lay your soft cloth on a clean, well-lit workspace. Let’s begin the transformation.

Step 1: Disassembly of the Stock Handle

  1. Remove the Retaining Plate Screw: Using your Phillips head screwdriver, carefully unscrew the small screw that holds the retaining plate onto the handle. Place this tiny screw immediately into your parts tray. It is the easiest part to lose.
  2. Lift Off the Retaining Plate: With the screw removed, the retaining plate should lift right off. Place it in the tray.
  3. Unscrew the Main Handle Nut: Now, use your wrench or the tool provided with your new handle to unscrew the main handle nut. Important Note: For a right-handed retrieve reel, this nut will typically be a standard right-hand thread (turn counter-clockwise to loosen). For a left-handed retrieve reel, it will often be reverse-threaded (turn clockwise to loosen). If it doesn’t budge with normal pressure, try the opposite direction before applying excessive force.
  4. Slide Off the Handle: With the nut removed, the entire stock handle assembly should slide straight off the drive shaft. You may see a small, thin washer or shim underneath; leave it in place if possible, or place it carefully in your parts tray.
  5. Remove the Star Drag (If Necessary): On some reels, the star drag (the star-shaped wheel used to adjust the drag pressure) may slide off along with the handle. Note its orientation—there is often a series of audible “clicker” washers underneath that need to be put back in the same order. Take a quick photo with your phone if you’re unsure.

Step 2: Preparing for the New Handle

  1. Clean the Area: With the handle off, it’s a great opportunity to take a soft brush or cotton swab and clean any accumulated dirt or old grease from around the drive shaft and the side plate of the reel.
  2. Re-install the Star Drag: If you removed the star drag, slide it back onto the drive shaft, making sure any clicker washers are in their correct positions. You should hear it click as you turn it.
  3. Check for Shims: Your new handle kit may come with small shims. These are used to eliminate any back-and-forth play if the new handle’s mounting hole is slightly thinner than the stock one. For now, plan to install the handle without any shims first to test the fit.

Step 3: Installing the New Handle

  1. Slide on the New Handle: Carefully slide your new carbon fiber or aluminum handle onto the drive shaft. It should seat flush against the star drag. Give it a gentle wiggle; it should feel solid with minimal play. If there is noticeable back-and-forth movement, slide it back off and add one of the provided shims before reinstalling it.
  2. Install the New Handle Nut: Select the correct nut from your new handle’s hardware kit. Most kits provide two or three nuts of different sizes and threading to fit various reel models. Start threading the nut by hand to ensure you have the correct one and are not cross-threading it.
  3. Tighten the Handle Nut: Using your wrench, tighten the nut until it is snug. It does not need to be cranked down with excessive force. Just make it firm enough that there is no wobble in the handle.
  4. Position the New Retaining Plate: Place the new retaining plate (keeper) over the nut. You may need to slightly tighten or loosen the main nut a tiny fraction of a turn to get the hole in the plate to line up perfectly with the screw hole on the new handle.
  5. Secure the Retaining Plate Screw: Insert the small screw and tighten it down with your Phillips screwdriver. Again, just make it snug. If you are concerned about it backing out, you can add a tiny drop of blue Loctite to the threads before installation.

Step 4: Final Checks and Adjustments

  1. Turn the Handle: Rotate the new handle. It should feel smooth and solid, with no wobble or binding.
  2. Check the Star Drag: Make sure the star drag still clicks and operates as it should.
  3. Test the Tension Cap: Ensure the handle does not interfere with your ability to access and adjust the spool tension cap.
  4. Admire Your Work: Step back and appreciate your newly upgraded, custom fishing machine.

By following these simple steps, you can confidently customize one of the most important contact points on your reel. This simple, 15-minute job not only adds a personal touch to your gear but can also provide tangible performance benefits on the water, giving you the comfort and leverage needed to fish harder and land more fish.

Posted on

Unlocking Your Tilt: The Definitive Guide to Changing the T-Bar Tilt Pin on a Minn Kota Trolling Motor

The tilt mechanism on a Minn Kota trolling motor is a critical component for any angler, allowing for quick adjustments when navigating shallow water, stowing the motor for a run, or deploying it for another pass. At the heart of this simple yet robust system is the T-bar tilt pin. Over years of use, this pin can wear, bend, or even break, leading to a sloppy, unreliable tilt function or, in the worst-case scenario, a motor that won’t lock into place.

Replacing this pin is a straightforward maintenance task that any motor owner with basic mechanical skills can perform. Doing so will restore the crisp, secure feel of your tilt-lock system and provide peace of mind that your valuable motor is held firmly in position. This comprehensive guide will walk you through every step of the process, from diagnosis to final inspection.

Understanding the T-Bar Tilt Pin and When to Replace It

The T-bar is the handle you pull to disengage the locking mechanism, allowing the motor shaft to pivot freely. The tilt pin itself is a short, sturdy metal dowel that passes through the T-bar. Its primary job is to engage and disengage with a series of locking teeth on the motor’s main bracket. When you pull the T-bar, you are pulling the pin out of these teeth. When you release it, a spring pushes the T-bar and the pin back into the teeth, locking the motor at the desired angle.

It’s time to consider a replacement when you notice the following symptoms:

  • Excessive “Slop” or “Play”: The motor wiggles or feels loose in its bracket even when locked. This often indicates the pin has worn down and is no longer fitting snugly into the locking teeth.
  • Difficulty Locking: The motor doesn’t reliably lock into one of the tilt positions. You may have to jiggle the shaft or T-bar to get the pin to engage.
  • Failure to Unlock: You pull the T-bar, but the motor remains stuck in position. This can happen if the pin is bent or has become jammed.
  • Visible Damage: A quick visual inspection reveals that the pin is bent, heavily corroded, or has a noticeable flat spot worn into it.

Tools and Materials You Will Need

This is a relatively simple job that doesn’t require a specialized workshop. Gather these tools before you begin:

  • New T-Bar Tilt Pin Kit: Order the correct replacement part for your specific Minn Kota model. These kits usually include the pin, a new tension spring, and a new retaining E-clip or roll pin.
  • Hammer: A small ball-peen or standard hammer will work perfectly.
  • Punch Set: A set of punches is essential for safely driving out the old retaining pin. A punch that is the same diameter or slightly smaller than the retaining pin is ideal.
  • Pliers: A pair of needle-nose pliers is invaluable for handling small parts like the E-clip and spring. Standard pliers can also be useful.
  • Small Flathead Screwdriver: For prying off an E-clip.
  • Block of Wood or a Towel: To protect the finish of your motor bracket during the procedure.
  • Safety Glasses: Always wear eye protection when working with springs and driving pins with a hammer.
  • Degreaser and Marine Grease (Optional): This is a great opportunity to clean and lubricate the moving parts of the tilt mechanism.

The Replacement Process: A Step-by-Step Guide

For this procedure, it is easiest to have the motor in the stowed (horizontal) position, resting securely on the boat deck or a workbench.

Step 1: Inspect the Assembly and Identify the Retaining Method

Before you start hammering, take a close look at your T-bar assembly. Minn Kota has used two primary methods to hold the tilt pin in place over the years:

  • Roll Pin: This looks like a small, hollow metal cylinder with a slit down its side. It is tension-fit into a hole that runs perpendicular through the T-bar handle and the tilt pin itself. You will need a punch to drive this out.
  • E-Clip: This is a small, C-shaped clip that fits into a groove on the end of the T-bar tilt pin, on the opposite side of the T-bar handle. It acts as a stop, preventing the pin from sliding out.

Knowing which one you have will determine your exact first step for removal.

Step 2: Remove the Old Pin

For models with a Roll Pin:

  1. Position the Bracket: Place your block of wood or a folded towel underneath the motor bracket to provide a stable, protected work surface. Position the T-bar so you have clear access to the roll pin.
  2. Select Your Punch: Choose a punch that is slightly smaller in diameter than the roll pin.
  3. Drive Out the Pin: Place the tip of the punch on the roll pin and give it a series of firm, controlled taps with your hammer. The pin will begin to back out the other side. Continue until it is completely removed. Use your pliers to pull it out if needed.
  4. Extract the T-bar and Pin: With the roll pin removed, you can now pull the entire T-bar handle and the old tilt pin out of the bracket assembly. Be mindful of the spring located behind the T-bar—don’t let it fly off and get lost.

For models with an E-Clip:

  1. Position for Access: Rotate the T-bar so you can easily access the E-clip.
  2. Pry Off the E-Clip: Place the tip of your small flathead screwdriver in one of the small gaps on the E-clip and gently pry it off the pin. Be careful here, as these clips are small and prone to flying across the workshop. Using your other hand to cup the area can help contain it.
  3. Extract the Pin: Once the E-clip is off, simply slide the old tilt pin out of the T-bar and bracket. The T-bar may come with it, or you may need to remove it separately. Again, watch for the spring.

Step 3: Clean and Inspect the Mechanism

With the old components removed, this is the perfect time for a bit of housekeeping.

  • Use a rag and some degreaser to clean out the hole where the T-bar and pin reside. Remove any old, gritty grease, sand, or debris.
  • Inspect the locking teeth on the main bracket. Ensure they are clean and not excessively worn or damaged.
  • Check the T-bar handle itself for any cracks or damage.

Step 4: Install the New Pin and Spring

  1. Prepare for Insertion: If you wish, apply a light coating of fresh marine grease to the new tilt pin and inside the mechanism housing. This will ensure smooth operation and help prevent corrosion.
  2. Position the Spring: Place the new tension spring into the hole in the bracket.
  3. Insert the T-Bar and New Pin: Slide the T-bar handle into position, compressing the new spring. Now, slide the new tilt pin through the bracket and the T-bar until the holes for the retaining pin align (for roll pin models) or the groove for the E-clip is exposed on the far side. You may need to wiggle the T-bar to get everything lined up perfectly.

Step 5: Secure the New Pin

For models with a Roll Pin:

  1. Start the New Pin: Using your pliers, hold the new roll pin and start it into the hole by hand.
  2. Drive it Home: Use your hammer to gently tap the roll pin until it is flush with the T-bar handle. Ensure it is centered and goes all the way through the new tilt pin.

For models with an E-Clip:

  1. Position the Clip: Using your needle-nose pliers, hold the new E-clip over the groove on the end of the tilt pin.
  2. Snap it On: Firmly press the E-clip into place. You should hear or feel a distinct “snap” as it seats securely in the groove. Give it a gentle tug with the pliers to confirm it is fully seated.

Step 6: Test the Mechanism

Your work is done. Now it’s time to test the function.

  • Pull the T-bar handle. It should move smoothly and retract on its own when you let go.
  • Tilt the motor shaft up and down, locking it into several different positions. The action should feel crisp and secure, with minimal play.
  • Ensure the motor locks firmly in the full stow position and the full deploy (vertical) position.

By investing a small amount of time and effort, you have successfully restored a key function of your trolling motor, ensuring safer operation and a longer service life for your valuable equipment.

Posted on

The Angler’s Circuit: A Detailed Guide to Troubleshooting the Cannon Autostop Feature

For the modern trolling angler, the Cannon Autostop feature is more than a convenience; it’s a critical tool for gear protection and efficient operation. This ingenious system automatically halts the downrigger’s retrieve just as the weight, or “cannonball,” reaches the surface, preventing it from crashing into the boom end and causing damage to the cable, pulley, or the downrigger itself. However, when this feature fails, it can be both frustrating and costly. This detailed guide will walk you through the inner workings of the Autostop system and provide a comprehensive, step-by-step process for troubleshooting and resolving any issues you encounter.

Understanding the Magic: How Autostop Works

Before you can fix the system, you must understand how it functions. The Cannon Autostop system is a clever application of a simple electrical circuit. It doesn’t rely on mechanical switches or sensors on the boom. Instead, it uses the downrigger cable and the water itself to complete a low-voltage circuit.

Here are the key components and the principle behind them:

  1. The Negative Path: The downrigger cable (which must be stainless steel) is connected to the negative side of the downrigger’s electrical system.
  2. The Positive Path: The water your boat is in acts as the positive conductor. Through the boat’s common ground and the downrigger’s wiring, the water is held at a positive potential relative to the cable.
  3. The Circuit: When the conductive downrigger cable is submerged in the water, a complete electrical circuit is formed. The control board inside the downrigger detects this completed circuit.
  4. The Insulator: A small, non-conductive bead, typically made of black plastic or vinyl, is crimped onto the downrigger cable a few feet above the weight. This is the Autostop Insulator Bead.
  5. Breaking the Circuit: As you retrieve the downrigger weight, the cable is pulled out of the water. The moment the Insulator Bead clears the water’s surface, the conductive path is broken because the section of cable still in the water is now electrically isolated from the downrigger by the bead. The control board instantly detects this interruption in the circuit and cuts power to the motor, stopping the retrieve.

This same principle is what drives Cannon’s “Positive Ion Control” (PIC) feature, which is designed to attract fish by creating a positive electrical field around the boat. The Autostop is essentially a secondary function of this core electrical design.


Step-by-Step Troubleshooting: From Simple Fixes to Deep Dives

When your Autostop fails, the problem is almost always a failure to complete or properly break the electrical circuit. Follow these steps methodically, starting with the most common and easiest-to-fix issues.

Step 1: The Basics – Operator Error and Obvious Issues

Before tearing anything apart, ensure the issue isn’t a simple oversight.

  • Is the Feature On? On some models, especially digital ones like the Digi-Troll, the Autostop feature can be toggled on or off in the settings menu. Consult your user manual to confirm it is enabled.
  • Is the Insulator Bead Present and Positioned Correctly? The bead is the lynchpin of the entire system.
    • Presence: Has the bead broken off or been removed? You must have one crimped onto the cable.
    • Position: The bead should be positioned on the cable so that it exits the water when the cannonball is at your desired stopping depth (typically just below the surface). If it’s too high up the cable, the weight will hit the boom long before the bead leaves the water. If it’s too close to the weight, the motor may stop too soon. A common starting point is 6 to 8 feet above the weight.
  • Is the Bead Damaged? Inspect the bead for cracks. If it’s cracked, water can seep in and maintain conductivity, preventing the circuit from breaking. Also, ensure it’s clean and not coated in metallic residue or conductive slime.

Step 2: The Circuit’s Foundation – Power and Ground

A faulty power supply or poor ground connection can cause a host of electrical gremlins, including Autostop failure.

  • Check Power Connections: Ensure the main power plug is securely connected to the downrigger base and that the contacts are clean and free of corrosion. Use a wire brush or contact cleaner if necessary.
  • Verify the Boat-Side Connection: Inspect the wiring from the downrigger’s receptacle back to the battery or fuse panel. Look for loose connections, frayed wires, or corrosion on terminals. The downrigger must have a solid connection to both the positive and negative terminals of your battery.
  • Confirm a Common Ground: The downrigger must be connected to the boat’s common ground. This means the negative wire from the downrigger should ultimately connect to the same negative bus bar or battery terminal as all your other electronics. Without a proper ground, the water cannot act as the positive side of the circuit relative to the cable.

Step 3: Inspecting the Conductive Path

If the basics check out, the next step is to trace the electrical path from the spool to the water.

  • The Spool Connection: This is one of the most common failure points. The downrigger cable must be electrically connected to the downrigger’s internal wiring via the spool.
    • Take the side plate off the downrigger to access the spool.
    • You will see that the downrigger cable is not tied directly to the plastic spool hub. Instead, it should be attached to a stainless steel band or terminal screw on the inside of the spool. This band is what makes contact with the downrigger’s internal electrical brushes.
    • Action: Ensure this connection is clean and tight. Look for corrosion between the cable termination and the stainless steel band. Remove the connection, clean both the cable loop and the terminal with a wire brush or sandpaper, and re-secure it firmly.
  • The Cable Itself: The system requires a conductive stainless steel cable. If you have recently re-spooled with a non-conductive cable, such as a coated wire or heavy monofilament, the system will not work.
  • The Water’s Conductivity: In extremely pure, low-mineral freshwater, the water’s conductivity can be very low, sometimes making the Autostop feature intermittent. This is rare but possible. If you suspect this is the case, the issue may be resolved by ensuring your Positive Ion Control is functioning correctly and all connections are pristine to maximize the electrical potential.

Step 4: The Bench Test – Isolating the Problem

If you’re still having issues, it’s time to isolate the downrigger from the rest of the boat’s wiring to determine if the fault lies with the unit or the installation.

  1. Remove the Downrigger: Detach the downrigger from its swivel base.
  2. Prepare a Test Environment: Get a 5-gallon plastic bucket and fill it with water. It helps to add a pinch of salt to the water to ensure good conductivity for the test.
  3. Direct Power Connection: Using a spare battery or a direct connection with jumper wires, connect the downrigger’s power cord directly to a 12V battery. This bypasses all of the boat’s wiring and grounding system.
  4. Simulate Operation:
    • Place the downrigger next to the bucket.
    • Lower the cannonball and a section of the cable, including the insulator bead, into the bucket of water.
    • Press the “Up” button to begin retrieving the cable.
    • Observe the unit closely. The retrieve should stop the instant the black insulator bead leaves the water.
  • If Autostop Works on the Bench: The problem lies in your boat’s wiring, power supply, or grounding. Re-check all the connections as described in Step 2.
  • If Autostop Fails on the Bench: The problem is internal to the downrigger itself. The most likely culprits are the internal brushes that contact the spool’s stainless steel band, the cable termination on the spool, or, in rare cases, the control board. At this point, unless you are very comfortable with electronics, it may be time to contact a Cannon Authorized Service Center.

By methodically working through these steps, you can diagnose and fix the vast majority of Cannon Autostop issues. Remember that the system is fundamentally simple, and the problem is almost always a break in a simple circuit. Patience and a logical approach will have your gear protected and your focus back on fishing. My initial search has yielded a wealth of valuable information from official Cannon support pages, user forums, and product manuals. I have a solid understanding of how the Autostop (also referred to as “Short Stop”) feature works, its reliance on an electrical circuit completed through the water and the downrigger cable, and its connection to the Positive Ion Control (PIC) system.

I’ve gathered specific troubleshooting steps from Cannon’s official resources, including how to test the system using a jumper wire and a multimeter. The search results also highlighted common user-reported issues, such as problems arising from using non-conductive braided line instead of steel cable, the importance of proper grounding, and potential issues with the insulated stop bead, wiring, and control board.

I have enough information to construct a comprehensive troubleshooting guide. I can now proceed to synthesize these findings into a detailed, step-by-step article without needing further searches. The plan to structure the article from simple checks to more complex diagnostics is well-supported by the information I’ve found.

I will now proceed with writing the article.

Your Ultimate Guide to Troubleshooting the Cannon Downrigger Autostop Feature

The Cannon Autostop is an indispensable feature for any troller, designed to automatically halt the downrigger weight at the water’s surface, preventing the “cannonball” from crashing into the boom and causing damage. When it works, it’s a seamless part of the fishing experience. When it fails, it can lead to frustration and potential gear damage. This detailed, lengthy guide will walk you through the entire process of diagnosing and fixing any issue with your Cannon Autostop system, from the most basic checks to more advanced electrical diagnostics.

Understanding the Magic: How Autostop Works

Before you can troubleshoot the system, it’s crucial to understand its elegant simplicity. The Autostop feature, also known as “Short Stop,” operates on a basic electrical circuit.

  1. The Circuit: The downrigger sends a very low-voltage electrical current down the stainless steel downrigger cable. This is often linked to the Positive Ion Control (PIC) system, which is designed to attract fish by creating a positive energy field around the wire.
  2. The Water’s Role: When the conductive downrigger cable and the attached weight are submerged, the water itself completes the electrical circuit back to the boat’s grounded electrical system.
  3. Breaking the Circuit: As you retrieve the downrigger weight, the system operates normally. The moment the weight and the conductive cable break the surface of the water, the electrical circuit is interrupted.
  4. The Stop Signal: The control board inside the downrigger instantly detects this break in the circuit and cuts power to the motor, stopping the weight precisely at the waterline.

This entire process relies on a continuous, uninterrupted flow of low-voltage electricity. Any problem with the Autostop feature is, therefore, a problem with this circuit.


Level 1 Troubleshooting: The Simple Stuff First

Always start with the most common and easiest-to-fix issues before breaking out the multimeter.

1. Check Your Downrigger Cable

This is the number one cause of Autostop failure. The system requires a conductive wire to function.

  • Are you using braided line? Many anglers switch from stainless steel cable to heavy braided line to eliminate cable hum. However, braided line is non-conductive. If you are using braid, the Autostop feature will not work. You must use stainless steel cable for the system to function as designed.
  • Is your cable coated? Some stainless steel cables come with a vinyl or plastic coating. If your cable is coated, a small section of the coating (at least 3-4 feet) must be stripped where it connects to the spool to ensure it makes contact with the set screw and the spool itself, which is part of the electrical circuit.

2. Inspect the Terminal End and Insulators

The connection between your cable, your weight, and your release is critical.

  • The Insulated Stop Bead: Cannon systems use a black, insulated stop bead that is crimped onto the cable a few feet above the weight. This bead is designed to trip a switch on some older models but primarily serves as a physical stopper. More importantly, the system relies on the black snap swivel insulator that is placed between the cable’s terminal snap and the release clip. Its purpose is to isolate the downrigger weight (the “cannonball”) from the electrically charged cable. If this insulator is missing or has been replaced with a standard metal snap swivel, the circuit can behave erratically. Ensure this insulator is present and in good condition.
  • Corrosion: Check the terminal end of your cable, the snap, and the swivels for any signs of rust or corrosion. Corrosion can act as an insulator, preventing a clean electrical connection with the water. Clean any corroded parts with a wire brush or replace them.

3. Verify Power and Ground Connections

A weak or faulty power connection can cause a myriad of issues, including Autostop failure.

  • Check the Plug: Ensure the downrigger’s power plug is securely seated in its socket. Look for any signs of corrosion on the plug prongs or inside the socket terminals. Clean them with electrical contact cleaner.
  • Trace the Wires: Inspect the power and ground wires running from the downrigger to the battery or fuse panel. Look for any frayed wires, loose connections, or corroded terminals. A solid ground connection is absolutely essential for the Autostop circuit to be completed. Ensure the ground wire is attached to a clean, unpainted surface on the main boat ground or directly to the battery’s negative terminal.

Level 2 Troubleshooting: Hands-On System Tests

If the basic checks don’t solve the problem, it’s time to perform some simple tests to isolate the faulty component.

1. The Jumper Wire Test (The “At-the-Dock” Method)

This is the definitive test to determine if the internal components of your downrigger are working correctly.

  • What You’ll Need: A simple piece of wire, 1-2 feet long (a “jumper wire”).
  • The Process:
    1. With the downrigger weight out of the water, turn on your downrigger.
    2. Connect one end of your jumper wire to a known good ground source on your boat (e.g., the negative terminal of the battery powering the downrigger).
    3. Touch the other end of the jumper wire directly to the stainless steel cable on the downrigger spool.
    4. Momentarily press the “UP” switch on your downrigger to begin retrieval. The downrigger should continue running on its own after you release the switch.
    5. While the downrigger is retrieving, remove the jumper wire from the cable.
  • Interpreting the Results:
    • If the downrigger stops immediately when you remove the jumper wire, the Autostop feature (the control board and internal wiring) is working perfectly. The problem lies “outside” the downrigger—either with the cable itself, the terminal connections, or the main ground connection for the downrigger. Re-inspect all the points from Level 1.
    • If the downrigger continues to run after you remove the jumper wire, the problem is “inside” the downrigger. This points to an issue with the control board or the internal wiring that transfers the current to the spool.

2. The Spool Connection Check

The electrical current has to get from the control board to the cable, and it does this through the spool assembly.

  • The Set Screw: Cannon downriggers have a small set screw on the spool. The first three wraps of the stainless steel cable must be wrapped over this set screw to ensure a solid electrical connection. If you’ve recently changed your cable, ensure it is installed this way.
  • Spool Shaft Contact: The spool itself makes contact with the downrigger’s drive shaft. Ensure this area is clean and free of excessive grease or debris that could insulate the components from each other.

Level 3 Troubleshooting: Advanced Electrical Diagnostics

If the problem persists, it’s time to use a multimeter to check for the correct voltages. This will definitively identify a faulty control board or internal wiring issue.

1. Testing the Positive Ion Control (PIC) Voltage

Since the Autostop and PIC systems are linked, testing the PIC voltage at the cable is a primary diagnostic step.

  • What You’ll Need: A multimeter (or voltmeter) set to read DC Volts.
  • The Process:
    1. Turn on your downrigger.
    2. Touch the negative (black) probe of your multimeter to a known good ground (the negative terminal of the battery).
    3. Touch the positive (red) probe of your multimeter directly to the stainless steel cable on the spool.
  • Interpreting the Results:
    • You should get a small voltage reading. For models with fixed PIC (like the Magnum series), this should be around 0.55V. For adjustable models (like the Digi-Troll or Optimum), the voltage will vary from approximately 0.2V to 1.2V depending on the setting.
    • If you get the correct voltage reading, it confirms that the control board is outputting the signal and the connection to the spool is good. If Autostop still fails, it strongly points to a grounding issue with the boat’s main electrical system.
    • If you get no voltage reading, the problem is inside the downrigger. The control board is either not generating the voltage, or it’s not reaching the cable. This could be a faulty control board or a broken internal wire (often a green wire) that runs to the gear case or motor. At this point, opening the downrigger housing for inspection or contacting a Cannon Authorized Service Center is your next step.

Summary: A Logical Path to a Solution

By following this structured approach, you can efficiently diagnose and solve nearly any Cannon Autostop issue.

  1. Start Simple: Confirm you are using steel cable and that all power/ground connections are clean and tight.
  2. Test Externals: Use the jumper wire test to quickly determine if the fault is inside or outside the downrigger unit.
  3. Verify Internals: If the fault is internal, check the cable’s connection to the spool via the set screw.
  4. Confirm with a Meter: Use a multimeter to check for PIC voltage at the cable. No voltage points to a faulty control board or internal wiring.

Patience and a logical process are your best tools. By understanding how the system works and methodically eliminating potential causes, you can get your Autostop feature working reliably, allowing you to focus on what’s most important—fishing.

Posted on

Mastering the Spool: A Guide to Installing Fishing Line on Your Reel

A fishing reel, no matter how technologically advanced, is only as good as the line it holds. Proper installation of that line is a fundamental skill every angler must master. It’s the critical link between you and the fish, and a poorly spooled reel can lead to a frustrating day of tangles, lost casting distance, and heartbreak.

Many anglers, especially beginners, rush this process, only to be met with monstrous tangles known as “bird’s nests” or line that mysteriously springs off the spool. But with a little knowledge and attention to detail, you can learn to spool your reels like a seasoned pro. This detailed guide will walk you through the correct procedures for both spinning and baitcasting reels, ensuring your line is laid perfectly every time.

The Foundation: Tools and Preparation

Before you even think about winding that handle, gathering a few simple items will make the process smoother and more effective.

Essential Tools:

  • Your Reel and Rod: You’ll want the reel mounted on the corresponding rod to provide proper tension and a natural path for the line.
  • Bulk Spool of Fishing Line: The new line you intend to install.
  • A Soft Cloth or Rag: Useful for applying tension.
  • Scissors or Line Cutters: For a clean cut.
  • A Pen or Pencil: An indispensable tool for spooling spinning reels correctly.

Optional but Helpful Tools:

  • Line Spooling Station: A device that holds the bulk spool and applies tension for you.
  • A Friend: An extra set of hands is always helpful, especially for maintaining tension.

Part 1: Spooling a Spinning Reel – The Battle Against Line Twist

Spinning reels are the most popular style for a reason—they are user-friendly and versatile. However, they are also highly susceptible to line twist if spooled incorrectly. This is because the line is wound onto a fixed spool, and if the direction of the winding fights the natural memory of the line coming off the bulk spool, you’re creating a twisted mess.

Step 1: Prepare Your Setup

Mount your spinning reel onto the rod. Open the bail arm and run the tag end of your new fishing line through the first (largest) line guide on the rod, closest to the reel.

Step 2: Tie the Arbor Knot

The arbor knot is the standard, secure way to attach your line to the reel’s spool (the “arbor”).

  1. Bring the tag end of the line around the spool.
  2. Tie a simple overhand knot around the main line.
  3. Tie a second overhand knot in the tag end itself, a couple of inches from the first knot.
  4. Pull the main line. The second knot will slide down and jam against the first, creating a secure, self-tightening loop around the spool.
  5. Trim the excess tag end close to the second knot.

Step 3: Close the Bail and Seat the Knot

Close the bail arm of your reel. Gently pull on the main line to cinch the arbor knot down snugly onto the spool. It doesn’t need to be Herculean tight, just snug.

Step 4: The Most Crucial Step – Line Orientation

This is where most mistakes are made. To prevent line twist, the line must come off the bulk spool in the same direction that the reel’s bail is winding it on.

  1. Lay the bulk spool on the floor or a table with the label facing up.
  2. Begin reeling slowly. Watch the line as it comes off the bulk spool and goes onto your reel. It should be coming off the bulk spool in a counter-clockwise direction, matching the rotation of your reel’s bail.
  3. The “Drop Test”: After you have about 10-15 turns of line on your reel, stop. Drop some slack line from your rod tip towards the reel.
    • If the line twists and coils up on itself, your orientation is wrong. The line is coming off the bulk spool in the wrong direction. Flip the bulk spool over so the label is facing down and try again.
    • If the line is relatively straight with minimal coiling, your orientation is correct. You can now proceed.

Step 5: Apply Proper Tension

Proper tension is key to preventing the line from being too loose on the spool, which can cause loops to fly off during a cast.

  1. Hold the rod in one hand and reel with the other.
  2. Use your non-reeling hand to pinch the line lightly against the rod blank just before the reel, using a soft cloth. This creates friction and ensures the line packs tightly onto the spool.
  3. Alternatively, you can place a pen or pencil through the center of the bulk spool and have a friend hold it, applying light pressure to the sides of the spool as you wind.

Step 6: Fill the Spool Evenly

Wind the line onto the reel at a steady pace. Make sure the line is distributing itself evenly across the height of the spool. Most modern spinning reels have good line-lay systems, but it’s good practice to watch it.

Continue winding until the line is filled to about 1/8th of an inch (or 2-3mm) from the outer lip of the spool.

Warning:

  • Underfilling the spool will significantly reduce your casting distance as the line has to fight against the tall lip of the spool.
  • Overfilling is the primary cause of “wind knots” and tangles, as loose loops of line will jump off the over-packed spool during a cast.

Once filled, cut the line from the bulk spool, and you’re ready to rig up and fish!

Part 2: Spooling a Baitcasting Reel – The Importance of Tension

Baitcasting reels are the choice for heavy-duty applications and precision casting. While they aren’t prone to line twist in the same way spinning reels are, they are susceptible to a different issue: backlash. The number one cause of horrific backlashes is line that was spooled too loosely. Under the pressure of a hard cast, the outer layers of line can dig into the looser layers underneath, causing the spool to stop abruptly while the lure continues, resulting in an epic bird’s nest.

Step 1: Prepare Your Setup

Mount the baitcaster on your rod. Take the tag end of your line and feed it through the line guide on the reel’s level-wind mechanism and then out through the guides on your rod.

Step 2: Tie the Arbor Knot

Most baitcasting spools have holes or perforations. You can wrap your line around the spool and tie an arbor knot just like you would on a spinning reel. Alternatively, you can pass the tag end through one of the holes in the spool and tape it down securely with a small piece of electrical tape before you begin winding. For braided line, this tape method is often preferred.

Step 3: Apply Firm, Consistent Tension

This is the most critical part of spooling a baitcaster. The line MUST be packed on the spool under significant tension.

  1. The best method is to have a friend insert a pencil through the bulk spool. They should then wear gloves or use a cloth to squeeze the sides of the spool, creating significant drag as you wind the line onto your reel.
  2. Go slowly and steadily. You should feel a good amount of resistance as you turn the handle. The goal is to pack the line so tightly that you cannot dig your thumbnail into it once it’s on the spool.

Step 4: Engage the Level-Wind

Ensure the level-wind mechanism is engaged and moving back and forth across the spool as you reel. This is what ensures the line is distributed evenly. Do not try to guide the line with your fingers; let the reel do the work.

Step 5: Fill to the Correct Level

Just like with a spinning reel, fill the spool to about 1/8th of an inch from the edge. Overfilling a baitcaster will cause the line to rub on the reel’s frame, and underfilling will reduce casting performance.

A Note on Backing and Braid

If you are using expensive fluorocarbon or slippery braided line, it’s common practice to first fill about half the spool with a cheaper monofilament “backing.” This saves money and provides a base that braided line can bite into, preventing it from slipping on the slick arbor. After filling with backing, join the backing to your main line using a strong line-to-line knot like the Double Uni Knot. Then, spool your main line on top, maintaining that crucial tension.

By investing a little time and care into properly spooling your reel, you’re setting yourself up for a more enjoyable, efficient, and successful day on the water. I have completed the initial research phase and have a solid foundation of information to write a detailed article on how to install fishing line on a reel. I’ve gathered specific instructions for both spinning and baitcasting reels, the two most common types. I have information on the importance of line direction for spinning reels to avoid twist and the need for proper tension on baitcasters to prevent backlashes. The searches also yielded details on using backing, the recommended knots like the arbor knot for attaching the line to the spool and the uni-to-uni knot for connecting backing to the main line, and the ideal fill level for the spool. I also found information about common mistakes and how to avoid them.

I believe I have enough information to create a comprehensive and lengthy article without needing further Google searches. I can now proceed to synthesize this information into a well-structured and detailed guide for anglers.

Therefore, I will now proceed with writing the article.

A detailed, lengthy article on how to install fishing line on a reel.

From Spool to Spool: The Definitive Guide to Installing Fishing Line on Your Reel

A day on the water can be made or broken by the simplest of things, and the way you’ve spooled your fishing line is a prime example. Properly installed line casts smoother, farther, and with fewer tangles, while a poorly spooled reel is a recipe for frustration in the form of bird’s nests, line twist, and lost fish. This comprehensive guide will walk you through the nuances of installing fishing line on the two most popular types of reels: spinning and baitcasting. By the end, you’ll have the knowledge and confidence to spool your reels like a seasoned pro.

The Fundamentals: What You’ll Need and Why It Matters

Before we dive into the specifics of each reel type, let’s gather our tools and understand some universal principles.

Essential Tools:

  • Your Rod and Reel: It’s always best to spool your line with the reel attached to the corresponding rod. This allows you to use the rod’s guides to help manage the line.
  • A Spool of New Fishing Line: Whether it’s monofilament, fluorocarbon, or braid, choose a line that’s appropriate for your target species and fishing style.
  • Line Cutters or Sharp Scissors: For clean, precise cuts.
  • A Soft Cloth or Gloves: To apply tension to the line without burning or cutting your fingers.
  • A Pen or Pencil (for baitcasters): To hold the filler spool.
  • Electrical Tape (optional but recommended for braid): To prevent braided line from slipping on the spool.

Key Concepts:

  • Line Memory: Monofilament and fluorocarbon lines have a tendency to “remember” the shape of the spool they were packaged on. This can lead to coiling and tangling if not addressed during the spooling process.
  • Line Twist (Spinning Reels): This is the bane of many spinning reel users. It occurs when the line is spooled onto the reel in a way that fights its natural coil, causing it to twist and eventually form frustrating knots.
  • Backing: This is an older, less expensive line (typically monofilament) that is spooled onto the reel before your main fishing line. There are two primary reasons for using backing:
    1. Cost Savings: High-performance lines, especially braid, can be expensive. By filling a portion of your spool with cheaper backing, you can use less of your pricey main line.
    2. Preventing Braid Slippage: Braided lines are notoriously slick and can slip on a smooth reel spool under pressure. A monofilament backing provides a surface for the braid to bite into, preventing this issue.
  • Spool Capacity: It’s crucial not to overfill or underfill your reel’s spool. A good rule of thumb is to leave about 1/8th of an inch of space between the line and the lip of the spool. Overfilling leads to line jumping off the spool, while underfilling will significantly reduce your casting distance.

Spooling a Spinning Reel: Conquering the Twist

Spinning reels are the workhorses of the fishing world, and spooling them correctly is all about managing line twist.

Step-by-Step Instructions:

  1. Prepare Your Reel and Rod: If there’s old line on your reel, remove it completely. Attach your reel to your fishing rod and thread the new line through the first line guide closest to the reel.
  2. Tie an Arbor Knot: Open the bail of your spinning reel. The bail is the wire arm that you flip to cast. With the bail open, use an arbor knot to secure the line to the spool. An arbor knot is essentially two overhand knots. First, tie an overhand knot around the main line. Then, tie a second overhand knot in the tag end of the line. When you pull the main line, the second knot will jam against the first, cinching down on the spool. Trim the tag end.
  3. The All-Important Line Direction: This is the most critical step for preventing line twist. Place the filler spool on the floor with the label facing up. The line should be coming off the filler spool in a counter-clockwise direction. As you reel, the bail of a spinning reel rotates in a clockwise direction. By having the line come off the filler spool in the opposite direction, you are counteracting the twist that the reel naturally imparts.
  4. Apply Tension and Start Reeling: Pinch the line lightly between your thumb and forefinger using a soft cloth or glove, about a foot above the reel. This tension is crucial for laying the line tightly and evenly on the spool. Begin turning the reel handle at a steady pace.
  5. Check for Line Twist: After about 15-20 cranks of the handle, pause and let some slack develop in the line between the reel and the first rod guide. If the line starts to twist and coil up on itself, your line is coming off the filler spool in the wrong direction. Simply flip the filler spool over so the label is facing down and continue spooling. The line should now hang relatively straight.
  6. Fill the Spool: Continue reeling and applying tension until the line is about 1/8th of an inch from the edge of the spool.
  7. Cut and Secure: Cut the line from the filler spool and thread it through the remaining guides on your rod. Tie on a lure or hook to keep the line from retracting through the guides.

Pro-Tip for Braided Line: If you’re spooling with braid and not using a monofilament backing, tie your arbor knot and then place a small piece of electrical tape over the knot and line on the spool. This will give the slick braid something to grip and prevent it from slipping.

Spooling a Baitcasting Reel: The Art of Tension

Baitcasting reels are favored for their power and precision, but they are also infamous for their ability to create “backlashes” or “bird’s nests.” Proper spooling with consistent tension is your best defense against these tangled messes.

Step-by-Step Instructions:

  1. Prepare Your Reel and Rod: Mount your baitcaster on its rod. Take the end of your new line and thread it through the rod’s line guides, starting from the tip and working your way down to the reel. Then, thread the line through the reel’s line guide (the small opening that moves back and forth).
  2. Secure the Line to the Spool: Most baitcaster spools have small holes in them. A simple and effective way to secure the line is to pass it through one of these holes, wrap it around the spool, and then tie an arbor knot or a couple of overhand knots around the main line. Tighten it down and trim the tag end.
  3. Set Up Your Filler Spool: Unlike a spinning reel, you want the line to come off the top of the filler spool in the same direction that the baitcaster’s spool rotates. The easiest way to achieve this is to place a pen or pencil through the center of the filler spool. Have a friend hold the pencil, or you can place it between your feet, allowing the spool to rotate freely.
  4. Apply Firm, Consistent Tension: This is the most critical step for a baitcaster. Using a soft cloth or gloves, pinch the line firmly as you begin to reel. The line should lay on the spool very tightly. If the line is spooled too loosely, the top layers will dig into the layers below it during a cast, causing a nasty backlash.
  5. Fill the Spool Evenly: Reel at a slow, steady pace, making sure the line lays evenly across the spool. Your reel’s line guide will help with this, but keeping an eye on it is good practice. Continue until the line is about 1/8th of an inch from the edge of the spool.
  6. Cut and Secure: Cut the line from the filler spool and tie on your lure or hook.

Using Backing on a Baitcaster:

If you’re using a monofilament backing with a braided main line, first spool on enough monofilament to cover the bottom of the spool. Then, tie your braid to the monofilament using a reliable line-to-line knot, such as a Double Uni Knot or an FG Knot. Trim the tag ends of the knot very closely, and then continue spooling with the braid, maintaining firm tension.

By taking the time to master these techniques, you’ll not only save yourself countless headaches on the water but also improve your casting and overall fishing success. A well-spooled reel is a testament to a prepared angler, and it’s a fundamental skill that will serve you well for years to come.

Posted on

Cut Down to Size: A Detailed Guide on How to Shorten Your Minn Kota Trolling Motor Shaft

A long trolling motor shaft can be more of a hindrance than a help in certain fishing scenarios. Whether you’re navigating shallow waters, casting from a low-profile kayak, or simply tired of the control head towering over your bow, shortening the shaft of your Minn Kota trolling motor can be a practical and rewarding DIY project. This in-depth guide will walk you through the process, from determining the ideal length to making the final cut, ensuring you have the confidence and knowledge to customize your motor for optimal performance.

Before You Begin: Important Considerations and Warnings

Shortening your trolling motor shaft is not a one-size-fits-all procedure. It’s crucial to understand the implications and potential risks before you pick up a single tool.

Warranty Void: The most significant consideration is that cutting the shaft of your Minn Kota trolling motor yourself will void the manufacturer’s warranty. If your motor is still under warranty, it is highly recommended to have the shaft shortened by a Minn Kota Authorized Service Center. This will ensure the work is done professionally and your warranty remains intact.

Model Restrictions: Not all Minn Kota motors are created equal when it comes to shaft modification.

  • Models That SHOULD NOT Be Shortened: Trolling motors with automatic stow and deploy features, such as the Ulterra, Ulterra Quest, and Riptide Instinct Quest, have complex internal mechanisms that are calibrated to a specific shaft length. Attempting to shorten these shafts can lead to catastrophic failure of the stow/deploy and trim functions.
  • Models That Are Difficult to Shorten: Foot-controlled models like the Maxxum and Fortrex present a significant challenge. The top of the shaft on these motors has a recessed area where the steering pinion sits. Cutting the shaft removes this recess, and recreating it with precision is extremely difficult without specialized equipment. An improperly seated pinion will result in erratic and unreliable steering. While it’s not impossible for a professional, it is not recommended as a DIY project.
  • Ideal Candidates for Shortening: Hand-controlled models such as the Endura and Riptide Transom, and electric-steer models like the PowerDrive and Terrova, are the most suitable candidates for this project. Their simpler head and steering mechanisms make the process more straightforward for the average DIYer.

Safety First: This project involves working with electrical components and cutting tools. Always disconnect the trolling motor from its power source before beginning any work. Wear appropriate safety gear, including safety glasses and gloves.

Why Shorten Your Trolling Motor Shaft?

There are several practical reasons to undertake this modification:

  • Improved Casting Clearance: A shorter shaft lowers the control head, providing more room for casting without obstruction, especially on boats with lower gunnels.
  • Enhanced Kayak and Small Boat Usability: For kayak anglers and those with smaller jon boats, a long shaft can be cumbersome and position the control head at an awkward, uncomfortable height.
  • Reduced Prop Depth in Shallow Water: In skinny water, a long shaft can force the propeller too deep, causing it to drag in the mud and spook fish. A shorter shaft allows for a more appropriate prop depth.
  • Easier Stowing: A shorter shaft can make the stowing process more manageable and result in a more compact and secure fit on the boat’s bow.

Determining Your Ideal Shaft Length

Before you make the cut, it’s essential to determine the correct new length for your shaft. The general rule of thumb is that the center of the motor’s lower unit should be at least 12 inches below the waterline for optimal performance and to prevent cavitation (the prop sucking in air).

  1. Position Your Boat: With your boat in the water and loaded with your typical fishing gear and passengers, position the trolling motor as you normally would.
  2. Measure the Waterline: Measure the distance from the top of the bow where the motor is mounted down to the waterline.
  3. Calculate the Ideal Depth: Add approximately 12 to 18 inches to your measurement from step 2. This will give you a good starting point for your new shaft length, ensuring the prop stays submerged in most conditions. For those who frequently fish in rough water, adding a few extra inches can provide a buffer.
  4. Mark Your Cut: Once you’ve determined the desired length, use a pencil or marker to clearly mark the cutting point on the shaft. Remember the adage: measure twice, cut once.

Tools and Materials You’ll Need

Gathering the right tools and materials is crucial for a smooth and successful project.

Tools:

  • Safety Glasses and Gloves
  • Screwdriver Set (Phillips and flathead)
  • Wrenches or Socket Set
  • Hacksaw with a fine-tooth blade or a Tubing Cutter: A tubing cutter will provide a cleaner, more precise cut on the composite shaft.
  • Power Drill and Drill Bits: A sharp drill bit is essential for creating a clean new mounting hole.
  • Wire Cutters and Strippers
  • Butt Connectors and a Crimping Tool
  • Heat Gun and Heat Shrink Tubing
  • Center Punch (optional but recommended)
  • Round File or Deburring Tool
  • Caulking Gun

Materials:

  • Marine-Grade Sealant: A high-quality, waterproof sealant is non-negotiable. Products like 3M 5200 Marine Adhesive Sealant or a specialized trolling motor shaft thread-locking sealant are excellent choices.
  • Dielectric Grease: To protect electrical connections from corrosion.

Step-by-Step Guide to Shortening Your Minn Kota Shaft

This guide will focus on the more straightforward process for hand-controlled and electric-steer models like the Endura, PowerDrive, and Terrova.

Step 1: Disassembly

  1. Disconnect Power: Completely disconnect the trolling motor from the battery.
  2. Remove the Control Head:
    • For hand-controlled models, there is typically a single through-bolt or a set of screws holding the tiller handle/head to the top of the shaft. Remove these fasteners.
    • For electric-steer models (PowerDrive/Terrova), you’ll need to remove the top cover of the control head. This usually involves removing several screws. Be mindful of any indicator lights or buttons and their wiring.
  3. Expose the Wiring: Carefully lift the control head or tiller handle off the shaft. You will see the main power wires (and potentially other sensor wires for i-Pilot models) running down the inside of the composite shaft.
  4. Document the Wiring: Before disconnecting anything, take clear photos of the wiring connections inside the head. This will be an invaluable reference during reassembly. Note the colors and their corresponding terminals.

Step 2: Cutting the Shaft

  1. Secure the Shaft: Securely clamp the trolling motor shaft in a vise or on a stable workbench. Use a soft cloth or rubber jaw protectors to avoid scratching the composite material.
  2. Protect the Wires: Gently pull the wires up and out of the top of the shaft as far as they will go to create slack. This is the most critical step to avoid damaging the internal wiring during the cut.
  3. Make the Cut:
    • Using a Tubing Cutter (for metal shafts): Place the tubing cutter on your marked line and slowly and steadily rotate it around the shaft, gradually tightening the cutting wheel with each rotation. This will produce a clean, square cut.
    • Using a Hacksaw (for composite shafts): If using a hacksaw, wrap the cutting line with masking tape to help prevent splintering of the composite material. Use a fine-toothed blade and make slow, controlled strokes to ensure a straight cut.
  4. Deburr the Edge: Once the cut is complete, use a round file or a deburring tool to smooth the inside and outside edges of the newly cut shaft. This will prevent any sharp edges from chafing the wires.

Step 3: Drilling the New Mounting Hole

  1. Mark the Hole: Carefully measure the location of the original mounting hole on the piece of shaft you just cut off. Transfer this measurement to the newly shortened shaft. Use a center punch to create a small indentation to guide the drill bit and prevent it from “walking.”
  2. Protect the Wires (Again): Push the wires down into the shaft, far away from where you will be drilling.
  3. Drill the Hole: Using a sharp drill bit of the correct diameter, drill the new mounting hole through the shaft. Drill slowly and steadily to ensure a clean hole.

Step 4: Shortening and Reconnecting the Wires

  1. Calculate Wire Length: You will now have an excess length of wire. You need to shorten the wires to prevent them from kinking or getting pinched inside the smaller space of the control head. The amount of wire to remove should correspond to the length of the shaft you cut off.
  2. Cut and Strip the Wires: Carefully cut the wires to the appropriate length. Strip about half an inch of insulation from the ends of the wires.
  3. Reconnect the Wires:
    • Using appropriately sized butt connectors, crimp the wires back together, ensuring you match the colors correctly based on the photos you took earlier.
    • Slide a piece of heat shrink tubing over each connection before crimping the other side.
    • Once the connections are crimped, use a heat gun to shrink the tubing, creating a secure and waterproof seal.
    • Apply a small amount of dielectric grease to the connections for an extra layer of corrosion protection.

Step 5: Reassembly and Sealing

  1. Feed the Wires: Carefully feed the shortened and reconnected wires back down into the shaft.
  2. Apply Sealant: Apply a generous bead of your marine-grade sealant around the top edge of the composite shaft where the control head will sit. This is crucial for preventing water intrusion down the shaft, which can damage the motor’s electronics.
  3. Reinstall the Control Head: Slide the control head back onto the shaft, aligning the mounting hole. Ensure the head is properly seated in the sealant.
  4. Secure the Head: Reinstall the through-bolt or screws that hold the head in place. Do not overtighten, as this can crack the composite shaft or the control head.
  5. Final Sealing: Wipe away any excess sealant for a clean finish. It’s also a good practice to apply a small amount of sealant around the head of the mounting bolt or screws for added water protection.
  6. Cure Time: Allow the sealant to cure completely according to the manufacturer’s instructions before using the trolling motor. This can take anywhere from 24 hours to several days.

A Job Well Done

By following these detailed steps and taking the necessary precautions, you can successfully shorten the shaft of your Minn Kota trolling motor, customizing it to your specific needs and improving your overall fishing experience. While the process may seem daunting at first, with careful planning and execution, you’ll be back on the water with a more efficient and user-friendly trolling motor in no time.

Posted on

Prop Replacement: A Detailed Guide to Maintaining Your Minn Kota Trolling Motor

IMPORTANT SAFETY WARNING: DISCONNECT POWER BEFORE PROCEEDING!

Before attempting any work on your Minn Kota trolling motor, including prop replacement, you MUST disconnect the motor from ALL power sources (e.g., battery). Failure to do so can result in severe electrical shock, serious injury, or even death. Always verify the power is disconnected before touching any part of the motor or prop assembly.

The propeller on your Minn Kota trolling motor is the unsung hero, silently pushing your boat through the water. Over time, however, props can become worn, nicked, bent, or entangled with fishing line, leading to reduced performance, increased noise, and even motor damage. Replacing a trolling motor prop is a relatively simple maintenance task that any boater can accomplish with a few basic tools and a careful approach.

This comprehensive guide will walk you through the step-by-step process of replacing the prop on your Minn Kota trolling motor, ensuring you get back on the water with optimal efficiency.

Why Replace Your Propeller?

Understanding when and why to replace your prop is the first step in proper maintenance:

  • Damage: The most common reason. Impacts with rocks, stumps, or shallow bottoms can chip, crack, or bend the prop blades. Even minor damage can significantly reduce thrust and efficiency.
  • Vibration: A bent or unbalanced prop will cause excessive vibration, which can lead to premature wear on motor components, shaft seals, and even electrical connections.
  • Weed/Line Entanglement: Fishing line, weeds, or debris wrapped around the prop shaft can wear down the prop boss, damage the lower unit seal, and reduce thrust.
  • Performance Degradation: Over time, general wear and tear can reduce the prop’s effectiveness, making your motor work harder for the same amount of thrust, draining your battery faster.
  • Upgrade: Sometimes you might replace a prop to switch to a different blade design (e.g., a weedless prop like the Minn Kota Weedless Wedge 2) that better suits your fishing environment or desired performance.

Tools and Materials You’ll Need

Before you begin, gather the following:

  1. New Minn Kota Propeller: Ensure you have the correct replacement prop for your specific Minn Kota model. Props vary in size, blade count, and hub design. Refer to your owner’s manual or the Minn Kota website for compatibility.
  2. Prop Nut Kit: This typically includes a new prop nut, a new prop pin (also called a drive pin or shear pin), and often a washer. It’s crucial to use a new pin each time you replace the prop, as they are designed to shear off to protect the motor from damage upon impact.
  3. Wrench or Pliers: To remove and tighten the prop nut. An adjustable wrench or a socket wrench (often a 7/16″ or 1/2″ socket) are commonly used. Some Minn Kota motors come with a specialized prop wrench.
  4. Flathead Screwdriver or Punch: To push out the old prop pin if it’s stuck.
  5. Small Hammer or Mallet (Optional): To gently tap out a stubborn prop pin.
  6. Needle-Nose Pliers (Optional): Useful for removing stubborn fishing line from behind the prop.
  7. Clean Cloth or Rag: For cleaning the prop shaft.
  8. Grease (Marine Grade/Waterproof): A small amount of waterproof marine grease for the prop shaft.
  9. Safety Glasses (Recommended): To protect your eyes.

Step-by-Step Propeller Replacement Guide

Again, ensure the motor is disconnected from all power sources before you begin.

Step 1: Disconnect Power (Critical Safety Step!)

  • For Bow-Mount Motors: Unplug the motor’s power cord from the battery or quick-disconnect plug on the boat.
  • For Transom-Mount Motors: Disconnect the positive (+) and negative (-) leads directly from your trolling motor battery terminals. If you have a battery switch, turn it to the “OFF” position.
  • Double-Check: Wiggle the power cables, try to turn the motor on (if possible), or use a voltmeter to confirm there is no power reaching the motor.

Step 2: Position the Motor

  • Clear Access: Lift the motor out of the water and deploy it so the lower unit (where the prop is located) is easily accessible.
  • Stability: If the motor is on a stand or bench, ensure it is stable and won’t tip over during the process.

Step 3: Remove the Old Propeller

  1. Locate the Prop Nut: The prop nut is on the very end of the prop shaft, holding the propeller in place.
  2. Hold the Propeller: Firmly grasp the propeller with one hand to prevent it from spinning while you loosen the nut.
  3. Loosen the Prop Nut: Use your wrench or pliers to turn the prop nut counter-clockwise (lefty-loosey). It may be tight or corroded, so apply steady, firm pressure.
  4. Remove the Prop Nut and Washer: Once loosened, unscrew the nut completely and slide off the washer behind it. Set these aside.
  5. Remove the Old Propeller: Carefully slide the old propeller off the prop shaft. It might be a bit stiff if it’s been on for a long time or if there’s corrosion. Gentle wiggling usually helps.

Step 4: Inspect and Clean the Prop Shaft Area

  1. Remove the Prop Pin: Look for a small metal pin (the drive pin or shear pin) that runs perpendicular through the prop shaft. This pin engages a slot in the propeller hub.
    • If it’s still in place, gently push it out using a flathead screwdriver or punch. A light tap with a hammer might be needed if it’s stuck.
    • If the pin is sheared or broken, remove any remaining pieces.
  2. Clear Debris: This is a crucial step. Thoroughly inspect the prop shaft and the area behind where the prop sits (often called the “seal housing” or “lower unit housing”) for:
    • Fishing Line: This is the most common culprit for motor damage. Carefully use needle-nose pliers or even a utility knife (with extreme caution) to remove any wrapped fishing line. Even small amounts can work their way past the prop seal and damage the motor’s internal components.
    • Weeds, Hair, or Other Debris: Clean off any other foreign material.
    • Corrosion: Gently scrape away any loose corrosion or mineral deposits from the shaft.
  3. Inspect the Shaft Seal: Look at the rubber or plastic seal at the base of the prop shaft. If it appears cracked, brittle, or damaged, it indicates that water could potentially enter the motor’s lower unit, which can lead to costly repairs. While replacing this seal is beyond the scope of a simple prop change, identifying damage is important for future maintenance.

Step 5: Install the New Propeller

  1. Grease the Prop Shaft: Apply a thin, even layer of waterproof marine grease to the entire prop shaft. This helps prevent corrosion, makes future removal easier, and protects the shaft.
  2. Insert the New Prop Pin: Take your new prop pin (from the prop nut kit). Align the small hole in the prop shaft with the hole on the prop pin, and carefully push the new prop pin through the shaft. Ensure it’s fully seated and extends evenly on both sides. Do NOT reuse the old prop pin.
  3. Align the Propeller: Take your new Minn Kota propeller. You’ll notice a slot or recess in the prop’s hub designed to engage with the prop pin. Carefully slide the propeller onto the shaft, aligning this slot with the newly installed prop pin.
    • The prop should slide on easily until it rests firmly against the lower unit housing.
    • Ensure the prop pin is fully seated within the prop’s slot.
  4. Install the Washer and Prop Nut: Slide the washer onto the prop shaft, followed by the new prop nut.
  5. Tighten the Prop Nut: Hold the propeller firmly with one hand and tighten the prop nut clockwise (righty-tighty) with your wrench.
    • Snug, But Not Overtight: Tighten the nut until it is snug and the prop no longer wiggles on the shaft. Do NOT overtighten it, as this can damage the prop, the shaft, or strip the threads. Minn Kota typically recommends tightening until the prop is firm against the pin, but not compressing the prop beyond its natural fit. A good rule of thumb is to tighten until firm, then perhaps an additional quarter turn.

Step 6: Final Check and Reconnect Power

  1. Spin the Propeller: Manually spin the new propeller to ensure it rotates freely without any binding or excessive wobble.
  2. Confirm No Loose Parts: Double-check that the prop nut is secure and there are no loose components.
  3. Reconnect Power: Once you are absolutely certain that all tools are clear of the prop and that the motor is safely assembled, reconnect the trolling motor to its power source (battery or quick-disconnect).
  4. Test: If safe to do so (e.g., in water or with the motor safely deployed and clear of obstructions), briefly test the motor’s operation at low speed to ensure the prop is functioning correctly.

Tips for Longevity and Performance

  • Carry a Spare Prop Kit: Always keep a spare prop, prop nut, and prop pin on board your boat. A damaged prop can quickly end a fishing trip.
  • Regular Inspection: Periodically inspect your prop for damage, especially after fishing in shallow or weedy areas.
  • Clean Behind the Prop: Make it a habit to check behind your prop for fishing line at the end of each season or after any suspected entanglement. This is the single most important preventative measure against lower unit seal failure.
  • Choose the Right Prop: If you frequently fish in heavy weeds, consider a weedless prop design. If you prioritize maximum thrust, consult Minn Kota’s recommendations for high-thrust props.

By following these detailed steps, you can confidently replace the prop on your Minn Kota trolling motor, ensuring it continues to provide reliable and efficient propulsion for many fishing adventures to come. Remember, safety first – always disconnect power before you touch that prop!

Posted on

More Than Just a Number: A Comprehensive Guide to Ice Thickness and Quality for Ice Fishing

The frozen surface of a lake on a crisp winter morning is a quintessential Canadian scene, beckoning anglers to a world of quiet solitude and the promise of a catch beneath the ice. But beneath this serene veneer lies a dynamic environment where safety is paramount. For the ice fishing enthusiast, understanding the nuances of ice thickness and, just as importantly, ice quality, is a non-negotiable skill. This guide will provide an in-depth look at how to safely assess ice conditions, ensuring your time on the hard water is both enjoyable and safe.

The Golden Rule: Ice Thickness Guidelines

Before stepping onto any frozen body of water, it’s crucial to know the recommended minimum ice thickness for various activities. These guidelines, supported by government agencies and safety organizations across Canada, are based on clear, new ice.

  • Under 4 inches (10 cm): STAY OFF. This ice is considered unsafe for any activity.
  • 4 inches (10 cm): Suitable for ice fishing on foot.
  • 5 – 7 inches (12 – 18 cm): Can support a snowmobile or an ATV.
  • 8 – 12 inches (20 – 30 cm): Can support a small car or a light-duty truck.
  • 12 – 15 inches (30 – 38 cm): Can support a medium-duty truck (¾-ton).

It is imperative to understand that these are guidelines for ideal conditions. The actual strength of the ice can be significantly affected by a multitude of factors.

Beyond Thickness: Deconstructing Ice Quality

The number on your ice chisel or auger measurement is only half the story. The quality and composition of the ice are equally critical factors in determining its strength. Ice is rarely uniform, and understanding its different forms is key to a proper safety assessment.

Clear (Blue) Ice: This is the strongest and most desirable type of ice. It forms when water freezes directly without any trapped air bubbles or impurities. Its translucent, often blueish appearance is a good indicator of its high density and strength. The thickness guidelines are based on this type of ice.

White (Snow) Ice: Often called “snow ice” or “milky ice,” this type is opaque and white. It forms when snow on the surface of existing ice becomes saturated with water and then refreezes. This process traps air bubbles within the ice, significantly reducing its strength. As a general rule, white ice is considered to be only about half as strong as clear ice. Therefore, you would need at least double the thickness of white ice to support the same weight as clear ice.

Grey Ice: Any ice that appears grey or dark is a sign of deterioration. This coloration often indicates the presence of water within the ice, either from melting or from the ice being saturated by the water below. Grey ice is weak, unsafe, and should be avoided at all costs.

Factors Influencing Ice Integrity

No two bodies of water freeze the same way, and conditions can change rapidly. Always consider the following factors:

  1. Water Body Type: Lakes and ponds tend to freeze more uniformly than rivers or streams. The constant current in moving water bodies creates friction and can result in dangerously thin and unpredictable ice, especially in areas with faster flow.
  2. Water Depth and Size: Shallow water bodies tend to freeze faster than deep ones. Similarly, smaller lakes will freeze over before larger ones.
  3. Snow Cover: A layer of snow can act as an insulator, slowing down the freezing process. A heavy snowfall on thin ice can also push the ice down, causing water to seep up and create a layer of weak, white ice.
  4. Temperature Fluctuations: A consistent period of cold temperatures (well below 0°C) is required to form good, thick ice. A mid-winter thaw, even for a short period, can significantly weaken the ice sheet. This freeze-thaw cycle can create internal fractures and reduce the ice’s overall integrity.
  5. Objects in the Water: Rocks, logs, and bridge pilings absorb heat from the sun and can create thin spots around them. Similarly, areas with decaying vegetation on the lakebed can release gas, which can also thin the ice from below.
  6. Inlets and Outlets: Areas where streams or rivers flow into or out of a lake will have weaker ice due to the moving water. These areas should be given a wide berth.

How to Check Ice Thickness: A Practical Guide

Never assume the ice is safe based on a single observation. Diligent and continuous checking is the hallmark of a safe ice angler.

  1. Start at the Shore: Before you even step on the ice, use an ice chisel (spud bar) to strike the ice near the edge. A solid, ringing sound indicates good quality ice, while a hollow or “thud” sound suggests weaker ice.
  2. Drill Test Holes: The most reliable method is to use an ice auger or drill to create a hole. This allows you to visually inspect the ice layers and get an accurate measurement.
  3. Measure as You Go: Your first test hole should be in shallow water near the shore. As you venture further out, continue to drill holes every 50 to 100 feet to ensure you are aware of any changes in thickness. Ice thickness is rarely uniform across an entire lake.
  4. Use Your Tools: An ice chisel is an invaluable tool for constantly probing the ice in front of you as you walk. A few solid strikes with the chisel can give you a good idea of the ice’s integrity. If the chisel goes through easily, turn back.

Essential Ice Safety Gear

Smart ice anglers never venture out without essential safety equipment. This gear can be life-saving in an emergency.

  • Ice Picks: A set of ice picks worn around your neck is arguably the most crucial piece of safety gear. They provide the grip needed to pull yourself back onto the ice if you fall through.
  • Flotation Suit or PFD: A modern floater suit not only keeps you warm but provides buoyancy if you end up in the water. At a minimum, wear a personal flotation device (PFD) over your winter clothing.
  • Ice Chisel (Spud Bar): As mentioned, this is essential for testing ice as you walk.
  • Rope: A bag containing a rope is invaluable for rescuing someone who has fallen through the ice.
  • Whistle: A whistle can be used to signal for help and is much more effective than shouting.
  • Cell Phone: Keep your phone in a waterproof pouch and fully charged.

In Case of Emergency: What to Do

If You Fall Through:

  1. Stay Calm: Panic will expend precious energy. The initial cold shock will be intense, but it will pass.
  2. Don’t Remove Your Gear: Your winter clothing can trap air and provide some initial buoyancy.
  3. Turn Towards the Direction You Came From: The ice you just walked on is the most likely to be strong enough to support you.
  4. Use Your Ice Picks: Place your hands and arms on the unbroken ice surface and use your ice picks to dig into the ice and pull yourself up.
  5. Kick Your Feet: Use a strong flutter kick to help propel you horizontally onto the ice.
  6. Roll Away: Once you are out of the water, do not stand up. Roll away from the hole to distribute your weight until you are on solid ice.

If You Witness Someone Fall Through:

  1. Do Not Rush In: Your first instinct may be to run to the hole, but this will likely result in you becoming a second victim.
  2. Call for Help: Immediately call 911 or your local emergency number.
  3. Reach, Throw, Don’t Go: Use a rope, a long branch, or even a set of jumper cables to reach the person from a safe distance.

Ice fishing is a cherished winter pastime, but it demands respect for the power and unpredictability of nature. By understanding the science behind ice formation, diligently testing for thickness and quality, and carrying the proper safety gear, you can ensure that your adventures on the hard water are memorable for all the right reasons. Never take ice for granted; your life may depend on it.

Posted on

The Enduring Allure of the Hardy Bougle: A Fly Fisher’s Heirloom

In the world of fly fishing, where tradition and innovation often cast lines in opposite directions, the Hardy Bougle fly reel stands as a testament to timeless design and enduring performance. For over a century, this iconic reel has graced the rods of discerning anglers, its distinctive click-and-pawl sound a cherished soundtrack to countless battles with wild fish in pristine waters. More than just a tool, the Bougle is an heirloom, a piece of angling history that continues to captivate with its blend of classic aesthetics and unwavering reliability.

A French Connection and a Lighter Perfect: The Genesis of the Bougle

The story of the Bougle begins in 1903, born from a collaboration between the legendary English tackle manufacturer Hardy Bros. and a passionate French tournament caster and angler, Louis Bouglé. A man of discerning taste and considerable skill, Bouglé sought a reel that was lighter than the then-dominant Hardy Perfect, yet retained its robust construction and ample line capacity. His vision was for a reel that could balance the increasingly popular lighter-weight split cane rods of the era.

Hardy’s engineers, ever at the forefront of tackle innovation, rose to the challenge. They took the fundamental design of the revered Perfect and ingeniously modified it. By introducing a raised, ported frame and a lighter, ventilated spool, they shed precious ounces without compromising structural integrity. The result was a reel that was both a functional masterpiece and a visual delight. The Bougle was born, a reel that was, in essence, a more refined and athletic version of its esteemed predecessor.

An Evolution in Design and Materials: From Pre-War Classics to Modern Marvels

The Hardy Bougle has not remained static throughout its long history. It has evolved, with various models and reissues marking significant milestones in its development.

The Early Years (1903-1939): The initial Bougle reels were crafted from a combination of brass and alloy, featuring a distinctive “floating” cage design with prominent pillars. The check mechanism, a critical component of any click-and-pawl reel, saw several iterations in the pre-war era, including the coveted 1912 check, known for its wide range of adjustment and distinct, musical click. These early models are now highly sought-after by collectors for their historical significance and unique character.

Post-War Interruption and the Rise of the Reissues: Production of the Bougle ceased with the outbreak of World War II and did not resume in the immediate post-war years. For a period, the Bougle existed only as a cherished memory and a prized possession for those fortunate enough to own one.

However, the legend of the Bougle refused to fade. In the latter half of the 20th century and into the 21st, Hardy reintroduced the Bougle in a series of highly anticipated reissues. These modern iterations, such as the 1939 Heritage and the 110th Anniversary models, have been meticulously crafted to pay homage to their predecessors while benefiting from modern manufacturing techniques.

Today’s Bougles are typically machined from high-grade bar-stock 6061 aluminum, offering a superior strength-to-weight ratio. They often feature anodized finishes for enhanced durability and corrosion resistance. The internal mechanics, while staying true to the classic click-and-pawl system, have been refined for even greater reliability and a smoother, more consistent drag. Key features like the naval brass bushings and spindles on many models are a nod to the quality and longevity that have always defined Hardy reels.

A significant development in the modern era has been the introduction of a wider range of sizes, from the diminutive “Baby Bougle” perfect for light line trout fishing to larger models designed for the rigors of spey casting for salmon and steelhead. Many modern Bougles also offer the convenience of being easily convertible from left- to right-hand wind.

The Bougle on the Water: Performance and Reputation

The enduring popularity of the Hardy Bougle is not merely a matter of nostalgia; it is rooted in its exceptional performance on the water. For the trout angler, the Bougle’s light weight and delicate balance make it an ideal partner for bamboo, fiberglass, and modern graphite rods. The audible click of the drag system is more than just a quaint feature; it is a form of communication between the angler and the fish, providing immediate feedback on the speed and power of a run. This allows for a more intuitive and engaging style of fishing, where the angler’s hand acts as a sensitive, adjustable brake.

For the spey angler, the larger Bougle models offer the line capacity needed for long, elegant casts and the robust construction required to handle powerful anadromous fish. The classic click-and-pawl drag, while not possessing the brute stopping power of a modern disc drag, provides ample resistance to tire even the most determined salmon or steelhead, rewarding the angler who plays a fish with skill and finesse.

The reputation of the Bougle among seasoned anglers is one of unwavering reliability and a certain ineffable charm. It is a reel that inspires confidence, a tool that feels “right” in the hand. The sound of a Bougle in full song is a cherished melody for many, a sound that evokes memories of misty mornings, rising fish, and the simple joy of being connected to the natural world.

The Collector’s Perspective: An Angling Antique of Enduring Value

Beyond its practical application, the Hardy Bougle holds a special place in the hearts of tackle collectors. Early, pre-war models, particularly those with rare check mechanisms or in exceptional original condition, can command significant prices on the secondary market. Identifying these treasures requires a keen eye for detail, including the style of the frame, the type of check, the materials used, and the maker’s marks.

Limited edition reissues have also become highly collectible, often appreciating in value over time. For the collector, owning a Bougle is not just about possessing a piece of fishing tackle; it is about holding a tangible piece of angling history, a connection to the artisans who crafted it and the anglers who have cherished it for generations.

Caring for a Classic: Maintenance and Upkeep

A Hardy Bougle, with proper care, will last a lifetime and beyond. Maintenance is relatively straightforward and is a rewarding ritual for any owner. Regular cleaning, especially after use in saltwater or dusty environments, is essential. A light application of quality reel oil to the moving parts and a thin coat of grease on the gear and pawl will keep the reel operating smoothly.

The click-and-pawl mechanism is designed to be user-serviceable, and spare pawls and springs are often available for modern models. This ease of maintenance is a significant part of the Bougle’s appeal, empowering the owner to keep their reel in perfect working order.

The Enduring Legacy of the Hardy Bougle

In a world of ever-changing technology and fleeting trends, the Hardy Bougle stands as a symbol of enduring quality and timeless design. It is a reel that connects us to the rich history of fly fishing while continuing to perform flawlessly in the modern era. Whether you are a dedicated angler seeking a reel that is both a joy to use and a pleasure to own, or a collector with an appreciation for the finest in angling craftsmanship, the Hardy Bougle is a reel that will not disappoint. It is more than a piece of equipment; it is a companion on the water, a keeper of memories, and a true icon of the sport.

The Enduring Allure of the Hardy Bougle: A Timeless Classic on the Fly

For over a century, the Hardy Bougle has held a revered position in the hearts and hands of fly anglers worldwide. More than just a tool for retrieving line, the Bougle is a masterpiece of engineering, a symbol of angling heritage, and a testament to the enduring appeal of classic design. From its inception at the turn of the 20th century to its modern iterations, the Bougle has captivated anglers with its distinctive sound, flawless performance, and timeless aesthetic. This detailed exploration delves into the rich history, meticulous craftsmanship, and celebrated reputation of one of fly fishing’s most iconic reels.

A French Connection and a Lighter Perfect: The Genesis of the Bougle

The story of the Hardy Bougle begins in 1903, born from a collaboration between the esteemed English tackle manufacturer Hardy Bros. and a discerning French angler named Louis Bouglé. A skilled tournament caster and an innovator in his own right, Monsieur Bouglé sought a reel that possessed the virtues of the legendary Hardy Perfect – its reliability and robust check system – but in a lighter and more refined form.

His request was for a reel with ample line capacity that would balance the delicate split cane rods of the era. The craftsmen at Hardy’s Alnwick workshop rose to the challenge, ingeniously modifying the solid backplate of the Perfect by introducing a raised, perforated frame. This innovative design, featuring distinctive circular porting, significantly reduced the reel’s weight without compromising its structural integrity. The result was a reel that was both a functional triumph and an aesthetic departure from its predecessors. The “Bougle” was born, and with it, a new chapter in fly reel history was written.

The Evolution of Design and Construction: A Century of Refinement

The Hardy Bougle has evolved over its long and storied history, with various models and reissues reflecting advancements in materials and manufacturing techniques while staying true to the spirit of the original.

Early Models (1903 – 1939): The initial Bougles were crafted from a combination of brass and alloy, with a leaded finish that developed a unique patina over time. The check mechanism, a key feature inherited from the Perfect, underwent several modifications, with the “Mark II” check becoming a hallmark of many Bougle reels. These early models are highly sought after by collectors for their historical significance and the tangible connection they offer to the golden age of fly fishing.

The Hiatus and the Rebirth: Production of the Bougle ceased with the outbreak of World War II in 1939. For several decades, the reel existed only in the hands of fortunate anglers and in the pages of angling history. However, the legend of the Bougle refused to fade, and in the late 20th and early 21st centuries, Hardy reintroduced this classic to a new generation of fly fishers.

Modern Iterations (Late 20th Century – Present): Today’s Hardy Bougle reels are a perfect marriage of heritage and modern technology. While they retain the iconic design cues of their predecessors, they are machined from high-grade bar stock 6061 aluminum, offering a superior strength-to-weight ratio and exceptional durability. The anodized finishes, in classic gunmetal or polished silver, provide excellent corrosion resistance.

The heart of the modern Bougle remains its famed click-check drag system. This simple yet incredibly effective mechanism provides a smooth and audible resistance that protects light tippets while allowing an angler to “palm” the spool for additional control when fighting a spirited fish. The distinctive “Bougle sound” – a resonant, purring click as a fish takes line – is a symphony to the ears of any fly fishing enthusiast.

Key features of modern Bougle reels often include:

  • A Rolling Pillar: This feature reduces line wear and ensures a smooth retrieve.
  • Naval Brass Bushings and Spindles: These high-quality components contribute to the reel’s smooth and reliable operation.
  • Interchangeable Spools: Many modern Bougle models feature spools that can be easily swapped, allowing anglers to carry different line weights or types for various fishing conditions.
  • Reversible Wind: Modern Bougles are easily converted from left-hand to right-hand retrieve to suit any angler’s preference.

A Family of Fine Reels: Notable Bougle Models

Throughout its history, the Hardy Bougle has been offered in a variety of sizes and configurations to suit different angling pursuits.

  • The “Baby” Bougle: A smaller, lighter version perfect for delicate presentations and small stream trout fishing.
  • The 3-inch Bougle: A classic trout reel, ideal for 3 to 5-weight fly rods.
  • The 3 ¼-inch Bougle: A versatile size suitable for a wide range of trout fishing applications.
  • The 3 ½-inch and 4-inch Bougles: Larger models with increased backing capacity, making them excellent choices for light spey and switch rods when targeting larger trout, sea trout, or even grilse.
  • The 1939 Heritage Reissue: A faithful reproduction of the last Bougle model produced before the war, featuring the iconic design and finish of the original.
  • The 110th Anniversary Edition: A special commemorative model released in 2013 to celebrate the Bougle’s centenary, showcasing the pinnacle of modern craftsmanship.

On the Water: Performance and Reputation

The Hardy Bougle’s enduring popularity is a direct result of its exceptional performance on the water. Anglers who fish with a Bougle often speak of a connection to their quarry that is lost with more modern, high-tech drag systems. The click-and-pawl mechanism provides just enough resistance to prevent overruns on the take, but it truly shines during the fight. The audible feedback of the reel allows an angler to gauge the speed and power of a fish’s run, while the ability to palm the spool offers a tactile and intuitive level of control.

For trout anglers, the Bougle is a dream. Its light weight balances perfectly with modern and classic fly rods, and its simple, reliable design is all that is needed to handle even the most acrobatic of trout. As one angler on a popular online forum noted, “The Bougle is the quintessential trout reel. It’s elegant, simple, and just plain works.”

In recent years, the larger Bougle models have gained a dedicated following among spey and switch rod anglers. The reel’s classic aesthetic is a perfect match for the traditional nature of two-handed casting, and its ample backing capacity provides peace of mind when a powerful steelhead or salmon takes to the current. Another online commentator praised its suitability for this style of fishing: “The larger Bougles are fantastic for light spey work. They have the capacity for modern spey lines, and the classic click-and-pawl is a joy to use when a chrome rocket takes off.”

The Collector’s Corner: An Enduring Investment

The Hardy Bougle is not only a fine fishing instrument but also a highly sought-after collector’s item. Original pre-war models, particularly those in excellent condition with their original packaging, can command significant prices at auction. When identifying a vintage Bougle, collectors should look for specific features such as the type of check mechanism, the material of the foot, and any maker’s marks or engravings. The condition of the reel is paramount, with any cracks, significant scratches, or non-original parts diminishing its value.

Modern limited-edition and commemorative Bougles have also become collectible in their own right, often appreciating in value over time. For many, owning a Bougle is an investment in a piece of angling history, a tangible link to the traditions and craftsmanship of a bygone era.

Care and Maintenance: Preserving a Legacy

With proper care, a Hardy Bougle can provide a lifetime of faithful service and can be passed down through generations. After each use, especially in saltwater or brackish environments, the reel should be rinsed thoroughly with freshwater and allowed to dry completely. A light application of a quality reel oil to the moving parts, as per the manufacturer’s recommendations, will ensure its continued smooth operation. Storing the reel in its protective case will prevent scratches and other damage.

The Enduring Legacy of the Hardy Bougle

In a world of ever-advancing fly fishing technology, the Hardy Bougle stands as a proud reminder that classic design and quality craftsmanship never go out of style. It is a reel that transcends mere function, offering a rich and rewarding angling experience that connects the user to the very soul of the sport. Whether you are a seasoned angler with a deep appreciation for tradition or a newcomer looking to invest in a piece of living history, the Hardy Bougle is a reel that will not only meet your expectations but exceed them in every way, a timeless classic that will continue to sing its beautiful song on rivers and streams for generations to come.

Posted on

Powering Your Trolling Motor: A Comprehensive Guide to 12V, 24V, and 36V Battery Hookups

For any serious angler, a trolling motor is an indispensable tool, offering quiet propulsion and precise boat control. But the heart of any trolling motor system lies in its battery bank. Understanding how to properly hook up your batteries for 12-volt, 24-volt, and 36-volt systems is crucial for optimal performance, longevity, and safety. This detailed guide from Reel Schematic will walk you through each configuration, ensuring you’re powered up and ready to hit the water.

The Fundamentals: Volts, Amps, and Series vs. Parallel

Before we dive into specific hookups, let’s clarify some basic electrical concepts:

  • Voltage (V): Think of voltage as the “pressure” that pushes electrical current. Your trolling motor is designed to operate at a specific voltage (12V, 24V, or 36V). Mismatched voltage can damage your motor.
  • Amperage (A): Amperage is the “volume” of electrical current flowing. Trolling motors draw a certain amount of amperage, and your batteries need to be able to supply it. Battery capacity is measured in Amp-hours (Ah).
  • Series Connection: Connecting batteries in series increases the total voltage while keeping the amperage capacity the same. This is achieved by connecting the positive terminal of one battery to the negative terminal of the next.
  • Parallel Connection: Connecting batteries in parallel increases the total amperage capacity while keeping the voltage the same. This is achieved by connecting positive terminals to positive terminals and negative terminals to negative terminals.

Safety First! Always prioritize safety when working with batteries.

  • Disconnect Power: Before making any connections, ensure all power is off and the trolling motor is disconnected.
  • Eye Protection: Always wear safety glasses to protect your eyes from accidental sparks or battery acid.
  • Gloves: Wear appropriate gloves to protect your hands.
  • Insulated Tools: Use tools with insulated handles to prevent accidental short circuits.
  • Ventilation: Work in a well-ventilated area, especially when dealing with lead-acid batteries, which can produce hydrogen gas.
  • Fuses and Circuit Breakers: Always install an appropriately sized fuse or circuit breaker as close to the battery bank as possible to protect your wiring and trolling motor from overcurrents. Refer to your trolling motor’s manual for the recommended fuse size.

Battery Types for Trolling Motors

While various battery chemistries exist, the most common for trolling motors are:

  • Lead-Acid (Flooded): These are the most traditional and often the most budget-friendly. They require maintenance (checking water levels) and should be kept upright.
  • AGM (Absorbed Glass Mat): A type of sealed lead-acid battery that is maintenance-free, spill-proof, and more resistant to vibration. They charge faster and have a longer lifespan than flooded batteries.
  • Lithium (LiFePO4 – Lithium Iron Phosphate): The most advanced option, offering significant weight savings, a much longer lifespan, consistent power output, and faster charging. While more expensive upfront, their benefits often outweigh the cost over time.

For this guide, the connection principles remain the same regardless of battery type, but always follow the manufacturer’s specific charging and maintenance guidelines for your chosen batteries.

1. 12-Volt Trolling Motor Systems

A 12-volt system is the simplest and most common for smaller trolling motors.

Required Components:

  • One 12-volt deep cycle battery (or two 6-volt batteries wired in series to create a 12-volt battery).
  • Battery cables (appropriately gauged for your motor’s amperage draw and cable length).
  • Battery terminal connectors.
  • Inline fuse holder or circuit breaker.

Hookup Procedure (Single 12V Battery):

  1. Position the Battery: Securely place your 12-volt deep cycle battery in a well-ventilated battery box or tray.
  2. Connect Positive (Red): Connect one end of your positive battery cable (typically red) to the positive (+) terminal of the 12-volt battery.
  3. Install Fuse/Breaker: Connect the other end of the positive cable to one side of your inline fuse holder or circuit breaker. If using a circuit breaker, connect the “load” side to your trolling motor.
  4. Connect to Trolling Motor: Connect a second positive cable from the other side of the fuse holder/breaker to the positive (+) terminal of your trolling motor.
  5. Connect Negative (Black): Connect one end of your negative battery cable (typically black) to the negative (-) terminal of the 12-volt battery.
  6. Connect to Trolling Motor: Connect the other end of the negative cable directly to the negative (-) terminal of your trolling motor.
  7. Double-Check Connections: Ensure all connections are tight and secure.

Alternative Hookup (Two 6V Batteries for 12V):

Some users opt for two 6-volt golf cart batteries, which are known for their robust deep cycle capabilities. To achieve 12 volts, you’ll wire them in series.

  1. Position Batteries: Place both 6-volt batteries securely.
  2. Series Connection: Connect a short jumper cable from the positive (+) terminal of the first 6-volt battery to the negative (-) terminal of the second 6-volt battery.
  3. Connect Positive (Red) to Trolling Motor: Connect your main positive battery cable from the unused positive (+) terminal of the second 6-volt battery (the one with the jumper connected to its negative terminal) to your fuse/breaker, and then to the trolling motor’s positive terminal.
  4. Connect Negative (Black) to Trolling Motor: Connect your main negative battery cable from the unused negative (-) terminal of the first 6-volt battery (the one with the jumper connected to its positive terminal) directly to the trolling motor’s negative terminal.
  5. Double-Check Connections: Verify all connections are tight and correct.

2. 24-Volt Trolling Motor Systems

A 24-volt system is common for medium to large trolling motors, offering more power and efficiency than a 12-volt system. This setup requires two 12-volt batteries wired in series.

Required Components:

  • Two 12-volt deep cycle batteries.
  • Battery cables (appropriately gauged).
  • Battery terminal connectors.
  • One short jumper cable (same gauge as main cables).
  • Inline fuse holder or circuit breaker.

Hookup Procedure (Two 12V Batteries in Series):

  1. Position Batteries: Securely place your two 12-volt deep cycle batteries side-by-side.
  2. Series Jumper Connection: Connect one end of your short jumper cable from the positive (+) terminal of the first 12-volt battery to the negative (-) terminal of the second 12-volt battery. This creates the 24-volt series connection.
  3. Connect Main Positive (Red): Connect your main positive battery cable from the remaining open positive (+) terminal of the second 12-volt battery (the one with the jumper connected to its negative terminal) to your fuse holder/circuit breaker.
  4. Connect to Trolling Motor: Connect a second positive cable from the other side of the fuse holder/breaker to the positive (+) terminal of your 24-volt trolling motor.
  5. Connect Main Negative (Black): Connect your main negative battery cable from the remaining open negative (-) terminal of the first 12-volt battery (the one with the jumper connected to its positive terminal) directly to the negative (-) terminal of your 24-volt trolling motor.
  6. Double-Check Connections: Ensure all connections are tight and secure.

Important Note on Charging 24V Systems: When charging a 24-volt series system, you’ll need a 24-volt compatible battery charger, or you can use two separate 12-volt chargers (one for each battery) or a “12/24V” charger that can be switched to the 24V setting. Never attempt to charge a 24V series system with a single 12V charger connected to only one battery, as this can lead to unbalanced charging and damage.

3. 36-Volt Trolling Motor Systems

A 36-volt system provides maximum power and run time, typically found on high-thrust trolling motors for larger boats. This setup requires three 12-volt batteries wired in series.

Required Components:

  • Three 12-volt deep cycle batteries.
  • Battery cables (appropriately gauged).
  • Battery terminal connectors.
  • Two short jumper cables (same gauge as main cables).
  • Inline fuse holder or circuit breaker.

Hookup Procedure (Three 12V Batteries in Series):

  1. Position Batteries: Securely place your three 12-volt deep cycle batteries.
  2. First Series Jumper: Connect one short jumper cable from the positive (+) terminal of the first 12-volt battery to the negative (-) terminal of the second 12-volt battery.
  3. Second Series Jumper: Connect a second short jumper cable from the positive (+) terminal of the second 12-volt battery to the negative (-) terminal of the third 12-volt battery. These two jumpers complete the 36-volt series connection.
  4. Connect Main Positive (Red): Connect your main positive battery cable from the remaining open positive (+) terminal of the third 12-volt battery (the one with a jumper connected to its negative terminal) to your fuse holder/circuit breaker.
  5. Connect to Trolling Motor: Connect a second positive cable from the other side of the fuse holder/breaker to the positive (+) terminal of your 36-volt trolling motor.
  6. Connect Main Negative (Black): Connect your main negative battery cable from the remaining open negative (-) terminal of the first 12-volt battery (the one with a jumper connected to its positive terminal) directly to the negative (-) terminal of your 36-volt trolling motor.
  7. Double-Check Connections: Ensure all connections are tight and secure.

Important Note on Charging 36V Systems: Similar to 24V systems, charging a 36-volt series system requires a 36-volt compatible battery charger. Alternatively, you can use three separate 12-volt chargers (one for each battery) or a “12/24/36V” charger that can be switched to the 36V setting. Proper charging is critical for battery health and longevity.

Cable Gauging: Don’t Skimp on Wire!

Using the correct wire gauge is paramount for efficient power transfer and to prevent overheating. Undersized wires can lead to voltage drop, reducing your trolling motor’s performance and potentially damaging it or even causing a fire.

  • Consult Your Trolling Motor Manual: Your motor’s manual will provide the recommended wire gauge based on its amperage draw and the length of the cable run.
  • General Guidelines (Always verify with manual):
    • 12-24V Systems (up to 50 amps): Often require 8 AWG for shorter runs, 6 AWG for longer runs.
    • 24-36V Systems (50-100+ amps): Typically require 6 AWG for shorter runs, 4 AWG or even 2 AWG for longer runs.
  • Longer Runs = Thicker Wire: The longer the cable run, the more resistance it has, and thus a thicker gauge wire is needed to minimize voltage drop.

Maintenance Tips for Your Trolling Motor Batteries

  • Regular Charging: Recharge your batteries as soon as possible after each use, even if they’re not fully depleted. Avoid letting them sit discharged for extended periods.
  • Use a Smart Charger: Invest in a multi-stage smart charger that matches your battery type (lead-acid, AGM, or lithium) and voltage system. These chargers optimize the charging process and prevent overcharging.
  • Check Connections: Periodically inspect all battery connections for corrosion, tightness, and wear. Clean terminals as needed with a wire brush and a baking soda/water solution (for lead-acid).
  • Keep Batteries Clean: Wipe down batteries to remove dirt and grime.
  • Store Properly: If storing your boat for an extended period, fully charge your batteries and disconnect them. Consider a trickle charger or maintenance charger for long-term storage.
  • Monitor Water Levels (Flooded Batteries): For flooded lead-acid batteries, regularly check the electrolyte levels and top off with distilled water as needed (never tap water).

Conclusion

Properly hooking up your trolling motor batteries is a fundamental aspect of maximizing your time on the water. By understanding the principles of series wiring for increased voltage and following these detailed instructions, you can ensure a reliable, efficient, and safe power supply for your 12-volt, 24-volt, or 36-volt trolling motor system. Always prioritize safety, use appropriate components, and adhere to your trolling motor and battery manufacturers’ recommendations. Happy fishing!

Posted on

The Enduring Legacy: Mastering the Water with Your Penn Spinfisher Series Reel

At ReelSchematic.com, we appreciate the intricate engineering and battle-tested reliability that define true fishing workhorses. Few reels embody these qualities as completely as the Penn Spinfisher series. For decades, the Spinfisher has been the gold standard for anglers seeking a robust, dependable spinning reel capable of tackling diverse species in some of the most challenging environments.

This isn’t just a reel; it’s a testament to Penn’s commitment to durability and performance. From its iconic all-metal body to its sealed drag systems, every iteration of the Spinfisher has been designed to stand up to the rigors of saltwater and heavy freshwater fishing. In this comprehensive guide, we’ll dive deep into what makes the Penn Spinfisher series so revered, how to maximize its potential on the water, and essential tips for its longevity.

The Penn Spinfisher: A Heritage of Toughness

Before we cast a line, let’s appreciate the core features that define the Spinfisher series (with variations across different generations like SSV, VI, and VII):

  • Full Metal Body, Sideplate, and Rotor: This is the bedrock of the Spinfisher’s legendary durability. The all-metal construction prevents frame flex under heavy loads, ensuring gears remain perfectly aligned for consistent power and smooth operation.
  • Sealed HT-100™ Carbon Fiber Drag System: Penn’s proprietary HT-100 washers are renowned for their incredible stopping power, smoothness, and heat dissipation. Critically, in the Spinfisher series, this drag system is fully sealed, protecting it from saltwater intrusion, sand, and other contaminants that can compromise performance. This is a game-changer for saltwater anglers.
  • CNC Gear™ Technology: Found in more recent generations (Spinfisher VI and VII), this advanced gearing system uses precision-machined gears for exceptional smoothness, increased durability, and superior power transfer.
  • IPX5 Sealed Body and Spool Design: This sealing standard (in Spinfisher VI and VII) means the reel can withstand sustained jets of water – in practical terms, it can take a serious splash or even be submerged briefly without internal water intrusion. This significantly enhances its saltwater resistance.
  • 5+1 Stainless Steel Bearing System: Provides smooth operation under pressure and contributes to the reel’s overall durability.
  • Line Capacity Rings: These handy rings on the spool indicate when you’ve reached 1/3, 2/3, and full line capacity, aiding in precise line management and avoiding overfilling.
  • Superline Spool: Designed to allow braid to be tied directly to the spool without backing, thanks to a rubber gasket.
  • Heavy-Duty Aluminum Bail Wire: Resists bending and ensures reliable line pickup.
  • Instant Anti-Reverse Bearing: Eliminates back play for solid hooksets.

Preparing Your Spinfisher: The Foundation for Success

Before your first cast, proper preparation is key to unlocking your Spinfisher’s full potential.

  1. Choosing the Right Size: The Spinfisher series comes in a wide range of sizes, typically from 2500 (or 3500 in some generations) up to 10500.
    • Smaller Sizes (2500/3500-4500): Ideal for inshore species like speckled trout, redfish, flounder, snook, stripers, or freshwater species like bass, pike, and catfish.
    • Mid-Sizes (5500-7500): Perfect for larger inshore fish, light surf fishing, medium-duty boat fishing for snapper, smaller grouper, cod, or moderate-sized tuna.
    • Larger Sizes (8500-10500): Built for heavy surf fishing, targeting large pelagics like tuna, mahi-mahi, wahoo, sharks, or heavy bottom fishing for large grouper and amberjack.
    • Rule of Thumb: Match the reel size to your target species and the line strength you plan to use. Don’t overpower light rods with huge reels, or vice versa.
  2. Line Selection and Spooling: The Spinfisher’s “Superline Spool” is made for braid, but it handles monofilament and fluorocarbon equally well.
    • Braided Line: Highly recommended for most Spinfisher applications due to its thin diameter (for more capacity), zero stretch (for sensitivity and solid hooksets), and superior strength-to-diameter ratio. Use an FG knot or a uni-to-uni knot to connect a fluorocarbon or monofilament leader.
    • Monofilament Line: A good choice for situations where stretch is desired (e.g., cushioning violent strikes, fishing with treble hooks), or for certain live bait applications.
    • Fluorocarbon Line: Best used as a leader material due to its invisibility underwater and abrasion resistance.
    • Proper Spooling: When spooling line, ensure it goes on tightly and evenly. Too loose, and it can dig into itself; too tight, and it can cause issues. Penn’s Superline Spool typically means no backing is needed, but a single wrap of electrical tape on the bare arbor can help prevent braid slippage. Fill the spool just below the lip to prevent wind knots.
  3. Rod Pairing: A balanced setup is crucial.
    • Match the rod’s power and action to the reel’s size and line rating. A 5500 Spinfisher on an ultra-light trout rod is a recipe for disaster.
    • Consider the application: A fast-action rod for jigging, a moderate action for live bait, etc.

Fishing with Your Penn Spinfisher: Techniques and Applications

The versatility of the Penn Spinfisher means it can excel in countless fishing scenarios. Here are some common applications and tips:

  1. Surf Fishing: This is where the Spinfisher truly shines. Its sealed body and drag are impervious to sand and salt spray.
    • Rigging: Use traditional surf rigs like fish finder rigs, Pompano rigs, or various bait-and-wait setups.
    • Casting Distance: Larger Spinfishers with large arbors and braided line are designed for maximum casting distance.
    • Fighting Fish: Use the powerful drag system. When fighting a large fish in the surf, apply steady pressure and pump the rod, gaining line on the downstroke. Don’t try to winch the fish in; let the rod and drag do the work.
  2. Inshore and Nearshore Fishing: From targeting redfish in the flats to snappers near the reefs, the Spinfisher is a reliable companion.
    • Jigging: The robust gears and minimal flex make the Spinfisher excellent for vertical jigging or casting and retrieving jigs.
    • Live Baiting: Its smooth drag and powerful retrieve are ideal for presenting live baits effectively and battling strong fish.
    • Pitching and Flipping: Smaller models can be used for pitching jigs or soft plastics into mangroves or structure.
  3. Boat Fishing (Bottom & Trolling): Mid to large Spinfishers are excellent for various boat-based methods.
    • Bottom Fishing: Ideal for snapper, grouper, amberjack. The powerful retrieve helps lift heavy fish from structure, and the strong drag handles their initial runs.
    • Light Trolling: While not a dedicated trolling reel, a larger Spinfisher can handle light trolling for species like Spanish mackerel or smaller kingfish.
  4. Freshwater Applications (Heavy Tackle): Don’t limit the Spinfisher to saltwater.
    • Catfishing: Larger models are fantastic for battling big catfish in rivers and lakes.
    • Musky/Pike: For throwing large baits or lures for these toothy predators, the Spinfisher’s durability is a huge asset.
    • Salmon/Steelhead: The smooth drag is crucial for handling the powerful runs of these anadromous species.
  5. Drag Management: This is paramount with any reel, especially the Spinfisher’s robust HT-100 system.
    • Setting the Drag: Always set your drag before fishing. A good starting point is 25-30% of your main line’s breaking strength. Use a reliable drag scale for precision.
    • During the Fight: Only adjust the drag if absolutely necessary during a fight. Small adjustments are key; sudden increases can break your line, and sudden decreases can lose the fish.
    • Maintenance: Keep the drag dry and free of debris. The sealed system helps significantly, but never apply oil or grease to the HT-100 drag washers themselves.

Maintenance: Ensuring Your Spinfisher Lasts a Lifetime

The Penn Spinfisher is built tough, but neglect will shorten its lifespan. Regular, proper maintenance is crucial.

  1. Post-Trip Rinse:
    • Freshwater Only: After every saltwater outing, thoroughly rinse the entire reel with fresh water. Do NOT spray directly into the drag knob or handle bearings with high pressure. A gentle stream or even submerging it in a bucket of fresh water for a few minutes is ideal.
    • Air Dry: Allow the reel to air dry completely in a shaded, well-ventilated area.
  2. External Cleaning and Lubrication:
    • Wipe Down: Use a soft cloth to wipe down the exterior of the reel, removing any salt residue or grime.
    • Light Oiling: Apply a small drop of high-quality reel oil to moving parts such as the handle knob(s), the bail arm pivot points, and the line roller (if accessible without disassembly). Less is more!
    • Grease: A very thin film of marine-grade grease can be applied to the main shaft where it enters the body, and to the bail wire where it connects to the rotor.
  3. Drag System Care:
    • Back Off the Drag: When storing the reel, always back off the drag knob completely. This prevents compression of the drag washers over long periods, which can reduce their effectiveness and lifespan.
    • Inspection: Periodically (e.g., once a season or after particularly brutal fights), unscrew the drag knob and inspect the HT-100 washers. They should be clean and smooth. If they appear dry or glazed, they may need replacement. Never lubricate these carbon washers.
  4. Internal Servicing (Advanced – Optional):
    • For experienced anglers or those comfortable with reel schematics, a deeper internal cleaning and greasing of the main gear, pinion gear, and other bearings can be done annually or biennially, depending on use. Refer to ReelSchematic.com for your specific Spinfisher model’s schematic. This is critical for proper reassembly.
    • Use only manufacturer-recommended reel grease for gears and appropriate reel oil for bearings.
    • If you’re unsure, it’s best to send your reel to a professional reel service center.
  5. Line Management:
    • Inspect Line: Regularly check your line for nicks, abrasions, or twists. Cut off any damaged sections.
    • Replace Periodically: Even with the best care, line wears out. Replace your main line periodically, especially braid which can become fuzzy or lose strength over time.

Why the Spinfisher Endures: A Final Thought

The Penn Spinfisher series isn’t about flashy gimmicks; it’s about pure, unadulterated performance and reliability. It’s the reel you grab when you know you’re going to put it through hell and expect it to come back for more. Its robust construction, sealed drag, and powerful gearing make it a timeless choice for anglers who demand strength and consistency.

By understanding its features, preparing it correctly, applying it to the right fishing scenarios, and diligently maintaining it, your Penn Spinfisher will not just be a reel; it will be a trusted partner on countless fishing adventures, helping you land the fish of a lifetime, time and time again. Invest in a Spinfisher, and you’re investing in a legacy of toughness.

Posted on

The Unseen Eye: Mastering Transducer Placement for Ultimate Fishing Success

For any serious angler, the transducer is the unsung hero of their electronics setup. It’s the “eyes” of your fish finder, sending and receiving sound waves that paint the underwater picture on your screen. A perfectly positioned transducer can mean the difference between a frustrating day of searching and a triumphant one of consistent catches. Conversely, a poorly placed transducer can render even the most expensive fish finder virtually useless, plagued by interference, lost readings, and a distorted view of the world beneath your boat.

At ReelSchematic.com, we understand that optimizing your fishing electronics is paramount. This comprehensive guide will delve into the critical aspects of transducer positioning, covering everything from fundamental principles to advanced considerations for various boat types and fishing styles. Get ready to transform your understanding of what’s happening below the surface!

The Fundamental Role of the Transducer

Before we dive into placement, let’s briefly revisit what a transducer does. It converts electrical energy into sound waves (pings) and then converts the returning sound waves (echoes) back into electrical energy. These echoes are then processed by your fish finder to display depth, bottom composition, structure, and, crucially, fish. The quality of this “picture” is directly proportional to the quality of the signal the transducer receives.

The Enemies of a Good Signal: What to Avoid

When positioning your transducer, your primary goal is to minimize anything that can interfere with the sound waves. The main culprits are:

  • Turbulence (Aerated Water): This is the number one enemy. Air bubbles in the water scatter sound waves, creating “noise” or “clutter” on your screen, often appearing as streaks, lines, or a complete loss of depth readings at speed. This is why transom mounts are so sensitive to their placement.
  • Obstructions: Any part of your boat’s hull, motors, or other equipment that blocks the transducer’s “cone” (the area it’s “looking” at) will cause blind spots or distorted readings.
  • Electrical Interference: While less common with modern transducers and properly wired systems, electrical noise from motors, pumps, or faulty wiring can manifest as lines or random dots on your screen.
  • Fouling: Marine growth (algae, barnacles) on the transducer face will impede signal transmission and reception.

Common Transducer Mounting Types and Their Placement Considerations

The type of boat you have and your fishing style will largely dictate the best transducer mounting option.

1. Transom Mount Transducers

Pros: Relatively easy to install, no holes drilled below the waterline (for external models), good for smaller boats and those with flat transoms. Cons: Most susceptible to turbulence, can be damaged by impact, often requires careful adjustment.

Optimal Placement for Transom Mounts:

  • Location, Location, Location:
    • Starboard Side Preferred (Generally): For most single-outboard boats, the propeller rotates clockwise (right-hand rotation) in forward gear. This rotation often creates less turbulent water on the starboard (right) side of the transom compared to the port (left) side, especially at higher speeds.
    • Away from Propellers and Intakes: Keep the transducer well clear of the main outboard propeller(s), kicker motor propellers, livewell intakes, bilge pump outlets, and any strakes, ribs, or through-hull fittings that could generate bubbles.
    • As Close to the Centerline as Possible (but not too close): While a truly central placement might be ideal in terms of hull symmetry, it often puts the transducer directly in line with turbulence from the main motor. The goal is to find the smoothest water available on the transom.
    • Behind a Stiff Part of the Hull: Ideally, the transducer should be mounted on a strong, flat part of the transom, away from any flexing areas.
  • Depth and Angle are Critical:
    • Just Below the Hull: The bottom of the transducer’s face should be just below the bottom of the boat’s hull when the boat is stationary and level. A common rule of thumb is 1/8″ to 1/4″ below the hull.
    • Level with the Water: Crucially, the transducer’s face must be perfectly parallel to the waterline (front to back, side to side) when the boat is in the water and at fishing speed. Many transducers have a slight “kick-up” angle to protect them from impact; ensure the active face remains level. Use a straight edge against the hull bottom and the transducer face to confirm.
    • Trial and Error (The “Sweet Spot”): This is where patience pays off. After initial installation, take your boat out and run it at various speeds, watching your fish finder screen.
      • Loss of Bottom/Fish at Speed: If you lose readings at speed, the transducer is likely too high or experiencing too much turbulence. Lower it slightly (1/8″ at a time).
      • Spray/Rooster Tail: If the transducer is too low, it will create excessive spray or a “rooster tail” behind the boat. Raise it slightly.
      • Noise/Clutter: If you see significant noise on the screen, particularly at speed, try adjusting the transducer’s side-to-side angle minutely or relocating it.
  • Mounting Techniques:
    • Mounting Board: Use a marine-grade plastic or starboard mounting board affixed to the transom. This allows for easier adjustment and drilling of multiple holes without drilling directly into your boat’s transom. Seal all screw holes with marine sealant.
    • Secure Fastening: Use stainless steel screws and ample marine sealant (like 3M 5200 or Sikaflex) to prevent water intrusion.

2. Thru-Hull Transducers

Pros: Excellent performance at all speeds, no exposure to impact, protected within the hull, ideal for deep water and high-speed applications. Cons: Requires drilling a significant hole in the hull below the waterline, more complex installation, boat must be out of the water.

Optimal Placement for Thru-Hull Transducers:

  • Location, Location, Location:
    • Forward of Propellers/Motors: Crucially, thru-hull transducers must be mounted forward of any propellers, driveshafts, or keel-mounted equipment that creates turbulence.
    • Away from Lifting Strakes/Ribs: Position in an area of clean, undisturbed water flow. Avoid mounting directly behind strakes, ribs, or other hull irregularities that disrupt water flow.
    • In a Dead Rise Area (for tilted element transducers): Most modern thru-hull transducers for fiberglass boats are “tilted element” types. These are designed to compensate for the boat’s dead rise (the angle of the hull from the keel to the chine). You’ll need to measure your hull’s dead rise and select the appropriate tilted element transducer (e.g., 0°, 12°, 20°). Mount it so the active element is perpendicular to the water surface.
    • Keel or Near Keel (for non-tilted elements): For traditional non-tilted element thru-hulls or bronze transducers, they are often mounted directly on the keel or very close to it in a flat, undisturbed section of the hull.
    • Accessibility: Consider access for maintenance and wiring inside the boat.
  • Inside the Hull Considerations (Puck-style or Shoot-Thru):
    • Some fiberglass boats allow for “shoot-thru” transducers (puck-style transducers epoxied directly to the inside of the hull).
    • Only for Fiberglass: This method only works on solid fiberglass hulls, not wood, aluminum, or cored hulls (unless a specific “wet box” is built).
    • Clean Surface: The inside hull surface must be clean, dry, and free of air bubbles when the transducer is epoxied down. Air voids will block the signal.
    • Test Before Permanent Installation: Before epoxying, place the transducer in a water-filled bag on the hull floor. Check your fish finder readings at various speeds. If readings are good, proceed with permanent epoxy.
    • Sacrifice Some Performance: While convenient, shoot-thru transducers typically experience some signal loss (around 10-20%) compared to transom or thru-hull mounts directly in the water. They are generally not recommended for side imaging or highly detailed down imaging, as the hull material can distort these signals.

3. Trolling Motor Mount Transducers

Pros: Ideal for slow-speed fishing, very clean signal (especially with integrated options), transducer moves with the motor’s head, excellent for seeing directly under the boat. Cons: Can be damaged by impacts, not suitable for high-speed readings (unless paired with a separate transom or thru-hull).

Optimal Placement for Trolling Motor Mounts:

  • Integrated Transducers: Many modern trolling motors (like the Lowrance Ghost or Garmin Force) have transducers built directly into the lower unit. This is the gold standard for clean, interference-free readings at trolling speeds. No real “placement” is needed beyond mounting the motor itself.
  • External Mounting: If adding an external transducer to your trolling motor shaft:
    • Securely Clamped: Use the manufacturer’s provided clamps or a robust aftermarket bracket.
    • Vertical Alignment: Ensure the transducer face is perfectly vertical and horizontal relative to the water surface. Any tilt will distort your sonar cone.
    • Cable Management: Crucially, secure the transducer cable tightly to the trolling motor shaft with zip ties or spiral wrap. Leave enough slack near the motor head for it to pivot without straining the cable. Ensure the cable doesn’t rub against anything when the motor is deployed or stowed.
    • Protection: Position the transducer so it’s less prone to impact with stumps or rocks. Some mounts allow for a slight recess behind the lower unit.

4. In-Hull (Puck-Style) Transducers (covered partially under Thru-Hull)

As mentioned, these are best for solid fiberglass hulls and involve epoxying the transducer directly to the inside of the hull. They are excellent for pure depth and traditional 2D sonar but generally not recommended for advanced imaging (SideScan, DownScan, or Live Sonar) due to signal degradation through the hull material.

5. Portable/Suction Cup Mounts

Pros: No permanent installation, easy to move between boats, good for rentals or temporary use. Cons: Less stable, prone to losing signal at speed, requires careful adjustment.

Optimal Placement for Portable Mounts:

  • Clean, Flat Surface: Attach to a clean, smooth, flat area on the transom, ensuring the suction cups get a good seal.
  • Submerged and Level: Ensure the transducer face is fully submerged and perfectly level with the water.
  • Monitor Signal: Because they are less stable, you’ll need to constantly monitor your fish finder for signal loss and readjust as necessary, especially in choppy water or at varying speeds.

Advanced Transducer Positioning Considerations

Beyond the basics, several factors can refine your transducer placement for specialized fishing techniques:

  • Side Imaging (StructureScan/Mega Side Imaging):
    • Clean Water is Paramount: Side imaging beams are very wide and shallow. They require an absolutely clean, unobstructed view to either side of the boat.
    • Avoid Obstructions: Any part of the hull, strakes, or motors that block the side view will create “shadows” or blind spots on your screen.
    • Dedicated Transducer (Often): For optimal performance, many anglers use a dedicated Side Imaging transducer, often mounted on a separate bracket or integrated into a trolling motor.
    • Transom Spacing: If mounting alongside a 2D/DownScan transducer on the transom, ensure adequate spacing to prevent interference between the two (check manufacturer recommendations, often 6-12 inches apart).
  • Down Imaging (DownScan/Mega Down Imaging):
    • Similar to 2D sonar, but the beam is typically very narrow front-to-back and wider side-to-side for a photographic-like view.
    • Less sensitive to minor turbulence than Side Imaging but still benefits from clean water.
  • Live Sonar (ActiveTarget, LiveScope, Mega Live):
    • Trolling Motor Mounting Dominates: The vast majority of live sonar transducers are mounted on the shaft of a trolling motor or a dedicated pole system. This allows the angler to point the transducer in any direction (forward, down, scout mode) independently of boat movement.
    • Vertical Alignment: Crucial for accurate readings. Ensure the transducer is perfectly vertical in “down” or “forward” modes.
    • Clear View: Avoid any part of the trolling motor lower unit or propeller blocking the beam.
    • Cable Management: Extremely important here. The cable will twist and turn as the trolling motor rotates. Use generous spiral wrap or cable protectors to prevent chafing and damage.
  • Dual Transducer Setups:
    • Many anglers opt for a dual setup: a transom-mounted transducer for high-speed readings and a separate transducer (often on the trolling motor) for slow-speed, detailed imaging, or live sonar. This provides the best of both worlds.
    • Ensure each transducer is wired to the correct sonar port on your fish finder and configured appropriately.

The Trial and Error Process: Don’t Be Afraid to Adjust!

Transducer placement is rarely a “one-and-done” task. It often requires a process of trial and error:

  1. Initial Installation: Follow manufacturer instructions and the general guidelines above for your transducer type.
  2. Water Test: Take your boat to the water.
    • Check Readings at Rest: Ensure you get a stable depth reading.
    • Check Readings at Low Speed: Troll slowly and observe the screen for clarity and consistent readings.
    • Check Readings at Increasing Speeds: Gradually increase your speed, paying close attention to when the signal degrades or is lost.
  3. Identify Problems:
    • “Rooster Tail” or Excessive Spray: Transducer is too low.
    • Loss of Signal at Speed, Noise/Clutter: Transducer is too high or in turbulent water.
    • Consistent Noise/Streaks: Possible electrical interference or slight misalignment.
    • Shadows/Blind Spots (especially Side Imaging): Obstruction in the beam.
  4. Adjust and Re-Test: Make small, incremental adjustments (e.g., 1/8″ at a time for height). Re-test after each adjustment. This process can be tedious but is essential for optimal performance.
  5. Secure Permanently: Once you find the sweet spot, ensure all mounting hardware is securely tightened and sealed.

Beyond Placement: Other Factors Affecting Transducer Performance

  • Cleanliness: Regularly wipe down your transducer face with a soft cloth and mild soap to remove slime, algae, and marine growth. Growth significantly degrades performance.
  • Cable Routing: Route transducer cables away from power cables, engine wiring, and other sources of electrical interference. Keep cable runs as short as possible without creating tension.
  • Correct Settings: Ensure your fish finder’s sensitivity, noise rejection, and frequency settings are optimized for your fishing conditions and transducer type.
  • Damage: Periodically inspect the transducer face and cable for any signs of physical damage.

Conclusion

Your transducer is the portal to the underwater world displayed on your fish finder. Its proper positioning is not just a recommendation; it’s a critical component of maximizing your fishing electronics’ potential. By understanding the principles of clean water flow, avoiding common pitfalls, and committing to the process of trial and error, you can transform your sonar experience. A perfectly tuned transducer will reveal structure, bait, and fish with unparalleled clarity, giving you the edge you need to locate and catch more fish. Invest the time in mastering transducer placement, and you’ll unlock the full power of your fish finder, forever changing how you approach the water.

Posted on

The Silent Sentinel: Mastering the Art of Ice Fishing with a Tip-Up

For many ice anglers, the tip-up is more than just a fishing device; it’s a symbol of winter’s embrace, a silent sentinel standing guard over a hidden world beneath the ice. While modern electronics and active sonar have their place, the humble tip-up offers a unique blend of simplicity, effectiveness, and the exhilarating thrill of a flag flying high.

At ReelSchematic.com, we appreciate the nuances of every fishing technique, and ice fishing with a tip-up is a true art form. This comprehensive guide will delve into every aspect of tip-up fishing, from choosing the right gear to advanced strategies and the sheer joy of watching that flag spring skyward.

The Enduring Appeal of the Tip-Up

In a world increasingly dominated by screens and high-tech gadgets, why does the tip-up remain a cherished tool for countless ice anglers?

  • Simplicity and Accessibility: Tip-ups are incredibly easy to set up and use, making them perfect for beginners and seasoned pros alike. There’s no complex wiring or battery charging required.
  • Versatility: They excel at fishing with live bait, which is often the most effective presentation for many species through the ice.
  • Wider Coverage: With multiple tip-ups spread across an area (within legal limits), you can cover a much larger swath of water than you could with a single rod and reel, increasing your chances of intercepting cruising fish.
  • Stealth: A tip-up presents a virtually undisturbed bait, making it incredibly effective for wary fish.
  • The “Flag Up!” Moment: Few things in ice fishing compare to the adrenaline rush of seeing that flag trip, signaling a bite and the start of a thrilling battle.
  • Cost-Effective: Tip-ups are generally much more affordable than a full ice fishing rod and reel setup, especially if you plan to fish with multiple lines.

Anatomy of a Tip-Up: Understanding Your Tool

Before diving into techniques, let’s understand the basic components of a typical tip-up:

  1. Base: This typically sits over the ice hole. It can be made of wood, plastic, or metal, and some newer designs incorporate insulated bases to prevent holes from freezing over.
  2. Spool/Reel: A large-diameter spool, usually made of plastic or aluminum, holds the fishing line. Its large size prevents line memory and allows for smooth payout.
  3. Trip Mechanism: This is the heart of the tip-up. It’s a spring-loaded or balanced arm that holds the flag down. When a fish pulls the line, it trips this mechanism, releasing the flag.
  4. Flag: A brightly colored flag (often red or orange) attached to a spring or flexible rod. When the trip mechanism is activated, the flag springs up, signaling a bite.
  5. Strike Indicator/Tension Adjustment: Many tip-ups have a way to adjust the tension required to trip the flag. This is crucial for matching the sensitivity to the target species. Some use a “tee” bar, others have a small metal arm that slides under the spool.
  6. Line Guide/Brake: A mechanism to guide the line off the spool and often provides some resistance to prevent overruns when the fish runs.

Essential Gear for Tip-Up Success

While the tip-up itself is simple, having the right accompanying gear will significantly enhance your experience and success.

  1. Ice Auger: A sharp, reliable auger is paramount.
    • Manual Augers: Affordable and good for thinner ice (under 10-12 inches).
    • Propane/Gas Augers: Powerful and fast, ideal for thick ice and drilling many holes.
    • Electric Augers: Quiet, environmentally friendly, and increasingly powerful, a great choice for all conditions.
    • Hole Size: For tip-ups, an 8-inch hole is usually sufficient for most panfish and medium-sized game fish. For larger fish like lake trout or northern pike, a 10-inch hole is recommended.
  2. Bait Bucket/Container: Keep your live bait (minnows, shiners, suckers, worms) alive and lively. An aerated bucket is ideal for minnows.
  3. Bait Dipper/Scoop: Essential for retrieving minnows from your bait bucket without getting your hands too cold.
  4. Fishing Line (Tip-Up Specific):
    • Dacron/Braided Tip-Up Line: This is the most common choice for the main line on your tip-up spool. It’s durable, has very low stretch, and doesn’t retain memory in cold water. Common strengths range from 20-pound for panfish to 50-pound or even 80-pound for large pike or lake trout.
    • Fluorocarbon Leader: Crucial for presenting your bait effectively. Fluorocarbon is nearly invisible underwater, extremely abrasion-resistant, and has a lower stretch than monofilament. Use 8-10 pound test for walleye, 15-30 pound for pike, and heavier for lake trout.
    • Swivels: A quality barrel swivel or ball-bearing swivel should be used between your main line and leader to prevent line twist, especially when using minnows.
  5. Hooks:
    • Treble Hooks: Popular for pike and larger predators, as they offer a good hook-up ratio. Sizes 6-10 are common for smaller baits, while 2-4 for larger.
    • Single Hooks (Circle or Octopus): Excellent for walleye, perch, and panfish. Circle hooks are particularly good for preventing gut-hooking. Sizes 4-10 for walleye/perch, 10-14 for panfish.
    • Quick-Strike Rigs: Specifically designed for northern pike. These rigs use multiple small treble hooks strategically placed to hook the fish immediately upon striking, reducing the chance of deep hooking.
  6. Weights/Sinkers:
    • Split Shot: Small, easily adjustable weights for fine-tuning presentations.
    • Slip Sinkers (Bullet/Egg): Allow the line to slide freely, which can be beneficial for fish that pick up the bait and run.
    • Sinker Stops: Used above slip sinkers to set the depth.
  7. Ice Skimmer/Ladle: For removing ice slush from your holes, critical for preventing line freeze-up.
  8. Pliers/Forceps: For hook removal, especially from toothy critters. Long-nose pliers are a must for pike.
  9. Measuring Tape/Scale: To adhere to regulations and document your catches.
  10. Tackle Box: To organize all your hooks, weights, swivels, and other small items.
  11. Safety Gear:
    • Ice Picks: Worn around your neck, essential for self-rescue if you break through the ice.
    • Spud Bar: To test ice thickness as you walk.
    • Life Vest/Flotation Suit: Highly recommended, especially in early or late ice conditions.
    • Whistle/Signaling Device: For emergencies.
  12. Warm Clothing & Shelter: Ice fishing is an outdoor activity in cold weather. Layers, insulated boots, gloves, and a portable ice shelter (shanty or hub style) are crucial for comfort and safety.

Setting Up Your Tip-Up: Step-by-Step

Proper tip-up setup is key to effective fishing.

  1. Drill Your Hole: Choose your spot carefully. Consider structure, depth, and potential fish holding areas. Drill a hole large enough for your target species.
  2. Clear the Slush: Use your ice skimmer to completely clear the hole of ice slush. This is vital for smooth line payout.
  3. Attach Main Line to Spool: Securely tie your braided tip-up line to the spool of your tip-up. Wind enough line to fish your desired depth plus a substantial reserve for runs (e.g., 50-100 yards).
  4. Add Leader and Terminal Tackle:
    • Tie your main line to a barrel swivel.
    • To the other end of the swivel, tie your fluorocarbon leader. The leader length can vary, but 2-4 feet is a good starting point.
    • Attach your hook or quick-strike rig to the end of the leader.
    • Add weights as needed. For a single hook, a split shot or two crimped on the leader just above the hook works well. For a slip sinker, thread it onto the leader above the swivel, then add a sinker stop to set your desired depth.
  5. Baiting Your Hook:
    • Minnows: Hook minnows lightly through the back (just behind the dorsal fin, above the lateral line) or through the lips. The goal is to keep them alive and swimming naturally. For a quick-strike rig, position the hooks to cradle the minnow effectively.
    • Shiners/Suckers: Similar to minnows, but often larger hooks are needed.
    • Dead Bait (for Pike/Eels): Often nose-hooked or threaded onto a quick-strike rig.
  6. Setting the Depth:
    • Lower your bait down the hole until your weight hits bottom.
    • Reel up a foot or two to suspend your bait just off the bottom. This is a common and effective starting point.
    • Alternatively, if you’re fishing suspended fish or near the top of the water column, set your bait accordingly using your fish finder.
  7. Setting the Trip Mechanism:
    • Carefully pull a few inches of line off the spool and loop it into the trip mechanism (the part that holds the flag down).
    • Adjust the tension. For aggressive fish like pike, you can set it fairly light. For sensitive biters like walleye or panfish, a lighter tension will ensure the flag trips. Many tip-ups have multiple tension settings.
    • Ensure the spool spins freely when the flag is tripped.

Strategic Deployment and Fishing Techniques

The true art of tip-up fishing lies in strategic deployment and understanding fish behavior.

  1. Spreading Your Spread:
    • Vary Depths: Don’t put all your tip-ups at the same depth. If allowed, spread them across different depths along a contour or structure.
    • Structure is Key: Focus on known fish-holding structures: weed lines, rock piles, drop-offs, humps, points, and transition zones.
    • Fan Out: If you’re fishing a flat, fan your tip-ups out in a wide arc to cover more ground.
    • Cover the Water Column: If you don’t know the fish depth, set one tip-up near the bottom, one mid-column, and one shallower.
  2. Targeting Specific Species:
    • Northern Pike: Aggressive predators. Often found near weed lines, ambush points, or shallow flats. Use larger minnows (suckers, shiners) or dead smelt/suckers on quick-strike rigs. Set baits shallower (2-5 feet off bottom) or mid-column.
    • Walleye: Often found near transition zones, rock humps, or basin edges. Use medium-sized minnows (shiners, fatheads) on single hooks or smaller trebles. Set baits near bottom (6 inches to 2 feet up). Walleye can be sensitive, so a lighter trip setting is often best.
    • Lake Trout: Deep water dwellers in large, clear lakes. Use larger minnows (ciscoes, smelt) or cut bait. Fish them off the bottom or suspended over deep water. Consider heavier line and a sensitive trip.
    • Perch/Crappie/Bluegill: While often caught jigging, tip-ups can be effective, especially for larger specimens. Use small minnows (rosy reds, fatheads) or wax worms/grubs. Use small hooks and the lightest possible tension. Fish near bottom or suspended over deep water.
  3. The Wait and Watch Game:
    • Patience is Virtue: Tip-up fishing is a waiting game. Stay alert, keep your holes clear of ice, and watch your flags.
    • The Run: When a flag goes up, don’t immediately rush to the hole. Observe the spool. Is the line peeling off steadily (a “run”) or stopping and starting?
      • Steady Run: This usually indicates the fish has taken the bait and is moving away. Give it a few more seconds to fully commit and turn the bait.
      • Stop and Go: The fish might be mouthing the bait, circling, or just not fully committed. Let it take more line.
    • Don’t Over-Think It: Resist the urge to yank the line prematurely. Let the fish make its move.
  4. The Hookset and Fight:
    • Approach Quietly: When a flag flies, approach the hole slowly and quietly to avoid spooking the fish.
    • Grab the Line: Gently grasp the main line. You’ll feel the fish’s weight.
    • Set the Hook: When you feel a steady pull or resistance, give a firm, upward sweep of the line to set the hook. This is crucial for tip-up fishing, as you’re pulling by hand.
    • Hand-Lining: This is the unique aspect of tip-up fishing. Carefully pull the line in hand-over-hand, maintaining tension. Allow the fish to take line if it makes a strong run – let it peel off the spool.
    • Managing the Fight: Don’t allow slack. Keep constant pressure on the fish. As it nears the hole, be prepared for a final surge.
    • Landing the Fish: For smaller fish, you can often lift them directly. For larger fish, especially pike, a gaff or large ice scoop can be helpful (check regulations for gaff use). Be prepared for the fish to shake its head when it sees the hole.
  5. Re-Setting and Repeating:
    • Once you land a fish, quickly rebait your hook and re-set the tip-up. Productive holes often yield multiple fish.

Advanced Tip-Up Tactics and Considerations

  1. Hole Maintenance:
    • Frequent Skimming: In very cold weather, your holes will freeze quickly. Skim them often to prevent the line from freezing in the ice.
    • Insulated Hole Covers: Some tip-ups come with or you can buy insulated covers that fit over the hole to reduce freezing. A bucket placed over the hole also works.
  2. Using a Fish Finder with Tip-Ups:
    • While tip-ups are often fished “blind,” a portable fish finder (flasher or LCD unit) is an invaluable tool for finding fish and determining depth before deploying your tip-up.
    • Use your flasher to scan potential holes for fish or structure before setting up. This dramatically increases efficiency.
  3. Light Conditions:
    • Low Light Bites: Dawn and dusk are often peak feeding times for many species, especially walleye and pike. Have your tip-ups set and ready during these windows.
    • Mid-Day Lulls: During bright mid-day, fish can be less active. Consider moving your tip-ups to deeper water or experimenting with different depths and baits.
  4. Wind and Ice:
    • Wind Concerns: Strong winds can blow tip-ups over or cause the line to blow off the spool. Secure your tip-ups by banking snow around the base or using anchor pegs.
    • Ice Conditions: Always be aware of ice conditions. Consult local reports, use a spud bar, and fish with a buddy. Never venture onto unsafe ice.
  5. Deadsticking with a Tip-Up:
    • Sometimes a completely still bait is more effective than a live, active one. Consider using a dead minnow or cut bait, especially for pike or if fish are finicky.
  6. Understanding Regulations:
    • Number of Lines: Know your local regulations regarding the maximum number of lines (tip-ups included) you can fish simultaneously.
    • Size and Bag Limits: Adhere to all size and bag limits for the species you are targeting.
    • Licensing: Ensure you have the proper fishing license.

The Zen of the Flag Up

There’s a unique camaraderie that develops when ice fishing with tip-ups. The shared anticipation, the excited shouts of “FLAG UP!” echoing across the frozen lake, and the communal celebration of a landed fish are part of the timeless appeal.

The tip-up teaches patience, observation, and a deeper connection to the environment. It strips away the complexities and brings ice fishing back to its fundamental roots: presenting a bait and waiting for the subtle dance of a fish taking hold.

So, as winter settles in and the lakes begin to harden, dust off your tip-ups, gather your bait, and embrace the silent sentinel. The next time that flag springs skyward, you’ll not only be battling a fish but also connecting with a rich tradition of ice angling that continues to captivate generations. Happy ice fishing!

Posted on

Ice Fishing Shelters: Your Mobile Fortress on the Frozen Frontier

For the dedicated ice angler, the pursuit of hardwater quarry is a year-round passion. But unlike fair-weather fishing, the harsh realities of winter demand a specialized piece of equipment: the ice fishing shelter. More than just a simple tent, a modern ice fishing shelter is a mobile fortress, offering refuge from biting winds, stinging snow, and frigid temperatures, transforming a potentially miserable outing into a comfortable and productive adventure.

At ReelSchematic.com, we understand that maximizing your time on the ice means being prepared and comfortable. This comprehensive guide will delve deep into the world of ice fishing shelters, exploring their various types, key features, setup and takedown strategies, essential accessories, and crucial safety considerations. Whether you’re a seasoned ice veteran or contemplating your first foray onto the frozen expanse, this article will equip you with the knowledge to choose, use, and maintain the perfect shelter for your needs.

The Evolution of Comfort: Types of Ice Fishing Shelters

Ice fishing shelters have come a long way from the basic canvas windbreaks of yesteryear. Today, anglers have a diverse range of options, each designed to cater to different fishing styles, group sizes, and comfort preferences.

1. Flip-Over Shelters (Sled-Style Shelters)

Description: These are arguably the most popular and versatile type of ice fishing shelter. A flip-over shelter consists of a durable sled base that doubles as a storage and transport vessel, to which a fabric shelter is attached. The shelter typically “flips over” and extends from the sled to create an enclosed space.

Key Features & Advantages:

  • Rapid Deployment: One of their biggest selling points is speed. Many models can be set up in under a minute, making them ideal for run-and-gun tactics or quickly escaping a sudden squall.
  • Portability: The sled base allows for easy pulling across the ice, whether by hand, ATV, snowmobile, or even a vehicle. It also keeps your gear contained and organized.
  • Integrated Seating: Most flip-overs come with comfortable, often swiveling, seats attached to a bench or individual frames, providing built-in seating for one or two anglers.
  • Wind and Cold Protection: The fabric, often insulated, offers excellent protection from the elements.
  • Built-in Floor (Sled Base): The sled base acts as a de facto floor, keeping your feet out of any slush or standing water.
  • Storage: The sled base provides ample storage for augers, rods, tackle, heaters, and other essentials.
  • Variations: Available in one-person, two-person, and even larger models (often called “side-by-sides” or “three-person flip-overs”).

Ideal For: Anglers who prioritize mobility, solo missions, or fishing with one partner. Excellent for chasing active bites or moving frequently between spots.

2. Hub-Style Shelters (Pop-Up Shelters)

Description: Hub shelters are freestanding, tent-like structures that “pop up” into a rigid frame using a system of internal hubs and collapsible poles. They are typically square or octagonal in shape and offer significant interior space.

Key Features & Advantages:

  • Spacious Interior: Their vertical walls and expansive footprint provide generous headroom and floor space, making them ideal for multiple anglers, gear, and even cots for overnight trips.
  • Lightweight for their Size: While they can be bulky when packed, their weight-to-interior-space ratio is excellent, particularly for larger models.
  • Easy Setup (Once Mastered): While not as instantaneous as a flip-over, hub shelters can be set up quickly once you get the hang of extending the hubs.
  • Versatility: Many can be used as general-purpose camping tents in the off-season.
  • Insulated Options: Many models come with fully insulated fabric, providing superior warmth retention.
  • No Integrated Sled: This can be a pro or con. While it means you need a separate sled for transport, it also means you can walk through the shelter directly onto the ice, or place a ground cover for added warmth.

Ideal For: Group fishing, family outings, anglers who prefer a semi-permanent base camp, or those who want maximum space for multiple holes and gear.

3. Cabin/Shanty Style Shelters (Permanent/Semi-Permanent)

Description: These are the most robust and often largest shelters, ranging from DIY wooden structures to purpose-built, heavy-duty fabric or hard-sided units. They are designed for extended stays and maximum comfort.

Key Features & Advantages:

  • Maximum Comfort: Often feature solid floors, multiple windows, doors, and even amenities like stoves, bunks, and power outlets.
  • Durability: Built to withstand harsh winds and heavy snow loads.
  • Security: Many offer lockable doors for peace of mind during overnight stays.
  • Customization: DIY options allow for complete personalization.

Ideal For: Anglers who fish the same lake regularly and prefer a dedicated, comfortable base camp for extended trips. Less practical for frequent moves.

4. Windbreaks/Open-Air Shelters

Description: These are the simplest form of shelter, typically consisting of a fabric screen supported by poles, designed to block wind from one or two sides. They offer minimal protection.

Key Features & Advantages:

  • Extremely Portable: Lightweight and pack down very small.
  • Very Affordable: The most budget-friendly option.
  • Minimalist Protection: Best for mild conditions or as a quick block from a brisk breeze.

Ideal For: Minimalist anglers, fair-weather ice fishing, or as a secondary windbreak on larger setups.

Key Features to Consider When Choosing an Ice Fishing Shelter

Once you’ve decided on the general type of shelter, several critical features will influence your comfort, convenience, and overall satisfaction.

  1. Insulation:
    • Uninsulated: Lighter and less expensive, but offer minimal thermal protection. You’ll rely heavily on your heater.
    • Insulated (Thermal): Feature multiple layers of fabric (often three-layer with a dark inner liner) to trap heat and block cold. This significantly reduces heater fuel consumption and interior condensation. Highly recommended for all but the mildest conditions.
  2. Size and Capacity:
    • Number of Anglers: Shelters are rated for 1-person, 2-person, 3-person, 4-person, and even larger capacities. Be realistic about how many people and how much gear you’ll be bringing. Err on the side of slightly larger if space is a priority.
    • Footprint: Consider the overall dimensions when set up and when packed down. Will it fit in your vehicle or on your sled?
    • Headroom: Taller shelters allow you to stand up and stretch, which can be a huge comfort factor on long days.
  3. Fabric Material:
    • Denier Rating: Indicates the thickness and density of the fabric (e.g., 600D, 900D). Higher denier means greater durability and tear resistance.
    • Ripstop: A weave pattern that prevents small tears from spreading.
    • Color: Darker colors absorb more sunlight (a minor benefit) but can feel more enclosed. Lighter colors can make the interior brighter during the day.
  4. Frame Material:
    • Aluminum: Lightweight and corrosion-resistant, but can be more expensive.
    • Steel: Heavier but often more robust and durable. Prone to rust if not properly maintained.
    • Fiberglass: Common in hub shelters, lightweight and flexible. Can become brittle in extreme cold over time.
  5. Windows:
    • Number and Size: More windows offer better visibility outside.
    • Removable/Velcro: Allows for easy cleaning, replacement, or customization.
    • Blackout Panels: Crucial for sight-fishing (watching fish bite the lure), as they block external light.
  6. Doors and Zippers:
    • Large, Easy-Access Doors: Important for getting in and out with bulky clothing and gear.
    • Heavy-Duty Zippers: The most common point of failure. Look for large, robust, self-repairing zippers with cold-weather pulls.
    • Multiple Doors: Beneficial for larger shelters, allowing easier access for multiple anglers.
  7. Ventilation:
    • Vents: Essential for safe use of heaters (to prevent carbon monoxide buildup) and for managing condensation. Look for adjustable vents that can be opened or closed.
    • Chimney Port: If you plan to use a wood stove, a designated stove jack is a must.
  8. Anchoring System:
    • Ice Anchors/Screws: Used to secure the shelter to the ice, preventing it from blowing away in windy conditions. Look for durable, easy-to-use anchors.
    • Ropes/Guy Lines: Provide additional stability in high winds.
  9. Transportability:
    • Packed Dimensions: How small does it pack down? Will it fit in your vehicle?
    • Weight: Can you comfortably pull it (if a flip-over) or carry it (if a hub)?
    • Sled Durability (Flip-Overs): Look for robust, rotomolded sleds that can withstand impacts.
  10. Seating (Flip-Overs):
    • Type: Bench, individual bucket seats, swiveling seats.
    • Comfort: Padding, back support.
    • Adjustability: Height, position.

Setting Up Your Ice Fishing Shelter: A Step-by-Step Guide

Proper setup is crucial for both comfort and safety. While specific instructions vary by model, here’s a general overview:

Flip-Over Shelters:

  1. Position the Sled: Drag your sled to the desired fishing spot.
  2. Unstrap: Release any straps securing the collapsed tent to the sled.
  3. Flip Over: Grab the frame and “flip” the tent over the sled, extending it into its open position.
  4. Extend Poles (if applicable): Some models have telescoping poles that need to be extended and locked into place for full height and tension.
  5. Anchor Down: Crucial! Use the provided ice anchors to secure the shelter to the ice at the designated points. In windy conditions, use all available anchor points and even additional guy lines.
  6. Cut Holes: Drill your fishing holes inside the shelter.
  7. Set Up Heater and Gear: Position your heater safely, ensuring proper ventilation. Arrange your rods, electronics, and other gear.

Hub-Style Shelters:

  1. Lay Out Flat: Remove the shelter from its bag and lay it flat on the ice.
  2. Extend Roof Hubs: Start by extending the roof hubs (usually the ones at the top/center).
  3. Extend Wall Hubs: Proceed to extend the hubs on each wall, pushing them out until the fabric is taut.
  4. Open Door(s): Open the door(s) to allow air pressure to equalize during setup.
  5. Anchor Down: This is paramount for hub shelters! Secure each skirt corner and any additional anchor points with ice anchors. In high winds, extend all guy lines and anchor them as well. A hub shelter can become a kite very quickly if not properly anchored.
  6. Cut Holes: Drill your holes inside.
  7. Set Up Heater and Gear: Place your heater, ensuring vents are open.

Pro Tip: Always set up your shelter before drilling all your holes, especially in windy conditions. This prevents holes from freezing over and provides immediate refuge.

Taking Down Your Ice Fishing Shelter: Efficiency is Key

Just as important as setup is an efficient and safe takedown, especially when fingers are cold.

Flip-Over Shelters:

  1. Remove Gear: Pack up all your fishing gear, rods, and electronics.
  2. Turn Off Heater: Allow your heater to cool down completely before packing.
  3. Collapse Poles (if applicable): Retract any telescoping poles.
  4. Release Anchors: Unscrew or remove the ice anchors.
  5. Flip Over: Collapse the tent back over the sled.
  6. Secure: Use straps or bungee cords to secure the collapsed tent to the sled for transport.

Hub-Style Shelters:

  1. Remove Gear and Heater: As above, pack gear and allow heater to cool.
  2. Release Anchors: Remove all ice anchors and guy lines.
  3. Collapse Wall Hubs: Starting with the lower wall hubs, push them inward to collapse the frame.
  4. Collapse Roof Hubs: Finally, collapse the roof hubs.
  5. Fold and Bag: Carefully fold the fabric towards the center. Many hub shelters have specific folding patterns to fit back into their carry bags. Take your time to fold neatly to avoid damage and make the next setup easier.
  6. Secure Bag: Zip up the carry bag and prepare for transport.

Essential Ice Fishing Shelter Accessories

To truly transform your shelter into a comfortable and efficient fishing base, consider these accessories:

  • Heater: A portable propane heater (e.g., Mr. Heater Buddy) is a must for warmth. Always use with proper ventilation.
  • Carbon Monoxide Detector: Non-negotiable safety item when using a heater in an enclosed space.
  • LED Lighting: Battery-powered LED strips, puck lights, or lanterns provide excellent illumination without the heat of propane lights.
  • Shelter Mat/Rug: A piece of carpet or an insulated mat can make a huge difference in keeping your feet warm and dry, especially in hub shelters.
  • Hole Sleeves/Covers: Prevent holes from freezing over, especially in colder temperatures or overnight.
  • Rod Holders: Attach to the shelter frame for convenient storage and hands-free fishing.
  • Gear Organizers: Netting, pockets, or hanging bags help keep tackle, tools, and other small items organized and off the floor.
  • Sled/Pulk: If you have a hub shelter, a dedicated utility sled makes transporting gear much easier.
  • Auger Caddy/Holder: Keeps your auger secure and prevents it from damaging the shelter fabric or other gear.
  • Propane Tank Insulator: Helps keep propane tanks warm in extreme cold, preventing them from “bottling out” (losing pressure).
  • Repair Kit: Duct tape, seam sealer, and fabric patches are invaluable for quick repairs on the ice.

Safety First: Non-Negotiables for Shelter Use

Your ice fishing shelter can be a lifesaver, but only if used safely.

  1. Ventilation, Ventilation, Ventilation: When using any combustion heater (propane, catalytic, wood stove), ensure adequate ventilation to prevent carbon monoxide buildup. Keep vents open, and crack a window or door slightly.
  2. Carbon Monoxide Detector: Always, always, always use a battery-operated carbon monoxide detector inside your shelter when running a heater. Test it before each trip.
  3. Fire Safety: Keep heaters away from flammable materials (fabric, clothing). Never leave a lit heater unattended for extended periods. Have a small fire extinguisher if possible.
  4. Ice Conditions: A shelter offers no protection from thin ice. Always check ice thickness and conditions before venturing out. Never set up a shelter on questionable ice.
  5. Anchoring: Always anchor your shelter down, even on calm days. Sudden wind gusts can turn an unanchored shelter into a dangerous projectile.
  6. Auger Safety: Be mindful of your auger blades, especially when maneuvering it inside the shelter. Use a blade cover.
  7. Lighting: Ensure you have adequate lighting inside, especially for night fishing, to prevent trips and falls.
  8. Buddy System: Whenever possible, ice fish with a partner, especially when using shelters.

The ReelSchematic.com Perspective

At ReelSchematic.com, we advocate for intelligent investment in your angling gear. An ice fishing shelter is not just an expense; it’s an investment in comfort, safety, and ultimately, your ability to spend more time on the ice, catching more fish. Understanding the nuances of different shelter types, their features, and proper usage will empower you to make an informed decision that enhances your hardwater adventures for years to come.

Take the time to research, read reviews, and consider your typical fishing style and local conditions. A well-chosen and properly maintained ice fishing shelter will become your cherished mobile sanctuary, allowing you to brave the elements and embrace the unique challenges and rewards of ice fishing. Happy hardwater fishing!

Posted on

The Ice Angler’s Essential Tool: A Comprehensive Guide to Ice Fishing Augers

For the passionate ice angler, the frozen expanse of a winter lake represents a world of opportunity, hidden beneath a solid, often intimidating, crust. To unlock this world and access the finned inhabitants below, one tool stands as absolutely indispensable: the ice auger. More than just a drill, an ice auger is the key to mobility, efficiency, and ultimately, success on the hard water.

At ReelSchematic.com, we understand that selecting the right gear is paramount. This detailed guide will delve into the intricate world of ice fishing augers, exploring their various types, key features, maintenance essentials, and advanced tips to ensure you’re punching holes with precision and power all season long.

The Fundamental Purpose: Why an Auger is Crucial

An ice auger’s primary function is simple: to create a hole in the ice, allowing anglers to drop lines, deploy transducers, and eventually, land fish. However, its importance extends far beyond this basic utility:

  • Access to Fish: Without a hole, there’s no fishing.
  • Mobility: Being able to quickly and efficiently cut new holes allows anglers to move, follow fish, and adapt to changing conditions.
  • Safety: A properly cut hole provides a clear opening for landing fish and can be crucial for accessing safety equipment in an emergency.
  • Efficiency: A good auger saves time and effort, maximizing your fishing time.

Types of Ice Fishing Augers: A Spectrum of Power and Convenience

Ice fishing augers have evolved significantly, moving from simple hand tools to sophisticated powerhouses. Understanding the distinct types is the first step in choosing the right one for your needs.

1. Hand Augers: The Traditional Workhorse

The simplest and most affordable option, hand augers rely solely on human power. They consist of a handle, a shaft, and a cutting head with blades.

Pros:

  • Affordable: The most budget-friendly option.
  • Lightweight and Portable: Easy to carry, making them ideal for walk-on anglers, minimalists, or those fishing in remote areas.
  • Reliable: No fuel, no batteries, no mechanical failures. They work every time, as long as you provide the muscle.
  • Quiet: Stealthy operation, which can be an advantage in shallow water or for easily spooked fish.
  • Low Maintenance: Little more than blade sharpening/replacement is needed.

Cons:

  • Labor-Intensive: Requires significant physical effort, especially in thick ice (over 12-18 inches).
  • Slower: Drilling multiple holes can be exhausting and time-consuming.
  • Limited Hole Size: Typically available in smaller diameters (4-8 inches) for easier drilling.

Ideal For: New ice anglers, those on a strict budget, early-season ice (under 12 inches), small fish targeting (panfish, trout), and anglers who prefer minimal gear.

2. Gas Augers: The Powerhouse of the Past (Still Relevant)

Gas-powered augers introduced significant power and speed to ice drilling. They utilize a small internal combustion engine to drive the auger bit.

Pros:

  • Fast and Powerful: Cut through thick ice with ease and speed.
  • Effortless Drilling: Minimal physical exertion required for drilling.
  • Reliable in Cold: Generally perform well in extreme cold, as long as fuel is properly stabilized and the engine is maintained.
  • Range of Hole Sizes: Easily handle larger hole diameters (8-10 inches), necessary for larger fish species or two-line setups.

Cons:

  • Noisy: The engine noise can be disruptive and potentially spook fish.
  • Smelly: Exhaust fumes are unpleasant and can linger.
  • Heavy and Bulky: Less portable than hand or electric augers, requiring more effort for transport.
  • Maintenance: Require fuel mixing, spark plug changes, oil changes, and winterization.
  • Fuel Requirements: Need gasoline (often mixed with oil) and careful storage.
  • Starting Issues: Can be finicky to start in extreme cold or after prolonged storage.

Ideal For: Anglers targeting large fish (pike, lake trout), those who need to drill many holes quickly, guiding operations, and areas with consistently thick ice.

3. Electric Augers: The Modern Revolution

Electric augers have rapidly gained popularity and are arguably the most versatile and convenient option available today. They are powered by rechargeable lithium-ion batteries.

Pros:

  • Quiet and Clean: No noise or fumes, offering a pleasant fishing experience and stealth on the ice.
  • Fast and Efficient: Modern electric augers rival gas augers in drilling speed and power, especially with good batteries.
  • Lightweight (Generally): Lighter than gas augers, making them easier to transport.
  • Easy Starting: Push-button start every time, no pull cords or priming.
  • Low Maintenance: No fuel, oil, or spark plugs. Just charge and go.
  • Environmentally Friendly: No emissions.

Cons:

  • Battery Life: Dependent on battery capacity and ice thickness. Can run out of juice if not properly charged or if drilling excessive holes.
  • Battery Performance in Extreme Cold: While improving, battery performance can degrade in very frigid temperatures. Keeping batteries warm is crucial.
  • Initial Cost: Generally more expensive than hand augers, and often comparable to or slightly more than gas augers.
  • Charging Infrastructure: Requires access to power for charging batteries.

Ideal For: Almost all ice anglers! Especially those who value quiet operation, convenience, ease of use, and who drill a moderate to large number of holes. Excellent for anglers targeting a wide range of species.

4. Drill-Powered Augers: The Hybrid Solution

These systems utilize a standard cordless electric drill (often 18V or 20V lithium-ion) paired with a specialized auger bit and an adapter.

Pros:

  • Extremely Lightweight: Often the lightest power auger option, as the drill itself is easily detached and carried.
  • Versatile: Your cordless drill can be used for other tasks.
  • Affordable (If you own a drill): If you already have a powerful cordless drill, the adapter and auger bit are relatively inexpensive.
  • Quiet and Clean: Similar to dedicated electric augers.

Cons:

  • Drill Limitations: Not all drills are powerful enough. You need a high-torque, brushless drill with a large battery (often 6.0 Ah or more). Standard consumer drills may overheat or struggle in thick ice.
  • Battery Life: Dependent on the drill’s battery system, and can be less efficient than dedicated electric augers.
  • Ergonomics: Holding a drill can be less comfortable than a purpose-built auger handle, especially for multiple holes.
  • Chuck Slippage: The auger bit can sometimes slip in the drill chuck if not properly tightened.

Ideal For: Anglers who already own a powerful cordless drill, budget-conscious anglers who want power without the full investment of a dedicated electric auger, or minimalist anglers who want a multi-use tool.

Key Features to Consider When Choosing an Auger

Beyond the basic type, several features contribute to an auger’s performance and user experience.

  1. Hole Diameter:
    • 4-6 inches: Ideal for panfish (perch, crappie, bluegill), trout, and quick hole-hopping. Easier to drill.
    • 7-8 inches: The most versatile size, good for panfish, walleye, pike, and allows for transducer deployment. A good all-around choice.
    • 9-10+ inches: Necessary for larger species (lake trout, muskies), two-line fishing (where legal), or if you frequently run larger Vexilar/Humminbird ice transducer floats. Much harder to drill by hand.
  2. Blade Type:
    • Straight Blades (Chipper Blades): Common on older augers and some cheaper hand augers. They “chip” away at the ice. Durable and less prone to damage from dirt, but slower.
    • Curved/Shaved Blades: Found on most modern augers. They “shave” the ice, resulting in faster and smoother cuts. More susceptible to damage from hitting sand or rocks, requiring careful handling.
    • Serrated Blades: Offer a very aggressive cut and are excellent for dirty or layered ice.
  3. Blade Material and Durability:
    • High-quality stainless steel or hardened steel blades are essential for sharpness and longevity.
    • Look for models with easily replaceable blades.
  4. Weight and Portability:
    • Consider how far you’ll be walking and whether you’ll be carrying other gear.
    • Gas augers are heaviest, followed by dedicated electrics, then drill augers, and finally hand augers.
  5. Extension Capabilities:
    • If you frequently fish on very thick ice (over 2-3 feet), an auger with an extension option is invaluable. This prevents you from having to kneel or struggle to reach the ice.
  6. Handle Design (Hand Augers):
    • Ergonomic handles reduce fatigue. Offset handles often provide better leverage.
  7. Reverse Function (Power Augers):
    • Many electric and some gas augers have a reverse function. This is incredibly useful for clearing slush out of the hole before lifting the auger, preventing ice “splashes” and making hole clearing much easier.
  8. Battery System (Electric Augers):
    • Voltage and Amp-Hours (Ah): Higher voltage (e.g., 40V, 80V) generally means more power. Higher Ah (e.g., 4Ah, 6Ah, 9Ah) means longer run time. A spare battery is always recommended.
    • Battery Protection: Look for battery systems designed to perform in cold weather and with built-in protection against over-discharge or overheating.
    • Charger Speed: A fast charger is a huge convenience.
  9. Build Quality:
    • Look for robust materials and solid construction. Components like the shaft, handle, and motor housing should feel sturdy.

Maintenance: Keeping Your Auger Ready for the Ice

Proper maintenance is critical for extending the life of your auger and ensuring it performs flawlessly when you need it most.

All Augers:

  • Blade Care:
    • Clean Blades: After each use, wipe down blades to remove water and prevent rust.
    • Blade Protectors: ALWAYS use a blade protector when transporting or storing your auger. This prevents damage to the blades and protects you from their sharpness.
    • Sharpening/Replacement: Dull blades are inefficient and dangerous. Replace or professionally sharpen blades as soon as they show signs of wear (difficulty cutting, chipping, dullness). Some anglers carry a spare set of blades.
  • Inspection: Regularly inspect the shaft, handle, and all fasteners for any signs of damage, wear, or looseness.
  • Storage: Store your auger in a clean, dry place, preferably upright to prevent moisture accumulation in the cutting head.

Gas Augers (Additional):

  • Fuel Management:
    • Use fresh, high-quality gasoline mixed with the correct ratio of 2-stroke oil.
    • Add a fuel stabilizer (e.g., Sta-Bil) to prevent fuel degradation and starting issues, especially for long-term storage.
    • Drain the fuel tank or run the carburetor dry before long-term storage (e.g., off-season).
  • Spark Plug: Check and clean/replace the spark plug as per manufacturer recommendations.
  • Air Filter: Clean or replace the air filter regularly.
  • Winterization: Follow the manufacturer’s instructions for off-season storage, which usually involves fuel drainage, cylinder lubrication, and general cleaning.

Electric Augers (Additional):

  • Battery Care:
    • Store Charged: Store batteries with a partial or full charge (check manufacturer recommendations). Avoid storing completely drained batteries.
    • Keep Warm: In extreme cold, keep spare batteries in a warm place (e.g., inside your jacket, insulated cooler) until ready to use.
    • Charge Appropriately: Use only the charger designed for your battery. Avoid overcharging or deep discharging.
  • Connectors: Keep battery terminals and charger contacts clean and dry.

Advanced Tips for Auger Use

  • Angle of Attack (Hand Augers): Experiment with the angle you apply downward pressure. Often, a slight forward lean can help the blades “bite” more effectively.
  • Clear the Hole: For power augers with a reverse function, use it to clear slush before lifting the auger out of the hole. This keeps your hands and clothes cleaner and prevents ice build-up on the auger shaft.
  • Start Clean: Try to start your hole on clean ice, away from slush or refrozen chunks, which can damage blades.
  • Safety First:
    • Always use a blade protector.
    • Keep hands and feet clear of the blades.
    • Wear appropriate footwear for traction on ice.
    • Be aware of your surroundings, especially with power augers, to avoid hitting other anglers or gear.
    • Never use an auger (especially gas) inside an ice shanty without proper ventilation. Carbon monoxide is a serious hazard.
  • Practice Makes Perfect: If you’re new to a type of auger, practice drilling a few holes near shore to get a feel for its operation before venturing far out.
  • Know Your Ice: Always check ice thickness before drilling. No auger can protect you from unsafe ice.

Conclusion

The ice fishing auger is more than just a tool; it’s an investment in your winter angling success. Whether you opt for the simplicity of a hand auger, the raw power of a gas model, or the modern convenience of an electric or drill-powered system, choosing the right auger and maintaining it diligently will ensure you’re always ready to punch through the ice and get down to where the fish are.

At ReelSchematic.com, we encourage you to research, compare, and select the auger that best fits your fishing style, the conditions you face, and your personal preferences. With the right auger in hand, the frozen landscape transforms from an impenetrable barrier into your personal fishing playground. So, get ready to drill, drop a line, and enjoy the thrill of ice fishing!

Posted on

The Unyielding Workhorse: Mastering Your Shimano TLD Series Trolling Reel

At ReelSchematic.com, we understand that serious anglers demand gear that can withstand the rigors of the open ocean. Few reels embody this spirit of durability, reliability, and sheer fish-fighting power as profoundly as the Shimano TLD series trolling reels. For decades, these reels have been the backbone of countless offshore adventures, from targeting powerful tuna and wahoo to battling monstrous marlin.

While often considered a “no-frills” workhorse, the TLD’s simplicity belies its incredible capability. This comprehensive guide will delve into the nuances of using your Shimano TLD reel, covering everything from its core features and optimal rigging to advanced fishing techniques and essential maintenance. Prepare to unlock the full potential of your TLD and conquer the depths with confidence.

The Shimano TLD Legacy: Built to Last

The Shimano TLD series (TLD 15, 20, 25, 30A, 50A, 50II LRSA) has earned its legendary status through a combination of robust construction and intelligent design. Key features that define the TLD’s enduring appeal include:

  • Graphite Frame and Sideplates: While some might see graphite as a compromise compared to aluminum, Shimano’s proprietary XT7 graphite is incredibly strong, lightweight, and corrosion-resistant. This makes the TLD reels remarkably easy to handle for their power, and virtually impervious to saltwater degradation.
  • Lever Drag System: This is the heart of the TLD’s fish-fighting prowess. A smooth, infinitely adjustable lever drag allows for precise control over line tension, enabling anglers to apply maximum pressure without fear of sudden break-offs, while also providing a crucial “strike” setting for hooksets.
  • Clicker System (Bait Clicker): A loud and reliable clicker alerts anglers to strikes, even when the rod is in a holder, preventing “rod-in-the-water” scenarios.
  • Aluminum Spool: Designed for superior strength and corrosion resistance, the aluminum spool ensures smooth line deployment and retrieval, even under heavy loads.
  • Stainless Steel Gears: Durable and precise, the stainless steel gears provide reliable power transmission and longevity, even after years of heavy use.
  • Ergonomic Handle Design: The power handle on TLD reels is designed for comfort and leverage, reducing fatigue during long fights.
  • Open Frame Design: The lack of a level wind system, while requiring manual line guiding, eliminates a common point of failure and allows for stronger, simpler construction. This is a deliberate design choice for heavy-duty trolling.

Preparing Your TLD for Battle: Rigging and Spooling

Proper rigging is paramount for maximizing your TLD’s performance and ensuring successful outings.

Line Selection: Monofilament Reign Supreme

For most TLD applications, monofilament fishing line is the go-to choice. Its stretch provides a crucial shock absorber, cushioning the impact of powerful strikes and head shakes, which is especially important when targeting large, aggressive pelagic species.

  • TLD 15/20/25: Ideal for lighter offshore trolling, live baiting, and bottom fishing. Typically spooled with 20-40 lb monofilament.
  • TLD 30A/50A: The workhorses for medium to heavy offshore trolling. Commonly spooled with 50-80 lb monofilament. The 30A is often preferred for 50 lb class outfits, while the 50A excels with 80 lb.
  • TLD 50II LRSA: The two-speed beast designed for serious big-game encounters. It handles 80-130 lb monofilament with ease, often with a monofilament topshot over braided backing for increased capacity.

Tips for Spooling:

  1. Backing (Optional but Recommended for larger TLDs): For the 30A, 50A, and 50II LRSA, consider adding a layer of braided line (Dacron or Spectra/Dyneema) as backing. This significantly increases your line capacity without adding much bulk. For example, a TLD 50A spooled with 100-200 yards of 100-130 lb braid, then topped with 80 lb monofilament, offers immense capacity.
  2. Proper Tension: Spool your line onto the TLD under significant tension. This prevents the line from digging into itself under heavy drag, which can lead to tangles, birds’ nests, or even line breakage during a fight. A line winder or a damp rag held firmly against the spool will achieve this.
  3. Knots: Use a strong, reliable knot to attach your backing to the monofilament topshot (e.g., Albright Knot, FG Knot). For attaching line to the spool arbor, a simple arbor knot is sufficient, but ensure it’s tight.
  4. Fill Level: Spool your reel to about 1/8 to 1/4 inch from the top edge of the spool. Overfilling can lead to tangles; underfilling reduces capacity and casting distance (though casting isn’t a primary function of TLDs).

Rod Pairing: The Perfect Match

The TLD series thrives when paired with appropriate trolling rods. Look for:

  • Heavy-Duty Construction: Solid fiberglass or composite blanks are ideal, offering durability and a smooth, parabolic bend.
  • Roller Guides (Recommended for larger TLDs): For 50 lb class and up, roller guides significantly reduce friction and line wear, especially during prolonged battles with large fish. For smaller TLDs, heavy-duty conventional guides are sufficient.
  • Bent Butts (Optional for 50II LRSA): For extreme big-game applications, a bent butt rod helps distribute pressure more effectively when fighting fish from a stand-up harness.

Operating Your TLD: From Strike to Landing

The TLD’s simple design makes it intuitive to use, but mastering its nuances will elevate your angling success.

1. Drag Setting: The Cornerstone of Control

The lever drag is the TLD’s most critical feature. Understanding and properly setting your drag is essential.

  • “Strike” Setting: This is your primary fishing drag setting. It should be approximately one-third of the breaking strength of your line. For 80 lb mono, your strike drag would be around 26-27 lbs. Use a reliable spring scale to measure and set this precisely.
  • “Full” Setting: The maximum drag setting on the lever. This is typically used only for the very final stages of a fight or to stop a run. Never start a fight at full drag; it will break your line or pull hooks.
  • Free Spool: The lever moved all the way back to the “Free” position. This allows the spool to spin freely, crucial for deploying baits or lures.
  • Bait (or Light Drag) Setting: A light drag setting often found just after “Free.” This allows line to peel off easily, preventing resistance for shy biters, while still providing enough tension to prevent backlash and keep the lure tracking properly. This is engaged by moving the lever slightly forward from “Free.”

Key Drag Principles:

  • Smoothness: The TLD’s drag washers provide incredibly smooth drag pressure, even under heavy loads. This smoothness is vital for preventing shock to the line and protecting your knots.
  • Check Your Drag: Always check your drag setting before deploying baits and periodically throughout the day. Drag can change due to temperature, moisture, or line stretch.
  • “Thumb on the Spool” (Advanced): In extreme situations, experienced anglers might apply additional thumb pressure to the spool to temporarily increase drag beyond the set limit. Use extreme caution, as this can lead to backlash or line breakage.

2. The Clicker (Bait Alarm): Your First Alert

  • Engagement: The clicker lever is usually located on the sideplate opposite the handle. Engage it when your bait or lure is in the water and the rod is in a holder.
  • Strike Indication: When a fish strikes, the clicker will scream, alerting you to the bite. It also provides enough resistance to help set the hook as the fish takes the bait.
  • Disengagement: Once you grab the rod and are ready to fight the fish, disengage the clicker. Fighting a fish with the clicker engaged adds unnecessary friction and noise.

3. Trolling Techniques: Letting the TLD Do the Work

  • Deployment: With the TLD in free spool, deploy your bait or lure smoothly, ensuring the line peels off without kinks or tangles.
  • Line Guiding (Manual Level Wind): Since the TLD lacks a level wind, you must manually guide the line evenly across the spool as you retrieve. Use your thumb and forefinger to lay the line smoothly side-to-side. This prevents line from burying into itself, which can cause jams or break-offs during a run. Practice this technique; it becomes second nature.
  • Strike Position: When a fish strikes, resist the urge to immediately jam the lever forward. Allow the fish to take the bait, letting the clicker scream. Once the fish is clearly running with the bait, slowly ease the drag lever forward to the “Strike” position. This allows the circle hook (if using) to find its purchase, or for the J-hook to fully engage.
  • Fighting the Fish:
    • “Pump and Reel”: This is the fundamental technique for fighting large fish. With the rod tip pointed towards the fish, pump the rod up to gain line, then quickly drop the rod tip while simultaneously reeling down to retrieve the gained line. Repeat this rhythmically.
    • Maintain Pressure: Always keep constant pressure on the fish. Slack line gives the fish an opportunity to shake the hook or gain an advantage.
    • Use Your Drag: Don’t be afraid to adjust your drag in real-time. If the fish is making a strong run, consider backing off the drag slightly to prevent a break-off. As the fish tires, you can increase the drag to gain line more effectively.
    • High Gear vs. Low Gear (TLD 50II LRSA): The two-speed models are invaluable for big fish.
      • High Gear: Use for retrieving line quickly when the fish is not pulling hard, or when clearing lines.
      • Low Gear: Engage low gear when the fish is making a powerful run or when you need maximum cranking power to gain line against a stubborn fish. Shifting between gears is smooth and immediate.

4. Landing the Catch

  • Teamwork: If possible, have a designated gaff man or leader man.
  • Short Strokes: As the fish approaches the boat, shorten your “pump and reel” strokes.
  • Clear the Area: Ensure decks are clear of obstructions.
  • Safety First: Always prioritize safety. Don’t overextend yourself or put yourself in a precarious position to land a fish.

Advanced Applications for the TLD Series

The TLD’s versatility extends beyond basic trolling.

  • Live Baiting: The TLD’s smooth free spool and audible clicker are excellent for deploying live baits for tuna, kingfish, or sailfish. The lever drag allows for subtle adjustments to match the bait’s behavior.
  • Chunking/Drifting: For targeting tuna on the drift, the TLD allows for easy deployment of baits at various depths and provides the power to fight a fish that takes a bait far from the boat.
  • Deep Dropping: While not a primary deep-drop reel, the TLD 50A or 50II LRSA can handle light to medium deep-dropping with braided line, especially for species like snapper or grouper in moderate depths.
  • Shark Fishing: The larger TLDs (30A, 50A, 50II LRSA) are popular choices for targeting sharks due to their robust drag and line capacity.

Essential Maintenance: Protecting Your Investment

The TLD series is renowned for its low maintenance requirements, but regular care will significantly extend its lifespan and ensure peak performance.

  1. Post-Trip Rinse:
    • Freshwater Rinse: Immediately after every saltwater outing, thoroughly rinse your TLD reel with fresh water. Do not submerge the reel. Focus on washing away salt spray and debris from the exterior.
    • Engage Drag: While rinsing, keep the drag lever in the “Strike” or “Full” position to compress the drag washers. This prevents water from seeping into the drag stack.
    • Rinse Handle and Spool: Pay attention to the handle, knob, and around the spool edges.
    • Shake Dry: Gently shake off excess water.
  2. Air Drying:
    • Loosen Drag: After rinsing and shaking dry, move the drag lever back to the “Free” position. This relieves pressure on the drag washers and allows them to dry completely.
    • Open Bail (if applicable): While TLDs don’t have a bail, ensure any openings are clear for air circulation.
    • Store in Ventilated Area: Allow the reel to air dry completely before storing it. Do not store in an enclosed, damp space.
  3. Lubrication (Every Few Outings or Seasonally):
    • Light Oil: Apply a tiny drop of high-quality reel oil to moving parts such as the handle knob, the spindle under the handle, and any exposed screws or pivot points.
    • Grease: For the main gears and drag washers (if servicing), use a marine-grade reel grease. Note: Only disassemble the reel for greasing if you are confident in your mechanical abilities or consult a professional. Improper reassembly can damage the reel.
    • Drag Washers: Shimano’s Dartanium drag washers are designed to be used dry or with a very thin coat of proprietary drag grease (Shimano Star Drag Grease). Avoid heavy greasing unless specifically instructed, as this can degrade performance.
  4. Propeller Shaft (for lever drag reels):
    • Check for Corrosion: Periodically check the propeller shaft (the part of the reel the spool rides on) for any signs of corrosion or buildup. A very light coat of marine grease can protect it.
  5. Line Inspection:
    • Check for Nicks/Fraying: Before and after each trip, inspect the first several feet of your line for any nicks, abrasions, or fraying. Cut back and re-tie as needed.
    • Replace Line: Depending on usage, consider replacing your monofilament line annually or more frequently if it sees heavy action.
  6. Storage:
    • Protective Cover: Use a neoprene or soft reel cover to protect your TLD from dust, dings, and UV exposure during storage.
    • Cool, Dry Place: Store your reels in a cool, dry, well-ventilated area, away from direct sunlight and extreme temperatures.

The Shimano TLD: A Testament to Reliability

The Shimano TLD series isn’t just a collection of reels; it’s a testament to the idea that robust, straightforward engineering can outperform complex designs when it comes to raw power and reliability. From its virtually indestructible graphite frame to its butter-smooth lever drag, every aspect of the TLD is designed to conquer the toughest fish in the ocean, trip after trip, year after year.

By understanding its core features, mastering its operation, and committing to diligent maintenance, your Shimano TLD will remain an unyielding workhorse in your arsenal, ready to answer the call of the deep and help you create unforgettable memories on the water. Invest in a TLD, and you’re investing in a legacy of offshore excellence.

Posted on

Restoring Control: A Detailed Guide to Replacing the 5-Speed Switch on Your Minn Kota Endura Trolling Motor

For countless anglers, the Minn Kota Endura trolling motor is a reliable workhorse, silently propelling them to prime fishing spots. Its simplicity, durability, and effectiveness have made it a freshwater staple. However, like any piece of frequently used equipment, components can wear out. One common culprit for erratic speed control or complete loss of function is a faulty 5-speed rotary switch.

At ReelSchematic.com, we believe in empowering anglers to tackle common repairs, saving time and money. This comprehensive guide will walk you through the process of replacing the 5-speed switch on your Minn Kota Endura trolling motor, restoring precise control and getting you back on the water with confidence.

Disclaimer: Working with electrical components carries inherent risks. Always disconnect the trolling motor from its power source (battery) before beginning any repair. If you are uncomfortable with any step, or if your motor is still under warranty, it’s best to consult a certified Minn Kota service technician.

Understanding the 5-Speed Switch

The Minn Kota Endura, particularly older models, typically uses a mechanical rotary switch located on the top of the control head. This switch has detents for five forward speeds (1-5) and three reverse speeds (R1-R3), along with an “Off” position. Internally, as you rotate the knob, the switch engages different electrical contacts, which in turn connect to various resistors or windings within the motor to deliver different levels of power, thus controlling the speed. Over time, these internal contacts can corrode, wear out, or become damaged, leading to inconsistent speeds, only certain speeds working, or the motor failing to turn on at all.

Tools and Materials You’ll Need:

Before you begin, gather the following:

  • Replacement 5-Speed Switch: Ensure you purchase the correct replacement switch for your specific Minn Kota Endura model. Minn Kota parts are often model-specific. Check your motor’s serial number and consult Minn Kota’s parts diagrams or a reputable dealer like MikesReelRepair.com.
  • Screwdrivers:
    • Phillips head screwdriver (various sizes may be needed for control head screws).
    • Flathead screwdriver (small, for prying or releasing wire terminals on some switches).
  • Wire Strippers/Cutters: If your new switch requires wiring, these will be essential.
  • Heat Shrink Tubing and Heat Gun (or Electrical Tape): For insulating new wire connections. Heat shrink tubing provides a more durable and water-resistant seal.
  • Crimping Tool and Electrical Connectors (Optional, but recommended): If your new switch requires cutting and re-crimping wires, having proper crimp connectors (e.g., spade connectors, butt connectors) will ensure secure connections.
  • Needle-Nose Pliers: Useful for manipulating small wires or connectors.
  • Marker or Camera: To label wires or take photos of the original wiring configuration.
  • Multimeter (Optional, but Recommended): For testing continuity and confirming the new switch is functioning correctly before reassembly.
  • Shop Towels or Rags: For cleaning.
  • Dielectric Grease (Optional): For protecting electrical connections from corrosion.

Step-by-Step Replacement Procedure:

Step 1: Safety First – Disconnect Power!

This is the most critical step. Before touching anything on the trolling motor, disconnect the battery cables (both positive and negative) from your boat’s battery. Even if the motor is off, there’s still a potential for electrical shock or damage if the battery is connected.

Step 2: Accessing the Control Head

The 5-speed switch is housed within the trolling motor’s control head (the main body where the speed knob is located).

  1. Remove the Speed Knob: The speed knob is usually held in place by a small Phillips head screw on the side or top of the knob itself. Unscrew this screw and carefully pull the knob straight off. If it’s stubborn, a gentle wiggle might help. Be careful not to lose the screw or any washer that might be underneath the knob.
  2. Remove the Control Head Screws: Look for screws on the underside or sides of the control head. These are typically Phillips head screws. There may be a few, strategically placed to secure the two halves of the control head together. Unscrew all of them.
  3. Carefully Separate the Control Head Halves: Once all screws are removed, gently pry apart the two halves of the control head. Take your time and be gentle, as there may be wires running between the halves. You’ll likely find that the top half, which contains the switch, will lift away.

Step 3: Documenting and Disconnecting the Old Switch

This is where organization is key. The 5-speed switch will have several wires connected to it. The number and color of wires can vary slightly by model year, but generally, you’ll see a main power input wire and several output wires corresponding to the different speeds and reverse.

  1. Take Photos: Before disconnecting any wires, take clear, well-lit photos of the existing wiring configuration from multiple angles. This will be an invaluable reference when connecting the new switch.
  2. Label Wires (If Necessary): If you’re concerned about remembering the connections, use a marker to label each wire with its corresponding terminal number or position on the old switch. Sometimes, the new switch may have different terminal numbering, so comparing it to your photos will be crucial.
  3. Disconnect Wires: Carefully disconnect each wire from the old switch.
    • Spade Connectors: Many switches use spade connectors that simply pull off the terminals. Use needle-nose pliers if they are tight, but avoid pulling directly on the wire itself.
    • Screw Terminals: Some switches may have small screws holding the wires in place. Unscrew these to release the wires.
    • Soldered Connections: In rare cases, older switches might have soldered connections. If this is the case, you’ll need a soldering iron to de-solder and re-solder the connections. However, most DIY-friendly Endura switches use simpler connectors.
  4. Remove the Old Switch: Once all wires are disconnected, the old switch itself is usually secured by a nut on the outside of the control head, or it may simply press-fit into a slot. Unscrew the retaining nut (if present) and carefully remove the old switch from the control head.

Step 4: Installing and Wiring the New Switch

Now it’s time to install your replacement switch.

  1. Mount the New Switch: Insert the new 5-speed switch into the opening in the control head. Ensure it’s oriented correctly, aligning any tabs or keyways. If there’s a retaining nut, tighten it to secure the switch.
  2. Connect the Wires: This is the most critical part. Refer to your photos and any labels you made.
    • Match Wire Colors/Positions: Connect each wire to the corresponding terminal on the new switch. Pay close attention to matching the old configuration precisely. Even if the terminal numbers on the new switch are different, the wire colors and their original positions relative to the “off” position are what matter.
    • Secure Connections:
      • Spade Connectors: Ensure spade connectors are pushed firmly onto the terminals. Give them a gentle tug to confirm they are secure.
      • Screw Terminals: If your new switch uses screw terminals, insert the bare wire end and tighten the screw securely. Avoid overtightening.
      • New Wires/Crimping: If your new switch came with pigtails or requires you to cut and re-crimp, ensure you strip about 1/2 inch of insulation from the wire end. Use a crimping tool and appropriate electrical connectors (e.g., butt connectors if joining two wire ends, or new spade connectors if attaching to terminals). Crimp them firmly, ensuring a strong mechanical and electrical connection.
      • Heat Shrink/Tape: After crimping, slide heat shrink tubing over the connection and heat it with a heat gun until it shrinks tightly, providing insulation and weather protection. If using electrical tape, wrap it tightly and securely around the connection.
    • Dielectric Grease (Optional): Before pushing on spade connectors or tightening screw terminals, apply a small dab of dielectric grease to the metal contacts. This helps prevent corrosion and ensures a good electrical connection.

Step 5: Testing the New Switch (Pre-Reassembly)

Before buttoning everything up, it’s highly recommended to perform a quick test.

  1. Reconnect Batteries (Briefly): Carefully reconnect the positive and negative battery cables to your boat’s battery.
  2. Test Functionality: With the propeller clear of obstructions and water, slowly rotate the new speed switch through all its forward and reverse settings.
    • Does the motor turn on and off correctly?
    • Does it engage all five forward speeds and three reverse speeds?
    • Does the speed increase/decrease as expected with each detent?
    • Does it turn off completely in the “Off” position?
  3. Listen and Observe: Listen for any unusual sounds or smells. If anything seems wrong, immediately disconnect the battery and re-check your wiring.
  4. Disconnect Batteries Again: Once you’ve confirmed the switch is working, immediately disconnect the battery cables again before proceeding to reassembly.

Step 6: Reassembling the Control Head

  1. Route Wires Neatly: Ensure all wires are tucked neatly inside the control head and are not pinched or crimped as you bring the two halves together.
  2. Reassemble Control Head Halves: Carefully align the two halves of the control head and gently press them back together.
  3. Reinstall Control Head Screws: Secure the control head halves by reinserting and tightening all the Phillips head screws you removed earlier. Do not overtighten.
  4. Reinstall Speed Knob: Place the speed knob back onto the switch shaft, ensuring it aligns with the “Off” position when the switch is in the off position. Reinsert and tighten the small screw that secures the knob.

Step 7: Final Test and Ready for the Water!

  1. Reconnect Batteries: Once everything is fully reassembled, reconnect the positive and negative battery cables to your boat’s battery.
  2. Final Test: Perform a thorough test of all speeds, forward and reverse, to ensure everything is working perfectly.
  3. Clean Up: Clean up any tools and dispose of the old switch.

Troubleshooting Common Issues:

  • Motor Still Not Working:
    • Double-check all wire connections. A loose connection is a common culprit.
    • Ensure the battery is fully charged.
    • Check the circuit breaker or fuse (if your boat has one) for the trolling motor.
    • Verify you have the correct replacement switch for your model.
  • Only Certain Speeds Working:
    • This usually indicates a faulty connection to the wires for the non-working speeds. Re-inspect those specific connections.
    • Less common, but possible, a manufacturing defect in the new switch itself.
  • Propeller Not Turning (but motor hums):
    • Check for fishing line or debris wrapped around the propeller shaft.
    • Inspect the prop pin for damage or shearing.
    • This is usually a prop-related issue, not a switch issue.
  • Switch Feels Loose or Jumpy:
    • Ensure the retaining nut on the switch (if applicable) is fully tightened.
    • Make sure the control head screws are snug.

By following these detailed steps, you can confidently replace the 5-speed switch on your Minn Kota Endura trolling motor, restoring its functionality and extending its lifespan. A little DIY effort can save you money and keep you fishing without interruption! For diagrams and specific part numbers for your Minn Kota Endura, always visit ReelSchematic.com’s extensive library of parts and schematics.

Posted on

How to Clean Up and Repair a Water Leak in Your Minn Kota Trolling Motor

A trolling motor is the silent workhorse of many angling adventures, providing precise boat control and stealthy approaches to fish. However, when that workhorse starts to “cry” with a water leak, it’s a clear signal that immediate attention is required. Water ingress into the lower unit of a Minn Kota trolling motor can lead to catastrophic failure, corroding sensitive electrical components, seizing bearings, and ultimately rendering your valuable motor useless.

At ReelSchematic.com, we understand the importance of keeping your gear in top condition. This comprehensive guide will walk you through the process of diagnosing, cleaning up, and repairing a water leak in your Minn Kota trolling motor. While some steps require a degree of mechanical aptitude, this article aims to empower you with the knowledge to tackle this critical issue, potentially saving you significant time and money.

Disclaimer: Working with electrical components and mechanical assemblies requires caution. If you are uncomfortable with any of these steps, or if the damage appears extensive, it is highly recommended to seek professional assistance from a certified Minn Kota service center.

Understanding the Enemy: Why Water Leaks Happen

Before we dive into the fix, let’s understand the common culprits behind water leaks in Minn Kota trolling motors:

  • Damaged Propeller Shaft Seals: This is by far the most common cause. The seals around the propeller shaft are designed to prevent water from entering the lower unit. Over time, these seals can wear out, crack, or become damaged by fishing line, debris, or impact.
  • Worn or Damaged O-Rings: O-rings are used in various places, such as around the end cap of the lower unit or where the motor housing components join. Like propeller shaft seals, these can degrade, flatten, or get pinched, compromising the seal.
  • Cracked or Damaged Lower Unit Housing: While less common, a severe impact with an underwater obstruction can crack the aluminum housing of the lower unit, creating an entry point for water.
  • Improperly Torqued End Cap Bolts: If the bolts holding the end cap in place are not tightened correctly after a repair or maintenance, the seal can be compromised.
  • Corroded Wires or Connections: In rare cases, severe corrosion within the motor, often due to previous water ingress, can create pathways for water, though this is usually a symptom of a pre-existing leak.

Phase 1: Diagnosis – Is There Really a Leak?

Before you tear apart your motor, confirm the presence and approximate location of the leak.

  1. Initial Inspection:
    • Visual Check: After using your motor, look for any oily residue or milky discoloration on the propeller shaft, around the propeller, or near the seams of the lower unit. This “milky” appearance is often emulsified gear oil (if your model uses it) or simply mixed water and grease.
    • Propeller Wiggle Test: Gently try to wiggle the propeller. Excessive play can indicate worn bearings or a compromised shaft seal.
  2. The Submersion Test (Controlled Environment):
    • Gather Supplies: A large bucket or tub, warm water (not hot), and paper towels.
    • Preparation: Remove the propeller from your trolling motor. This is crucial for accessing the seals.
    • Submersion: Carefully submerge only the lower unit (the bullet-shaped part that houses the motor and propeller shaft) into the water. Ensure the entire lower unit is covered, but do not submerge the shaft or control head.
    • Observation: Look closely for a steady stream of small bubbles emanating from any particular spot. Bubbles indicate a leak. Pay special attention to:
      • Around the propeller shaft.
      • Around the edge of the end cap (the very back of the lower unit, behind the prop).
      • Any cracks or seams in the housing.
    • Rotate and Test: Slowly rotate the motor and try wiggling the shaft to see if the bubbles appear under stress.
    • Power On (Carefully!): If you’re certain no water will reach the upper electrical components, you can briefly power on the motor while submerged to see if the rotation exacerbates the leak. However, be extremely cautious and only do this if you are confident in your setup.
  3. Oil Check (If Applicable):
    • Some Minn Kota motors (older models or specific designs) use oil in the lower unit. If your model does, a milky, frothy appearance of the oil when drained is a definite sign of water contamination. Consult your owner’s manual to determine if your model uses lower unit oil and how to check it.

Phase 2: The Cleanup – Preventing Further Damage

Once a leak is confirmed, the clock is ticking. Water inside the motor is a destructive force.

  1. Disconnect Power IMMEDIATELY: Before doing anything else, disconnect all power to the trolling motor. Unplug it from the battery or remove the battery terminals. Safety first!
  2. Disassemble the Lower Unit (Carefully!):
    • Propeller Removal: Start by removing the propeller. Usually, this involves loosening a nut or bolt. Note the order of any washers or spacers.
    • End Cap Removal: The end cap is typically held on by several screws or bolts. Remove these carefully. The end cap might be tight due to the O-ring seal. You may need to gently pry it open.
    • Internal Component Removal:
      • Armature/Motor Assembly: Carefully slide out the entire motor assembly (armature, brushes, commutator, etc.) from the lower unit housing. This is often a snug fit. Take note of how everything is oriented.
      • Bearings and Seals: Pay close attention to the bearings and seals at both ends of the shaft within the lower unit. These are often the culprits.
  3. Assess and Document Damage:
    • Visual Inspection: Look for signs of corrosion (green, white, or black residue) on the motor windings, commutator, brushes, and electrical connections.
    • Bearing Inspection: Check the bearings for rust, gritty feeling when rotated, or excessive play.
    • Seal Inspection: Examine the propeller shaft seals and O-rings. Look for cracks, tears, flattening, or hardening. Use a magnifying glass if necessary.
    • Housing Inspection: Check the inside of the lower unit housing for cracks, pitting, or significant wear.
    • Take Photos: Document everything with photos. This will be invaluable for reassembly and if you need to order replacement parts.
  4. The Drying Process (Crucial!):
    • Rinse with Isopropyl Alcohol (IPA): For electrical components, this is your best friend. IPA (at least 90% concentration) displaces water and evaporates quickly, leaving minimal residue.
      • Method: Gently rinse the affected electrical components (armature, commutator, brush assembly, wiring connections) with IPA. You can use a spray bottle or a small brush. Do NOT use water!
      • Avoid Submerging Windings: While IPA is safe, try not to completely submerge the motor windings for prolonged periods unless absolutely necessary.
    • Desiccant / Drying Chamber: Place all components in a warm, dry area. Consider using:
      • Rice/Silica Gel: A container filled with uncooked rice or silica gel packets can draw out moisture.
      • Dehumidifier: A room with a dehumidifier is ideal.
      • Warm Air: A gentle fan or a hairdryer on a low, cool setting (held at a distance) can help air circulation and evaporation. DO NOT use high heat, as this can damage insulation and plastic parts.
    • Extended Drying Time: This is not a quick process. Allow components to dry for at least 24-72 hours, or even longer for heavily saturated motors. Patience here will prevent future issues. Ensure absolutely no moisture remains.
  5. Clean Corroded Contacts (If Present):
    • If you find any corrosion on electrical contacts or brush surfaces, gently clean them using a very fine grit sandpaper (600-800 grit), a pencil eraser, or a specialized electrical contact cleaner spray. The goal is to restore good electrical conductivity.

Phase 3: The Repair – Sealing the Breach

Once everything is thoroughly dry and clean, it’s time to replace the compromised components and reassemble the motor.

  1. Order Replacement Parts:
    • Based on your diagnosis, you’ll likely need a new propeller shaft seal kit and potentially new O-rings for the end cap.
    • If bearings are rusted or rough, order new ones.
    • If you suspect a cracked housing, this is a more significant repair, possibly requiring professional welding or a full lower unit replacement.
    • ReelSchematic.com Resources: Check our diagrams and parts lists for your specific Minn Kota model to ensure you order the correct parts. Have your motor’s serial number handy.
  2. Installing New Seals and O-Rings:
    • Propeller Shaft Seals:
      • Carefully remove the old seals from the shaft housing. You might need a small pick or screwdriver. Be careful not to scratch the metal surfaces.
      • Lubrication: Lightly lubricate the new seals with a marine-grade grease or silicone lubricant before installation. This helps them seat properly and prevents damage during assembly.
      • Pressing In: Gently press the new seals into place. Some kits might include a small installation tool. Ensure they are seated squarely and fully.
    • End Cap O-Ring:
      • Remove the old O-ring.
      • Clean the O-ring groove thoroughly.
      • Lightly lubricate the new O-ring with marine grease and seat it firmly into its groove on the end cap. Ensure it’s not twisted or pinched.
  3. Reassembly of the Lower Unit:
    • Lubricate Bearings: If replacing or reusing bearings, lightly lubricate them with appropriate marine-grade grease.
    • Slide in Armature: Carefully slide the motor armature and associated components back into the lower unit housing. Ensure brushes are properly seated on the commutator. You may need to gently push the brushes back into their holders to allow the commutator to pass.
    • Reinstall End Cap: Align the end cap with the housing, making sure the O-ring stays in its groove. Gently press the end cap into place.
    • Tighten Bolts/Screws: Secure the end cap with its screws/bolts. Crucially, tighten these bolts evenly and in a criss-cross pattern. Over-tightening one side can deform the O-ring seal. Consult your Minn Kota manual for specific torque specifications if available.
    • Reinstall Propeller: Attach the propeller, ensuring any washers or spacers are in the correct order. Tighten the propeller nut securely, but do not over-tighten, as this can damage the shaft or prop.

Phase 4: Verification – The Leak Test (Again!)

After reassembly, it’s absolutely vital to re-test the motor for leaks before you put it back on your boat.

  1. Submersion Test: Repeat the controlled submersion test from Phase 1. Submerge the lower unit and look for any bubbles.
  2. Pressurized Test (Optional, Advanced): Some technicians use specialized tools to slightly pressurize the lower unit with air and then submerge it. This can reveal very small leaks. However, this requires specific equipment and knowledge and is beyond the scope of a typical DIY repair.

Phase 5: Preventative Measures – Protecting Your Investment

Once your Minn Kota is leak-free, adopt these practices to prevent future water ingress:

  1. Regular Propeller Inspection:
    • After Every Trip: Make it a habit to remove your propeller after every few trips (or certainly if you’ve hit anything) and inspect behind it.
    • Remove Fishing Line: Fishing line is a silent killer of propeller shaft seals. It can wrap around the shaft, cut into the seals, and create pathways for water. Always remove any fishing line immediately.
    • Check for Debris: Clear any weeds, monofilament, or other debris that might be wrapped around the shaft.
  2. Periodic Lower Unit Inspection:
    • Visual Check: Annually, or more often if you fish heavily, visually inspect the entire lower unit for any signs of cracks, loose bolts, or damage to the end cap seal.
    • Oil Check (If Applicable): If your motor uses lower unit oil, check its condition annually. If it’s milky, change it and investigate for leaks.
  3. Proper Stowing and Storage:
    • Drainage: When stowing your motor, ensure the lower unit has a chance to drain any standing water.
    • Protection: Protect the motor from impacts when trailering or storing.
  4. Avoid Impacts:
    • While Minn Kota motors are durable, direct impacts with rocks, stumps, or other underwater hazards can crack the housing or damage internal components, leading to leaks. Exercise caution, especially in shallow or unfamiliar waters.
  5. Use Genuine Parts:
    • When replacing seals, O-rings, or other components, always opt for genuine Minn Kota replacement parts. Aftermarket parts may not meet the exact specifications, potentially compromising the seal.

Conclusion

A water leak in your Minn Kota trolling motor is a serious issue that demands your attention. By carefully following these steps for diagnosis, cleanup, and repair, you can effectively address the problem, prevent costly damage, and extend the life of your valuable equipment. Remember, vigilance and proactive maintenance are your best allies in keeping your trolling motor running silently and reliably, ensuring countless more successful days on the water. If you ever feel out of your depth, don’t hesitate to consult a professional service center – your investment is worth protecting.

Posted on

The Enduring Legacy of Excellence: The Shimano Curado Series Reels

For decades, the name “Curado” has been synonymous with reliability, performance, and unwavering durability in the baitcasting reel world. From weekend warriors to seasoned tournament pros, anglers worldwide have trusted Shimano Curado reels to deliver under the toughest conditions. At ReelSchematic.com, we understand the importance of choosing the right tools for the job, and few reels offer the consistent quality and innovative engineering found throughout the Curado series.

This comprehensive article will delve into the rich history, core technologies, and various models within the Shimano Curado lineup, providing you with a thorough understanding of why these reels have earned their legendary status and how they can elevate your angling experience.

A Heritage of Innovation: The Curado Story

The Shimano Curado made its debut in the late 1980s, quickly establishing itself as a mid-range workhorse that punched well above its weight class. Early models, like the green Curado Bantam series, became instant classics, lauded for their smooth retrieves, robust gearing, and impressive casting distance. Shimano’s commitment to continuous improvement meant that with each subsequent generation, the Curado evolved, incorporating cutting-edge technologies trickling down from their flagship models.

This iterative design philosophy has allowed the Curado to remain relevant and competitive in an ever-advancing market. It’s a testament to Shimano’s engineering prowess that a reel series can maintain its core identity while consistently adapting to the demands of modern fishing techniques.

Core Technologies that Define the Curado

While specific features may vary between models and generations, several foundational Shimano technologies are consistently found across the Curado series, contributing to their renowned performance:

  • HAGANE Body: This incredibly rigid metal reel body eliminates body flex and distortion, even under extreme loads. The result is improved cranking power and a more efficient transfer of energy from the handle to the gears, leading to a smoother and more powerful retrieve.
  • X-Ship: A key gear support system, X-Ship places a bearing on both ends of the pinion gear. This precise alignment and added support eliminate twist and torque in the pinion gear, leading to increased gear durability and a smoother, more powerful retrieve under load. You’ll feel the difference when fighting a stubborn fish or reeling in a heavy lure.
  • MicroModule Gearing (selected models): This advanced gear design features smaller, more numerous teeth, leading to increased contact points between the main gear and pinion gear. The benefit is an incredibly smooth and quiet retrieve, reduced vibration, and enhanced durability.
  • SVS Infinity Braking System: Shimano’s centrifugal braking system offers a wide range of cast control adjustments. With externally adjustable brake weights, anglers can fine-tune their casting performance for various lure weights, wind conditions, and casting styles. This system is known for its reliability and ease of use, helping to prevent backlashes.
  • CI4+ Body Material (selected models): For reels where weight reduction is critical without sacrificing strength, Shimano utilizes CI4+. This carbon-fiber reinforced material is significantly lighter and stronger than traditional graphite, contributing to a lighter overall reel that reduces angler fatigue during long days on the water.
  • Cross Carbon Drag: Shimano’s Cross Carbon Drag washers provide a wider range of drag settings, consistent drag pressure throughout the fight, and superior heat dissipation. This means a smoother, more reliable drag that instills confidence when battling large, powerful fish.
  • SilentTune (selected models): This technology further improves casting performance by reducing vibration in the spool and bearings, resulting in a quieter, smoother cast and increased casting distance.
  • Super Free Spool: This design ensures that the pinion gear is supported by a bearing, eliminating friction on the spool shaft during a cast. The result is reduced resistance and increased casting distance, especially with lighter lures.

Exploring the Curado Family: A Model Breakdown

The Curado series isn’t a single reel; it’s a family of baitcasters, each designed with specific applications and preferences in mind. While models may be discontinued and new ones introduced, understanding the general philosophy behind each iteration can help you choose the right Curado for your needs.

The Workhorse Standard: Shimano Curado K (and its predecessors)

The “standard” Curado models, often denoted by a single letter (e.g., K, M, I, G, E, D, B), represent the core of the series. The Curado K is the current flagship of this line, building upon a long lineage of popular models.

  • Key Features of the Curado K: The Curado K typically incorporates HAGANE Body, X-Ship, SVS Infinity Braking, and Super Free Spool. It’s known for its robust construction, smooth operation, and exceptional versatility.
  • Why it’s Popular: It’s the quintessential all-around baitcaster. The Curado K excels at throwing a wide variety of lures, from jigs and Texas rigs to crankbaits and spinnerbaits. It’s a reliable choice for freshwater species like bass, pike, and even smaller saltwater species. Its balanced performance and durable build make it a go-to for countless anglers.
  • Versatility: Available in various gear ratios (e.g., 6.2:1 for power, 7.4:1 for speed, 8.5:1 for blistering retrieves), allowing anglers to select the ideal speed for their chosen technique.

The Lighter Side: Shimano Curado MGL

The Curado MGL (MagnumLite Spool) takes the core Curado performance and injects it with a significant boost in casting ability, particularly with lighter lures.

  • Key Feature: MGL Spool: The defining characteristic is the MGL spool, which is significantly lighter and has less inertia. This allows the spool to start rotating faster with less effort, resulting in increased casting distance and control, especially with finesse presentations like weightless worms, jerkbaits, or small topwaters.
  • Ideal Applications: Perfect for situations where casting distance and precision with lighter baits are paramount. It’s a favorite for finesse bass fishing, clear water scenarios, and anytime you need to maximize your cast.
  • Balance: While optimized for lighter lures, the Curado MGL still retains the Curado’s signature durability and power, making it a surprisingly versatile option.

The Powerhouse: Shimano Curado 300/301

When big baits, big fish, and heavy lines are the order of the day, the Curado 300/301 series steps up. These are significantly larger and more powerful than the standard Curado models.

  • Key Differences: Larger line capacity, heavier-duty gearing, and a more robust frame designed to handle extreme pressure. They often feature larger handles for increased cranking power.
  • Target Species/Techniques: Ideal for musky, pike, large bass (with oversized swimbaits or glide baits), inshore saltwater species like snook and redfish, and even light offshore applications. They excel at throwing heavy lures, deep diving crankbaits, and punching through dense cover.
  • Power and Durability: Built to withstand immense strain, the Curado 300 models are true workhorses for trophy hunting.

The Saltwater Ready: Shimano Curado DC (and other saltwater compatible Curados)

While many Curado models are suitable for light saltwater use with proper maintenance, some, like the Curado DC, offer enhanced features that make them particularly well-suited for battling corrosive environments.

  • DC Braking (Digital Control): The Curado DC features Shimano’s revolutionary I-DC4 digital braking system. This microcomputer-controlled braking system monitors spool speed 1,000 times per second and applies the optimal amount of braking pressure, virtually eliminating backlashes. This is incredibly beneficial in saltwater environments where wind and various lure types can make casting challenging.
  • Corrosion Resistance: While not a dedicated “saltwater” reel like a Tranx or Calcutta, the Curado DC often incorporates enhanced corrosion resistance in its bearings and components compared to its freshwater counterparts.
  • Versatility in Saltwater: Ideal for inshore species like redfish, speckled trout, snook, and small tarpon, where casting accuracy and backlash prevention are highly valued.

Matching Your Curado to Your Fishing Style

Choosing the right Curado involves considering a few key factors:

  1. Target Species & Lure Weight:
    • Standard Curado K: Excellent for general-purpose freshwater fishing (bass, walleye, northern pike) with a wide range of lure weights (1/4 oz to 1 oz+).
    • Curado MGL: Best for lighter lures (1/8 oz to 5/8 oz) and finesse techniques where casting distance with lighter baits is crucial.
    • Curado 300/301: For heavy lures (1 oz+) and large, powerful fish.
  2. Gear Ratio:
    • Low Gear Ratio (e.g., 6.2:1): Power. Ideal for deep crankbaits, large swimbaits, slower retrieves, and techniques requiring more torque.
    • Medium Gear Ratio (e.g., 7.4:1): All-around versatility. Good for jigs, Texas rigs, spinnerbaits, and general purpose.
    • High Gear Ratio (e.g., 8.5:1): Speed. Perfect for burning spinnerbaits, topwater, pitching and flipping, and quickly taking up line.
  3. Braking System Preference:
    • SVS Infinity: Traditional and highly effective centrifugal braking. Requires a bit of external adjustment but is reliable.
    • DC (Digital Control): Virtually backlash-proof, especially beneficial for beginners or challenging conditions (wind, varying lure weights). Offers less external adjustment but exceptional performance.
  4. Ergonomics and Feel: While all Curados share a similar aesthetic, subtle differences in frame size and handle length can impact how a reel feels in your hand over a long day of fishing. If possible, handle different models to find one that fits your hand comfortably.

Maintaining Your Curado: Ensuring Lifelong Performance

Even the most durable reels require proper care. A well-maintained Curado will last for many years and provide consistent performance.

  1. Rinse After Use: Especially important after saltwater or brackish water use. Lightly rinse the exterior of the reel with fresh water to remove salt and debris. Do not submerge the reel.
  2. Wipe Down: Use a soft cloth to dry the reel thoroughly.
  3. Light Lubrication:
    • Spool Bearings: Periodically apply a tiny drop of high-quality reel oil to your spool bearings. A little goes a long way.
    • Worm Shaft: Apply a light coat of grease or specialized oil to the worm shaft (level wind mechanism) to ensure smooth line lay.
    • Handle Knobs: A small drop of oil in the handle knob bearings (if applicable) will keep them spinning freely.
  4. Drag Maintenance: Keep your drag washers dry and clean. Avoid over-tightening the drag when storing the reel, as this can compress the washers over time.
  5. Professional Service: For internal cleaning, gear lubrication, and bearing replacement, consider having your Curado professionally serviced every few years, especially if you use it frequently or in harsh conditions. ReelSchematic.com is an excellent resource for finding schematics and parts if you prefer to do your own maintenance!
  6. Storage: Store your reel in a cool, dry place, ideally in a reel cover to protect it from dust and scratches.

The Curado Legacy Continues

The Shimano Curado series has earned its reputation not through flashy marketing, but through consistent, reliable performance on the water. It’s a reel that inspires confidence, allowing anglers to focus on fishing rather than worrying about their gear. Whether you’re a seasoned pro targeting tournament-winning bass or a passionate enthusiast exploring new waters, there’s a Curado model perfectly suited to your needs.

By understanding the technologies, recognizing the nuances between models, and committing to proper maintenance, your Shimano Curado will undoubtedly be a trusted partner in your angling adventures for years to come, proving that true excellence endures.

Posted on

Clipping In for Success: A Guide to Downrigger Release Clips

Downrigger fishing is a highly effective method for targeting suspended fish at precise depths, allowing anglers to present lures or baits directly in the strike zone. However, the success of this technique hinges on one often-overlooked but crucial component: the downrigger release clip. More than just a simple clamp, the right release clip ensures your line stays put until a fish strikes, and then provides a clean, consistent release when the moment of truth arrives.

At ReelSchematic.com, we believe in understanding every part of your fishing system. This detailed article will explore the various types of downrigger release clips, their unique characteristics, and how to choose and optimize them for your specific downrigger fishing scenarios.

The Fundamental Role of a Release Clip

In downrigger fishing, your main fishing line (from your rod) is attached to a downrigger cable via a release clip. The downrigger ball then pulls your line and lure down to the desired depth. When a fish strikes, the tension of the strike, combined with the angler’s upward rod sweep, causes the release clip to open, freeing your fishing line from the downrigger cable. This allows you to fight the fish directly on your rod and reel, unencumbered by the heavy downrigger weight.

A good release clip must:

  • Hold Securely: Maintain sufficient tension to keep your lure at the desired depth, even in rough water or with active lure actions.
  • Release Consistently: Open cleanly and reliably when a fish strikes, without premature releases or, worse, failing to release at all.
  • Be Adjustable: Allow for tension adjustments to accommodate different line sizes, lure resistances, and the biting tendencies of your target species.
  • Be Durable: Withstand repeated use in freshwater or saltwater environments.

Types of Downrigger Release Clips

While all release clips serve the same basic function, they employ different mechanisms and offer varying degrees of adjustability. Here are the most common types you’ll encounter:

1. Pinch-Pad / Clamp-Style Releases

These are arguably the most ubiquitous and versatile downrigger release clips. They feature two pads (often rubber or plastic) that pinch your fishing line.

  • How they work: Tension is adjusted via a screw or spring mechanism that controls the clamping force on the pads. To increase tension, you tighten the screw, compressing the pads more tightly on the line. To decrease tension, you loosen it.
  • Popular Examples:
    • Scotty Power Grip Plus: A highly popular choice known for its durable construction and a wide range of adjustability. Many versions include a “stacking” feature, allowing you to attach a second clip to the leader for fishing multiple lines from one downrigger (stacker fishing).
    • Offshore Tackle OR1 (and variations): Widely regarded for their reliability and adjustability. Offshore Tackle offers various models with different tension ratings (light, medium, heavy) to suit diverse fishing applications and line sizes. The OR1 is a medium tension clip, ideal for salmon, steelhead, and trout with 10-25 lb mono.
    • Dubro Release Clips: Often noted for their E/Z Adjust Tension Screw, offering fine-tuning capabilities.
  • Pros:
    • Excellent Adjustability: Offer precise control over release tension.
    • Versatility: Can be used for a wide range of fish sizes and lure types.
    • Gentle on Line: The soft pads minimize line abrasion and damage.
    • Stacking Capability: Many models are designed for “stacker” fishing, allowing multiple lures off a single downrigger.
  • Cons:
    • Can sometimes slip with very heavy lures or in extremely rough conditions if not adjusted properly.
    • Pads can wear out over time and may need replacement.

2. Spring-Loaded / Snapper Releases

These clips utilize a spring-loaded mechanism to hold the line, often with a small pin or roller.

  • How they work: The line is typically placed in a slot or notch, and a spring-loaded arm or roller holds it in place. The tension is often fixed or has limited adjustment. When a fish strikes, the force overcomes the spring tension, and the line “snaps” free.
  • Popular Examples:
    • Scotty Snapper Release: A simple and effective design, often favored for its ease of use.
    • Cannon Uni-Line Release: Another common spring-loaded option, often with different tension ratings.
  • Pros:
    • Simplicity and Ease of Use: Very quick to attach and detach lines.
    • Reliable Release: Often provide a very definitive release when a fish hits.
    • Less Maintenance: Fewer moving parts to adjust or replace compared to some pad clips.
  • Cons:
    • Limited Adjustability: May not offer the fine-tuning capabilities of pinch-pad clips, potentially leading to premature releases or missed bites if fish are finicky.
    • Can be harder on the line if not designed well, potentially causing minor kinks.

3. Roach-Style Clips (Specialized)

While less common as primary downrigger clips, some anglers use “roach clips” or similar designs for specific downrigger applications, particularly for stacking or in situations where very light tension is desired.

  • How they work: These clips often use a very light spring or a simple bend in metal/plastic to provide minimal holding power. They are typically smaller and less robust than dedicated downrigger clips.
  • Pros:
    • Very Light Tension: Ideal for extremely shy bites or very small baits.
    • Compact Size: Can be useful for stacking lines closely.
  • Cons:
    • Limited Holding Power: Prone to false releases with any significant boat movement or lure resistance.
    • Less Durable: Not designed for heavy-duty downrigger use.
    • Not a primary downrigger clip: Best suited for specific, specialized stacking setups rather than direct attachment to the downrigger ball.

Choosing the Right Release Clip for Your Fishing

The “best” release clip isn’t a one-size-fits-all answer. It depends on several factors:

  1. Target Species:
    • Salmon, Steelhead, Trout: Medium-tension pinch-pad clips (e.g., Offshore OR1, Scotty Power Grip Plus) are ideal. These fish often strike aggressively, but you still want enough tension to keep your lure running true.
    • Walleye, Bass, Panfish (with downriggers): Lighter tension clips are often preferred, as these fish can have a more subtle bite. Adjustable pinch-pad clips allow for fine-tuning.
    • Larger Offshore Species (Mackerel, Tuna, etc.): Heavy-duty, robust clips with strong springs or high-tension pads are essential to prevent premature releases from powerful lures or boat speed.
  2. Line Type and Diameter:
    • Monofilament: Generally works well with most pinch-pad clips. Adjust tension based on line diameter – thicker mono requires less clamping pressure.
    • Braided Line: Braided lines are thinner and have less stretch, making them more prone to slipping in some clips. Look for clips designed specifically for braid or those with very grippy pads. You might need to use slightly higher tension with braid compared to mono of equivalent breaking strength. Some anglers will loop braid around the pads once or twice to increase friction.
  3. Lure/Bait Resistance:
    • High-Drag Lures (e.g., deep-diving crankbaits, large dodgers/flashers): Require higher tension clips to prevent premature releases caused by the lure’s resistance in the water.
    • Low-Drag Lures (e.g., small spoons, flies, natural baits): Can be run on lighter tension clips, which allows for more sensitive bites to register a release.
  4. Water Conditions:
    • Rough Water: You’ll generally need more tension to keep your line from prematurely releasing due to boat bounce.
    • Calm Water: Lighter tension can be used, potentially allowing for more sensitive bite detection.
  5. Stacker Fishing:
    • If you plan to run multiple lines from one downrigger, choose “stacker” clips specifically designed for this purpose. These clips typically attach to the downrigger cable and then feature a second release clip for your fishing line. They often have a self-locating snap for easy attachment.

Optimizing Your Release Clip Performance

Once you’ve chosen your clips, proper setup and technique are key:

  • Adjusting Tension:
    • Start Light: Begin with a lighter tension setting and gradually increase it until your line holds securely without false releases from lure action or boat movement.
    • Test the Release: Before fishing, give your rod a quick, sharp tug (simulating a fish strike) to ensure the clip releases cleanly. It should require a noticeable pull, but not an excessive amount of force that could break your line or snap your rod tip.
    • Species-Specific Tension: For light-biting fish, keep the tension as light as possible while still holding the lure. For aggressive strikers, you can increase tension slightly.
    • Placement on Pads: With pinch-pad clips, placing the line closer to the pivot point (deeper into the jaws) will increase tension. Placing it closer to the outer edge will decrease tension.
  • Line Placement:
    • Ensure your fishing line is seated properly and securely in the clip’s jaws or mechanism. A poorly seated line is prone to premature release or line damage.
  • Leader Length:
    • The length of the leader from your downrigger ball to your release clip can influence how your lure tracks and releases. Experiment with different lengths to find what works best for your setup and target species.
  • Maintenance:
    • Cleanliness: Keep your clips clean of salt, dirt, and debris. Rinse them with fresh water after every saltwater outing.
    • Inspect Pads: For pinch-pad clips, regularly inspect the pads for wear, tears, or hardening. Worn pads will lose their gripping power. Replacement pads are readily available.
    • Check Screws/Springs: Ensure tension adjustment screws are not seized and springs are not corroded or bent.

The Downrigger Clip as a System

Remember, the release clip is just one part of your downrigger system. Its performance is intertwined with:

  • Your Rod: A rod with a fast tip and a strong backbone will allow for better hook sets and clearer indication of a strike.
  • Your Reel: A smooth drag system is critical for fighting fish once released.
  • Your Lure/Bait: The action and resistance of your lure will directly impact the required tension.
  • Your Boat Speed: Adjusting boat speed influences lure action and the effective tension on the clip.

By understanding the different types of downrigger release clips, their strengths and weaknesses, and how to properly set and maintain them, you’ll significantly enhance your downrigger fishing success. Don’t let a small piece of tackle be the weak link in your setup. Invest in quality clips, learn to use them effectively, and get ready to feel that satisfying “pop” as a fish takes your bait!

Posted on

Dialing in Your Depths: A Comprehensive Guide to Downrigger Weight Selection

Downrigger fishing is an art and a science, offering anglers unparalleled precision in presenting baits and lures at specific depths to target suspended fish. A critical component of this system, often overlooked in its nuances, is the downrigger weight. The size, shape, and even material of your downrigger ball can significantly impact your success on the water.

At ReelSchematic.com, we believe in empowering anglers with the knowledge to optimize their gear. This detailed guide will delve into the factors influencing downrigger weight selection, helping you choose the perfect cannonball to consistently hit your target depths and put more fish in the boat.

The Core Purpose of a Downrigger Weight

Simply put, a downrigger weight’s primary job is to hold your fishing line, attached via a release clip, at a precise depth while you troll. As you move through the water, various forces act upon this weight and the downrigger cable, pulling them back and up from a true vertical position. This phenomenon is known as blowback. Understanding and minimizing blowback is key to maintaining accurate depth control.

Key Factors Influencing Weight Selection

Choosing the right downrigger weight isn’t a “one size fits all” proposition. Several interconnected factors dictate the optimal poundage:

  1. Target Depth: This is the most obvious and critical factor. The deeper you want to fish, the heavier the weight you’ll generally need to overcome drag and maintain a vertical line.
    • Shallower Depths (Under 50 feet): For kokanee, shallower salmon, or trout in inland lakes, 6 to 8-pound weights are often sufficient.
    • Mid-Depths (50-100 feet): A good all-around choice for many salmon and lake trout scenarios, 8 to 12-pound weights are common.
    • Deep Water (100+ feet): When chasing deep-dwelling species in large lakes or saltwater, 12 to 20-pound weights, or even heavier, become necessary. Some anglers even go up to 24 pounds or more in extreme depths and currents.
  2. Trolling Speed: As your trolling speed increases, so does the water resistance on the downrigger weight, cable, and even your fishing line and lure. This increased drag causes more blowback, making your weight ride shallower than the counter indicates.
    • Slower Speeds (Under 2 MPH): Lighter weights can be effective at slower speeds, as there’s less blowback.
    • Moderate to Fast Speeds (2-4 MPH+): If you’re running fast to cover ground or target aggressive fish, a heavier weight is essential to keep your lure in the strike zone. Charts provided by downrigger manufacturers often illustrate the effect of speed on depth for various weight sizes.
  3. Water Current: Whether it’s river current, tidal current in saltwater, or subsurface thermocline currents in lakes, water movement significantly impacts downrigger performance. A strong current pushing against your downrigger system will increase blowback and push your weight off target.
    • Strong Currents: Heavier weights are paramount in strong currents to cut through the water and maintain a more vertical line.
    • Variable Currents: Be aware that currents can change with depth. Your sonar might show your weight moving erratically or “kiting” if it hits a strong subsurface current.
  4. Downrigger Cable Type: The diameter and material of your downrigger cable play a significant role in drag and blowback.
    • Stainless Steel Wire: Traditional stainless steel wire is common. Its smooth surface helps it cut through the water, but it can be more prone to creating an “electrical charge” which some anglers believe can repel fish if not managed with grounding systems.
    • Braided Line (e.g., PowerPro Downrigger): Many anglers are switching to specialized braided downrigger lines. These lines have a smaller diameter than wire for the same breaking strength, which translates to less drag and significantly less blowback, especially at deeper depths. This means you might be able to use a slightly lighter weight with braid to achieve the same depth as a heavier weight with wire. Braided lines are also non-conductive, eliminating electrical charge concerns.
  5. Lure Size and Type: While the downrigger weight does most of the heavy lifting, the drag created by your lure, flasher, or dodger also contributes to blowback. Larger, more aggressive lures or those with significant water resistance will increase the overall drag on the system, potentially requiring a heavier downrigger weight to compensate.
  6. Boat Size and Freeboard: On larger boats with high freeboard (distance from water to gunwale), longer downrigger booms are often used to prevent the weight from banging against the side of the boat in rough conditions. This isn’t directly a weight factor, but the overall setup of your downrigger can indirectly influence how well a certain weight performs.

The Benefits of Using a Heavier Weight (When Appropriate)

While it might seem counterintuitive to use a heavier weight than strictly necessary, there are several advantages:

  • Reduced Blowback: This is the biggest benefit. A heavier weight cuts through the water more efficiently, keeping your downrigger cable closer to vertical. This ensures your lure is consistently at the desired depth.
  • Accurate Depth Readings: With less blowback, the counter on your downrigger (which measures cable deployed) will be a more accurate indicator of your actual lure depth.
  • Better Sonar Visibility: When your downrigger weight is more vertical, it’s more likely to remain within the cone angle of your boat’s transducer. This allows you to “mark” your downrigger ball on your fish finder, giving you real-time visual confirmation of your true depth and helping you dial in precisely where the fish are.
  • Faster Descent: A heavier weight sinks faster, getting your lures down to the strike zone quicker, especially beneficial when frequently changing depths or resetting lines.
  • Reduced Tangles: By keeping your downrigger lines more vertical and closer to the boat, heavier weights minimize the chance of tangles with other lines, especially when running multiple rods or making turns.
  • Improved Lure Action (in some cases): A more stable downrigger ball can allow your lure to exhibit its intended action more consistently without being pulled up by excessive blowback.

Downrigger Weight Shapes and Their Impact

Beyond poundage, the shape of your downrigger weight also influences its performance:

  • Round Ball (Cannonball): The most traditional and widely available shape. They are simple and effective, but can sometimes spin, potentially twisting your downrigger cable.
  • Finned Ball: A round ball with a stabilizing fin. This fin helps the weight track straighter and reduces spinning, leading to less line twist and more consistent depth. This is a very popular and versatile choice.
  • Fish/Torpedo Shaped: These hydrodynamic shapes are designed to cut through the water with minimal drag, reducing blowback. They often track very straight and are excellent for deeper trolling or faster speeds where minimizing resistance is key. Some even feature reflective tape for added attraction.
  • Pancake/Disc Shaped: These flat, thin weights are also designed for reduced drag and straight tracking. They can be very effective at minimizing blowback.

Important Note on Shapes: If you are running multiple downriggers, especially off the same side of the boat, it’s generally recommended to use weights of the same shape and similar size. Mixing shapes can cause them to track differently, increasing the risk of tangles.

Practical Tips for Selecting and Using Weights

  • Start Heavy, Go Lighter: A good rule of thumb, especially for beginners, is to start with the heaviest weight your downrigger can comfortably handle (e.g., 10-12 lbs for most standard setups). If you consistently find your lines are too vertical or you’re not getting enough blowback for your spread, you can experiment with slightly lighter weights.
  • Monitor Your Sonar: Your fish finder is your best friend for downrigging. Watch your downrigger ball on the screen. If you can consistently see it, you know your true depth. If it disappears, it’s likely riding high due to excessive blowback, indicating a need for a heavier weight or slower speed.
  • Observe Your Downrigger Angle: Visually observe the angle of your downrigger cable entering the water. The closer to vertical it is, the more accurate your depth reading. Significant angle indicates blowback.
  • Experiment and Document: Every boat, every body of water, and every trolling scenario is unique. Don’t be afraid to experiment with different weight sizes, shapes, and trolling speeds. Keep a log of what works best for specific depths, speeds, and conditions.
  • Safety First: Always ensure your downrigger unit is rated for the weight you are using. Overloading a downrigger can damage the unit or, in extreme cases, even cause structural damage to your boat.

Conclusion

Downrigger weight selection is a finely tuned aspect of precision trolling. By understanding the interplay of target depth, trolling speed, current, cable type, and weight shape, you can make informed decisions that drastically improve your downrigger fishing success. Invest in a selection of quality weights, pay attention to how your system performs on the water, and leverage your electronics to visually confirm your depths. With this knowledge, you’ll be well on your way to mastering the art of downrigger fishing and consistently putting your baits where the fish are.

Posted on

Unveiling the Phantom Angler: The Lowrance Ghost Trolling Motor

For serious anglers, the trolling motor isn’t just an accessory; it’s an extension of their will on the water. It’s the silent navigator, the precision tool that puts you on the fish, and the key to unlocking those elusive bites. In a market brimming with innovation, the Lowrance Ghost trolling motor has emerged as a true game-changer, quickly garnering a reputation for its stealth, power, and seamless integration. For ReelSchematic.com readers who demand the best in their angling pursuits, a detailed exploration of the Ghost is not just warranted, it’s essential.

The Genesis of a Predator: What Makes the Ghost Stand Out?

From the moment it hit the water, the Lowrance Ghost was designed with a clear purpose: to deliver unparalleled performance without compromise. Its name, “Ghost,” isn’t merely a marketing gimmick; it perfectly encapsulates its defining characteristic – an incredibly quiet operation that allows anglers to approach fish without spooking them. But the Ghost’s prowess extends far beyond its whisper-quiet hum.

1. The Silent Assassin: Brushless Motor Technology

At the heart of the Ghost’s stealthy operation lies its revolutionary brushless motor. Unlike traditional brushed motors that generate friction and noise through carbon brushes, the Ghost’s brushless design offers several critical advantages:

  • Unmatched Silence: This is arguably the Ghost’s most lauded feature. The absence of brushes dramatically reduces mechanical noise, allowing you to sneak up on wary fish in even the calmest conditions. Imagine casting to a shallow-water bass without the tell-tale hum of a traditional motor alerting them to your presence – that’s the Ghost advantage.
  • Enhanced Efficiency: Brushless motors are inherently more efficient, translating to longer run times on a single charge. This is a huge benefit for tournament anglers and those who spend extended hours on the water.
  • Increased Durability and Longevity: With fewer moving parts and less friction, the brushless motor is built to last. This means less maintenance and more time enjoying your time on the water.

2. Power and Precision: More Than Just Quiet

While silence is golden, it means little without ample power and precise control. The Ghost delivers on both fronts with impressive capabilities:

  • Exceptional Thrust: Available in 47-inch, 52-inch, and 60-inch shaft lengths, the Ghost offers powerful thrust options (up to 120 lbs depending on the model) to propel even large bass boats through challenging conditions like strong currents or heavy winds. This raw power ensures you maintain optimal boat control no matter what the water throws at you.
  • Instantaneous Steering: The Ghost boasts a unique, fly-by-wire steering system that provides instant and precise control. There’s no lag, no hesitation – just immediate response to your foot pedal commands. This level of responsiveness is crucial for holding position on structure, navigating tight spots, and making quick adjustments when a fish is on.
  • User-Configurable Foot Pedal: Lowrance understands that every angler has their preferences. The Ghost’s foot pedal is highly customizable, allowing you to configure programmable shortcut buttons for quick access to essential functions like anchor mode, heading lock, and more. This personalization optimizes your control and reduces distractions.

3. Seamless Integration: The Lowrance Ecosystem Advantage

One of the most compelling reasons to choose the Lowrance Ghost is its unparalleled integration with the Lowrance ecosystem. This isn’t just about compatibility; it’s about creating a unified command center on your boat:

  • Direct Sonar Integration: The Ghost comes equipped with an integrated Lowrance HDI (High-Definition Imaging) transducer right out of the box. This means you get crystal-clear CHIRP sonar and DownScan Imaging™ directly from your trolling motor, eliminating the need for external transducers and messy wiring. This integrated transducer is a game-changer for anglers who rely on precise bottom and structure identification.
  • Plug-and-Play Compatibility with Active Imaging™: For those seeking even greater detail, the Ghost is designed to accept an optional Active Imaging™ 3-in-1 nosecone. This upgrade provides SideScan, DownScan, and CHIRP sonar capabilities, offering a comprehensive view of the underwater world around your boat. This modular design allows you to customize your sonar setup based on your fishing needs.
  • Direct Control from Lowrance Displays: Through a simple network connection, you can control your Ghost trolling motor directly from your Lowrance HDS LIVE, Elite FS, or HOOK Reveal display. This includes activating anchor mode, setting heading lock, adjusting speed, and even navigating to waypoints – all from the convenience of your fish finder screen. This level of integration streamlines your operations and keeps your hands free for fishing.
  • Pinpoint GPS Anchoring: Leveraging the precision of Lowrance’s GPS technology, the Ghost’s anchor mode is incredibly accurate. With a simple press of a button, your boat will hold its position steadfastly, even in strong winds or currents. This frees you up to focus on casting and fighting fish, without constantly adjusting your boat.

On the Water: Real-World Applications and Advantages

So, how does all this cutting-edge technology translate into real-world benefits for the angler?

  • Finesse Fishing Mastery: The Ghost’s silent operation is a dream come true for finesse anglers. Whether you’re drop-shotting for suspended fish or carefully working a shaky head on a bed, the lack of motor noise allows you to present your bait naturally and avoid alerting wary fish.
  • Targeting Shallow Water Species: Redfish in the flats, bass in lily pads, or crappie in brush piles – these shallow-water species are notoriously skittish. The Ghost allows you to approach these areas with unprecedented stealth, increasing your chances of a successful hook-up.
  • Tournament Efficiency: In a competitive environment, every advantage counts. The Ghost’s efficiency translates to longer battery life, meaning you can stay on the water longer without worrying about running out of juice. Its precise control and instant responsiveness allow for quicker boat adjustments, maximizing your fishing time.
  • Hands-Free Operation: With anchor mode and heading lock readily available, you can spend less time steering and more time fishing. This is particularly valuable when fighting a fish, re-tying, or simply enjoying the scenery.
  • Enhanced Sonar Interpretation: Having a dedicated, high-quality transducer built into your trolling motor provides a clear, unobstructed view of the bottom and structure directly in front of your boat. This eliminates interference from your main engine and allows for more accurate interpretation of sonar returns.

Maintenance and Care: Ensuring Longevity

While the Lowrance Ghost is built for durability, proper maintenance will ensure its longevity and optimal performance:

  • Rinse After Every Use: Especially when fishing in saltwater, thoroughly rinse your trolling motor with fresh water to remove salt, dirt, and debris.
  • Check Propeller Regularly: Inspect the propeller for any fishing line, weeds, or damage. Clear any obstructions to ensure smooth operation and prevent damage to the motor.
  • Lubricate Moving Parts: Consult your owner’s manual for recommended lubrication points and schedules.
  • Battery Maintenance: Ensure your trolling motor batteries are properly charged and maintained according to the manufacturer’s recommendations.
  • Software Updates: Like all modern electronics, the Ghost may receive software updates. Keep your Lowrance displays and Ghost firmware updated for optimal performance and access to new features.

The Verdict: Is the Lowrance Ghost Right for You?

For the discerning angler who prioritizes stealth, power, precision, and seamless integration, the Lowrance Ghost trolling motor represents a significant investment that delivers exceptional value. Its innovative brushless motor technology, intuitive controls, and deep integration with Lowrance electronics create an unparalleled angling experience.

If you’re looking to elevate your fishing game, gain a silent advantage over your quarry, and unlock new levels of efficiency and control on the water, the Lowrance Ghost is undoubtedly a top contender. It’s more than just a trolling motor; it’s a silent partner that will help you put more fish in the boat. For detailed schematics and parts information, as always, refer to ReelSchematic.com.

Posted on

Revolutionizing the Angling Experience: The Lowrance ActiveTarget 2

For decades, sonar technology has been an indispensable tool for anglers, transforming how we locate fish and understand underwater environments. From traditional 2D sonar to side and down imaging, each innovation has pushed the boundaries of what’s possible. However, the advent of live sonar has truly revolutionized the game, and at the forefront of this evolution stands the Lowrance ActiveTarget 2.

Building upon the groundbreaking success of its predecessor, ActiveTarget 2 offers an unparalleled real-time view of the underwater world, allowing anglers to see fish reacting to their lures, dissect structure, and adapt their presentations on the fly. This detailed article for ReelSchematic.com will delve into the features, benefits, optimal usage, and expert tips for maximizing your success with this incredible piece of technology.

The Evolution of Vision: What Makes ActiveTarget 2 Stand Out?

ActiveTarget 2 isn’t just an incremental upgrade; it’s a significant leap forward in live sonar performance. Lowrance has refined its core technology to deliver a clearer, smoother, and more detailed image across a wider range. Here’s what sets it apart:

  • Highest Resolution and Clarity: The most striking improvement in ActiveTarget 2 is its enhanced image quality. Anglers report a significantly clearer picture of fish and structure, allowing for easier identification of species, precise understanding of their movements, and the ability to distinguish individual fish even within dense schools. This means less guesswork and more confidence in your casts.
  • Smoother, More Consistent Imaging: Gone are the days of choppy, inconsistent live feeds. ActiveTarget 2 boasts a smoother, more fluid presentation across its entire operational range. This improved consistency translates to a more natural and continuous view of the underwater environment, making it easier to track fish and observe their behavior in real-time.
  • Increased Detail at Greater Distances: Thanks to advancements in its beam broadcasting, ActiveTarget 2 provides more detailed images further from your boat than ever before. This expanded range is a game-changer for covering vast areas, scouting for offshore schools, or simply extending your reach in open water. Being able to spot fish at 80-100 feet allows for stealthier approaches and more strategic planning.
  • Versatile Viewing Modes: ActiveTarget 2 offers three primary viewing modes, each designed for specific fishing scenarios:
    • Forward View: Provides a crystal-clear image of what’s directly in front of your boat, perfect for targeting individual fish or specific pieces of structure.
    • Down View: Gives you a detailed look at what’s directly beneath your boat, ideal for vertical jigging or pinpointing fish holding tight to bottom structure.
    • Scout View: Offers an ultra-wide, overhead view of the water column in front of your boat. This mode is exceptional for quickly scanning large areas, locating bait balls, or identifying widespread schools of fish.
  • Multi-View Capabilities (with HDS PRO): For the ultimate angler, pairing ActiveTarget 2 with a Lowrance HDS PRO unit unlocks the ability to display multiple ActiveTarget 2 views simultaneously. This can include Forward + Scout, 180-degree view (Forward + Back with an optional second transducer), or Scout Wide (dual Scout mode for double the coverage). This comprehensive view provides an unparalleled understanding of the underwater landscape around your boat.
  • Robust Construction and Compatibility: Built to withstand the rigors of the marine environment, ActiveTarget 2 is waterproof (IP67 rated) and designed for reliable performance. It’s compatible with a wide range of Lowrance displays, including HDS PRO, HDS LIVE, HDS Carbon, and Elite FS units, ensuring seamless integration into your existing Lowrance ecosystem.

Mastering ActiveTarget 2: Settings, Strategies, and Success

While ActiveTarget 2 is lauded for its “auto-tuning” capabilities and ease of use, a deeper understanding of its settings and optimal strategies will unlock its full potential.

Transducer Placement: Your Eyes Underwater

The placement and orientation of your ActiveTarget 2 transducer are paramount to getting the best image.

  • Trolling Motor Shaft Mount: This is the most common and versatile mounting option. The transducer can be oriented for Forward, Down, or Scout views by rotating it on the shaft. Many anglers recommend mounting the transducer 6-10 inches above the foot of the trolling motor for optimal viewing of subsurface and topwater baits. This also helps keep the transducer safer from impacts.
  • Motor Mount: Less common, but still an option. It can be used for Forward, Down, or Scout views, but may offer less protection than a shaft mount.
  • Transom Mount (Accessory): For boats without a trolling motor, or for those who prefer it, an optional transom bracket allows for Down or Forward views.

Key Transducer Considerations:

  • Cable Management: Ensure enough slack in the transducer cable to allow for full rotation of the trolling motor shaft and easy adjustment between views.
  • Alignment: Properly aligning your transducer with the centerline of your trolling motor or the direction of your casts is crucial for accurate target acquisition. Use visual cues like bridge pilings or stationary objects to fine-tune your alignment.
  • Protection: While robust, the transducer is still susceptible to damage. Be mindful of shallow water or underwater obstacles when deploying your trolling motor.

Optimal Settings: Dialing in Your Vision

While ActiveTarget 2 is designed to be user-friendly, a few tweaks to the settings can significantly enhance your experience.

  • Range: This is perhaps the most critical setting. Don’t be afraid to extend your range, especially in open water or when scouting. Many pro anglers will run their range out to 80-100 feet in 20 feet of water to quickly locate fish. However, once you identify fish, work your way in closer to make that precise cast. The resolution can diminish past 30 feet, so getting closer maximizes your clarity for the final approach.
  • Gain/Sensitivity: This controls the strength of the sonar return. Start with the “Auto” setting, but don’t hesitate to experiment. In clear water, you might be able to reduce the gain for a cleaner image, while in murky water, increasing it slightly can help pick up fainter returns. Avoid excessive gain, as it can introduce clutter.
  • Contrast and Color Palettes: These settings influence how fish and structure appear on your screen. Experiment with different color palettes to find one that makes fish “glow” and stand out against the background, regardless of water clarity. Adjusting contrast can further refine the distinction between targets and surrounding environment.
  • Noise Rejection/Interference: In areas with heavy boat traffic or other sonar units, you might encounter interference. ActiveTarget 2 has settings to help mitigate this. Explore the noise rejection options to clean up your screen.
  • TVG (Time Varied Gain): This setting helps compensate for signal attenuation in deeper water. While often handled automatically, understanding its function can be useful for advanced users.
  • Surface Clarity: Reduces surface clutter caused by aeration or debris. Adjust this as needed, especially in choppy conditions.
  • Depth Range: Don’t always feel the need to show the bottom. If you’re targeting suspended fish or those in the upper water column, shorten your bottom depth to focus on the area of interest. This can provide a clearer, more magnified view of the target zone.
  • Overlay Data: Customize the data displayed on your screen, such as depth, temperature, and boat speed, to keep all relevant information readily accessible.
  • Grids: Turning on the grid pattern can be incredibly helpful for judging the size of fish and their distance from the boat, especially when using longer ranges.

Fishing with ActiveTarget 2: Strategies for Success

ActiveTarget 2 is a tool for strategic angling, not just finding fish. Here’s how to integrate it into your fishing approach:

  • Targeting Individual Fish: Once you spot a fish on ActiveTarget 2, observe its behavior. Is it active, or holding tight to structure? Make your cast, and watch how the fish reacts to your lure. This real-time feedback is invaluable for adjusting lure choice, retrieve speed, and presentation angles. If the fish doesn’t react, make a subtle change.
  • Working Structure: ActiveTarget 2 allows you to dissect brush piles, rock formations, and other submerged cover with unprecedented clarity. Identify where fish are holding within the structure and pinpoint your casts for maximum effectiveness.
  • Locating Schools and Bait: Use Scout mode to quickly scan vast areas for bait balls or schools of fish. Once located, switch to Forward or Down view for a more detailed assessment and precise targeting.
  • Following Fish: ActiveTarget 2 enables you to track fish as they move. If a fish swims away from your initial cast, you can often re-position your boat or make a follow-up cast to intercept it.
  • Understanding Fish Behavior: Observe how fish react to different lures, retrieves, and even boat movements. This real-time learning is one of the most powerful aspects of live sonar, helping you develop a deeper understanding of fish behavior.
  • Practice, Practice, Practice: Like any advanced tool, mastering ActiveTarget 2 takes time on the water. Experiment with different settings, angles, and fishing scenarios to develop your own system and maximize its effectiveness. The “game-changer” aspect often takes a few trips to truly understand and appreciate.

ActiveTarget 2 in the Broader Ecosystem

ActiveTarget 2 integrates seamlessly with the Lowrance “Ultimate Fishing System,” which includes:

  • HDS PRO Displays: The flagship displays that unlock the full potential of ActiveTarget 2, including multi-view capabilities and advanced networking.
  • Ghost Trolling Motor: Designed for stealth and precision, the Ghost trolling motor often serves as the ideal platform for mounting the ActiveTarget 2 transducer, allowing for quiet approaches and precise positioning.
  • Active Imaging HD: Complementary sonar technology that provides incredibly detailed views of structure and bottom composition.

The Debate: ActiveTarget 2 vs. the Competition

In the world of live sonar, Lowrance ActiveTarget 2 faces strong competition, particularly from Garmin LiveScope. While both technologies offer similar core functionalities, there are some key distinctions often debated among anglers:

  • Image Clarity vs. Cone Angle: Some users report that ActiveTarget 2 offers a slightly clearer image, particularly at longer ranges, while Garmin LiveScope may have a slightly wider cone angle. The “best” image often comes down to personal preference and the specific fishing conditions.
  • Ease of Use: Lowrance is often praised for its “auto-tuning” sonar, which can make it easier to get a good image right out of the box without extensive manual adjustments. Garmin’s systems may offer more customizable settings for those who prefer to fine-tune every parameter.
  • Interference: Interference can sometimes be a factor when multiple live sonar units are in close proximity. Both brands have developed technologies to combat this, but anecdotal evidence suggests some differences in how effectively each handles it.
  • Ecosystem Integration: For anglers already invested in a particular brand’s electronics, sticking with that brand for live sonar often makes the most sense due to seamless integration and shared user interfaces.

Ultimately, both ActiveTarget 2 and LiveScope are exceptional technologies that have transformed fishing. The choice often comes down to individual preference, existing equipment, and specific fishing needs.

Conclusion

Lowrance ActiveTarget 2 represents a significant leap forward in live sonar technology, offering anglers an unprecedented real-time view of the underwater world. Its high-resolution, clear, and smooth imaging, combined with versatile viewing modes and multi-view capabilities, empowers anglers to make more informed decisions, refine their presentations, and ultimately catch more fish.

While an investment, the ability to see fish react to your lure in real-time provides an invaluable learning experience that traditional sonar simply cannot replicate. By understanding its features, optimizing your settings, and embracing the strategic advantages it offers, the Lowrance ActiveTarget 2 will undoubtedly become an indispensable tool in your angling arsenal, helping you unlock a whole new level of fishing success.

Posted on

See Everything, Catch Anything: Mastering Your Humminbird MEGA 360

For anglers serious about finding and catching more fish, the Humminbird MEGA 360 Imaging system isn’t just an accessory; it’s a paradigm shift. Moving beyond traditional sonar’s limited cones, the MEGA 360 delivers an unparalleled, constantly updating 360-degree view of the underwater world around your boat. This detailed, almost photographic imagery empowers you to identify structure, pinpoint fish, and understand their movements with unprecedented clarity. At ReelSchematic.com, we believe that understanding and optimizing this revolutionary technology is key to unlocking its full potential on the water.

What is Humminbird MEGA 360 and Why Does It Matter?

At its core, the Humminbird MEGA 360 is a high-frequency imaging transducer that rotates, effectively acting as an underwater radar. Unlike traditional Down Imaging or Side Imaging which provide a snapshot of what’s directly beneath or to the sides of your boat as you move, MEGA 360 offers a continuous, real-time sweep of a 360-degree radius, typically out to 125 feet in every direction.

This continuous, high-resolution view is powered by Humminbird’s MEGA Imaging technology, operating in the megahertz range. This ultra-high frequency translates to incredibly detailed, picture-like images that allow you to distinguish individual tree branches, differentiate between hard and soft bottom, and even spot individual fish or bait schools.

The “Why” is simple: Efficiency and Precision.

  • Rapid Scouting: Instead of making multiple passes to map out an area with traditional sonar, you can quickly scan a large radius from a single spot, dramatically reducing your search time.
  • Pinpoint Casting: The ability to see structure and fish in a full 360-degree field, combined with features like range rings, allows you to make incredibly accurate casts directly to your targets, minimizing wasted casts and maximizing your chances of a bite.
  • Situational Awareness: Whether you’re navigating tight cover, observing how fish relate to structure, or tracking moving schools, the constant update provides unparalleled situational awareness.

Getting Started: Installation and Setup

While the thought of installing new electronics might seem daunting, Humminbird has streamlined the process for MEGA 360. The most common mounting options include:

  • Trolling Motor Mount (Ultrex/Fortrex/Maxxum): This is the most popular choice, providing an uninterrupted sonar picture even when your trolling motor is turning or you’re using features like Spot-Lock. The MEGA 360 transducer mounts independently to the trolling motor shaft.
  • Universal Hand Control Mount: For boats without compatible trolling motors, or for those who prefer the transducer separate from the trolling motor, this mount offers flexibility.
  • Ice Adapter Kit: Yes, MEGA 360 has even revolutionized ice fishing, allowing anglers to scan wide areas beneath the ice.

Key Installation Considerations:

  • Compatibility: Ensure your Humminbird fish finder is compatible. MEGA 360 Imaging is compatible with APEX, XPLORE, SOLIX, and HELIX G3N/G4N series fish finders equipped with MEGA Imaging+.
  • GPS Heading Sensor: A GPS heading sensor (compass) is essential for accurate navigation features and waypoint marking on your MEGA 360 screen.
  • Wiring: Follow the installation guide carefully for connecting the transducer to your fish finder and power source. Proper wiring ensures optimal performance and prevents interference.

Initial Setup and Optimization:

Once installed, a few initial settings will help you get the most out of your MEGA 360:

  • Transducer Orientation: Ensure the transducer is perfectly aligned with the boat’s long axis for accurate readings. Slight adjustments can be made with the mounting knob to make sure your trolling motor and outboard returns appear vertically on your screen.
  • Networking: If you have multiple compatible Humminbird units, ensure they are networked via Ethernet to share the MEGA 360 view across all displays. This allows for dedicated screens for mapping, traditional sonar, and your MEGA 360 view.

Dialing In Your View: Optimizing Settings for Different Conditions

The true power of the MEGA 360 lies in its adjustability. Mastering these settings will allow you to adapt to any fishing scenario:

  • Range: This determines how far out from your boat the MEGA 360 will scan.
    • Finding Structure: When searching for large underwater features like humps, points, or weed lines, a wider range (e.g., 80-125 feet) is effective.
    • Targeting Fish: Once you’ve located a promising area, narrow the range (e.g., 40-60 feet) to get a more detailed view of individual fish and their proximity to structure.
    • Range Rings: Always keep range rings activated. These concentric circles provide critical distance measurements from your boat to targets, aiding in precise casting. Customize their spacing to match your preferred casting distances.
  • Sweep Speed: This controls how quickly the transducer rotates and updates the image on your screen.
    • Faster Speed: Provides more frequent updates, ideal for moving quickly or scanning new areas. However, image quality might be slightly reduced.
    • Slower Speed: Offers higher image clarity and detail, perfect for dissecting a specific piece of structure or observing subtle fish movements when stationary. A balance of 2-3 is often recommended for general fishing, but don’t hesitate to slow it down for detailed analysis.
  • Sensitivity and Contrast: These settings are crucial for defining the clarity and definition of your sonar returns.
    • Sensitivity: Adjusts the unit’s ability to detect weak signals. Too high, and you’ll get clutter; too low, and you’ll miss subtle details. Start around 12-14 and fine-tune based on water conditions and target type.
    • Contrast: Controls the difference between light and dark returns, making objects stand out. Experiment to find a level that provides a clear distinction between bottom, structure, and fish. Brighter returns typically indicate harder objects.
  • Viewing Area (Field of View): While 360 degrees is the default, you can narrow your field of view to focus on a specific quadrant.
    • Narrowing the View: This can reduce screen clutter and allow for faster refresh rates in a specific direction, useful when working a known piece of structure or when you’ve pinpointed fish in a particular area. Pre-set options like a 45-degree forward view are excellent for casting.
  • Sonar Zoom: Magnify specific areas on your screen to get a closer look at fish or intricate structure. This is particularly useful when you’ve identified a potential target and want to confirm its identity.
  • Color Palette: Different color palettes can enhance the visibility of certain targets. Experiment to find what works best for your eyes and the conditions you’re fishing in.

Advanced Strategies: Integrating MEGA 360 into Your Fishing

The true magic happens when you integrate MEGA 360 into your overall fishing strategy.

  • Structure Fishing: The MEGA 360 is a game-changer for dissecting structure. You can easily identify brush piles, rock formations, submerged timber, roadbeds, and subtle depth changes. Observe how fish are positioned around or within these structures, not just on top of them.
  • Open Water Angling: Even in seemingly featureless open water, MEGA 360 can reveal subtle contours, bait schools, and suspended fish that traditional sonar might miss. Follow roaming schools and understand their travel paths.
  • Ice Fishing Revolution: With the optional Ice Adapter Kit, MEGA 360 brings its panoramic view to the hard water. Scan large areas around your hole to locate fish and structure, minimizing the number of holes you need to drill and maximizing your time actually fishing.
  • Complementing Live Sonar (MEGA Live): While MEGA 360 provides a top-down, rotational view of your surroundings, live sonar (like Humminbird’s MEGA Live) offers a real-time, forward-facing view of individual fish and their interaction with your lure. Many anglers find the combination of MEGA 360 for “seeking” and MEGA Live for “destroying” (i.e., targeting and catching) to be the ultimate setup. MEGA 360 helps you quickly find productive areas and understand the overall layout, while MEGA Live allows for precise bait presentation and real-time feedback on fish reactions.
  • Waypoint Management: Mark waypoints directly on your MEGA 360 screen. As your boat moves, these waypoints update, providing a constantly evolving map of your targets. This is invaluable for returning to hot spots later or sharing information with fishing partners.
  • Understanding Fish Behavior: Observe how fish react to your boat’s presence and your lures. Are they scattering? Are they ignoring your presentation? This feedback, especially when combined with live sonar, provides invaluable insights into fish mood and the effectiveness of your tactics.

Troubleshooting and Best Practices

  • Clear Picture: For the clearest images, especially when evaluating intricate structure, aim to be stationary or moving very slowly with your trolling motor.
  • Interference: If you experience interference, check all electrical connections, grounding, and ensure the transducer cable is routed away from other electrical wiring.
  • Software Updates: Regularly check for and install software updates for your Humminbird unit and MEGA 360 transducer. These updates often include performance enhancements and new features.
  • Clean Transducer: Keep your transducer clean from debris and marine growth for optimal performance.
  • Practice: Like any advanced tool, mastering the Humminbird MEGA 360 takes practice. Spend time on the water experimenting with settings and observing how different targets appear on your screen. The more you use it, the more intuitive it becomes.

Conclusion: A New Horizon in Angling

The Humminbird MEGA 360 Imaging system has undeniably transformed how anglers approach fishing. Its ability to provide a high-definition, 360-degree view of the underwater world offers an unparalleled advantage in finding fish, understanding their environment, and making more precise presentations. Whether you’re a tournament angler dissecting prime real estate or a weekend warrior looking to maximize your time on the water, investing in and mastering the Humminbird MEGA 360 will undoubtedly lead to more successful and enjoyable fishing experiences. Embrace the technology, learn its nuances, and prepare to see everything, and catch anything.

Posted on

Unlocking the Underwater World: A Guide to Garmin LiveScope

Garmin LiveScope has undeniably revolutionized the angling world, transforming the way we perceive and interact with the underwater environment. No longer are we solely reliant on traditional sonar’s historical snapshots; LiveScope offers a real-time, live-action view of fish, structure, and your lure, creating an unprecedented level of interaction and insight. For the dedicated angler looking to truly understand the aquatic realm and elevate their catch rates, mastering LiveScope is no longer a luxury – it’s a necessity.

This detailed guide, brought to you by ReelSchematic.com, will delve deep into the mechanics, applications, and optimization of Garmin LiveScope, empowering you to unlock its full potential.

What is Garmin LiveScope and How Does It Work?

At its core, Garmin LiveScope is a live-scanning sonar system that utilizes a specialized transducer to emit multiple sonar beams in real-time. Unlike traditional 2D sonar that paints a historical picture of what the boat has passed over, LiveScope provides a continuously updating, video-like display.

Think of it like this: traditional sonar is a photograph, while LiveScope is a live video feed. This real-time imagery allows you to see:

  • Fish swimming and reacting: Observe individual fish, schools, and their movements in relation to bait, structure, and your boat.
  • Your lure in the water: Watch your jig, crankbait, or soft plastic descend, how it’s presented, and how fish react to its presence.
  • Underwater structure with incredible detail: Discern individual branches on a brush pile, the contours of a rock pile, or the density of submerged vegetation.
  • Baitfish schools: Identify and track baitfish, often a key indicator of predator presence.

The magic happens through the GLS™ 10 sonar black box and the LVS transducer (e.g., LVS32, LVS34, LVS62 XR). The transducer emits high-frequency sonar waves, and as these waves encounter objects, they reflect back to the transducer. The black box then processes this data and translates it into the vivid, real-time images you see on your compatible Garmin chartplotter (such as EchoMap UHD, GPSMAP Plus, or GPSMAP Ultra series).

The different LVS transducers offer varying capabilities, with the newer LVS34 and LVS62 XR providing improved resolution, reduced noise, clearer images, and better target separation compared to the original LVS32.

The Power of Perspective: LiveScope’s Viewing Modes

One of LiveScope’s most significant advantages is its versatility in viewing angles. Depending on your transducer mounting and fishing situation, you can utilize three primary modes:

  1. LiveScope Forward: This is arguably the most popular and game-changing mode. It allows you to see what’s directly in front of and around your boat, typically out to 200 feet (though image quality may diminish at extreme ranges). This mode is invaluable for:
    • Scouting new areas: Quickly scan ahead for brush piles, rock formations, or submerged timber before you run over them.
    • Identifying fish location: Pinpoint fish holding on structure or suspended in the water column before making a cast.
    • Casting accuracy: See exactly where your lure lands in relation to fish or structure.
    • Working fish: Observe how fish react to your presentation and adjust your retrieve or lure choice accordingly.
  2. LiveScope Down: This mode provides a view directly below your boat, similar to traditional 2D sonar but with the real-time clarity of LiveScope. It’s excellent for:
    • Vertical jigging: Watch your bait and fish directly beneath you in high definition.
    • Checking bottom composition: Get a detailed look at the bottom contours and hardness.
    • Identifying fish directly under the boat: Crucial for precise presentations when fish are holding tight to structure.
  3. Perspective Mode: Available with specific transducer mounts, Perspective Mode offers an overhead, “bird’s-eye” view of the water in front of your boat, ideal for shallow water situations (typically under 20 feet). This mode is fantastic for:
    • Shallow water scouting: Efficiently scan expansive flats, weed lines, or shorelines for cruising fish.
    • Observing fish behavior: Get a wider view of how fish are moving and orienting themselves in relation to shallow cover.
    • Navigating tight spaces: Identify submerged obstacles in shallow water.

Strategic Applications: Using LiveScope to Catch More Fish

LiveScope isn’t just a fancy toy; it’s a powerful tool that, when wielded effectively, can dramatically increase your angling success. Here are some key strategies and tips for various fishing scenarios:

1. Locating Fish:

  • Aggressive Scouting: Instead of aimlessly drifting or trolling, use LiveScope Forward or Perspective mode to actively scan for fish and structure. Cover water efficiently, looking for telltale signs like bait balls, individual fish arches (which appear as distinct “blobs” or “lines” on LiveScope), or promising structure.
  • Targeting Isolated Cover: Once you spot a brush pile, laydown, or rock pile, use LiveScope to zoom in and identify if fish are holding on or near it.
  • Following Schools: For suspended fish like crappie or white bass, LiveScope allows you to track their movements and stay on top of the school.
  • Ice Fishing: LiveScope has become a game-changer for ice anglers. Use it to scan for fish off to the sides of your hole, identify their depth, and even watch them approach your jig. Many ice anglers use a dedicated LiveScope pole for easy maneuvering and viewing.

2. Presenting Your Lure:

  • Pinpoint Accuracy: See exactly where your lure lands and how it descends in relation to fish or structure. This eliminates guesswork and allows for incredibly precise casts.
  • Reading Fish Reaction: This is where LiveScope truly shines. Observe how fish react to your lure. Are they ignoring it? Following it but not committing? Flaring at it? This real-time feedback allows you to:
    • Adjust retrieve speed: Speed up or slow down to elicit a strike.
    • Change lure action: Vary your jigging cadence or retrieve style.
    • Switch lure type: If fish are consistently ignoring a particular bait, you’ll know instantly to try something different.
    • See the bite: Often, you’ll see a fish inhale your lure on screen before you even feel the bite, allowing for quicker hooksets.

3. Understanding Fish Behavior:

  • Learning Fish Habits: By observing fish in their natural environment, LiveScope provides invaluable insights into their daily routines, preferred depths, and reactions to different baits and environmental conditions. This knowledge transcends a single fishing trip and builds a stronger understanding of fish behavior.
  • Identifying Species (with practice): While LiveScope doesn’t magically label fish, with experience, you can learn to distinguish between different species based on their size, shape, swimming patterns, and how they interact with structure. Bass often appear as thicker, more torpedo-shaped returns, while crappie might show up as smaller, more elongated signals.

Optimizing Your LiveScope Settings for Maximum Clarity

While LiveScope offers incredible out-of-the-box performance, fine-tuning your settings is crucial for maximizing clarity and reducing clutter, especially in varying water conditions. Think of it as dialing in your reel’s drag – a subtle adjustment can make all the difference.

Here are the key settings and tips for optimization:

  1. Gain (Sensitivity):
    • What it does: Controls the overall sensitivity of the sonar return. Higher gain shows more targets but also more background noise and clutter.
    • Recommended Starting Point: 55-70%.
    • Adjustment:
      • Clear Water: You can often increase gain to 65-70% to pick up subtle returns like small baitfish or faint structure.
      • Dirty/Murky Water: Reduce gain closer to 55% to minimize noise and clutter.
      • Pro Tip: Start with a moderate gain and gradually increase it until you start seeing too much clutter, then back off slightly. The goal is to see fish clearly without overwhelming the screen.
  2. Color Gain:
    • What it does: Increases the brightness and contrast of strong returns, making fish “pop” on the screen.
    • Recommended Setting: 70-85%.
    • Pro Tip: This setting significantly helps in distinguishing fish from background clutter. Experiment to find a level where fish returns are vivid but not oversaturated.
  3. TVG (Time Variable Gain):
    • What it does: Filters out noise from targets farther away from the transducer, often used to clean up the water column.
    • Recommended Setting: Low or Off.
    • Pro Tip: While TVG can make your screen look cleaner, it can also suppress weaker returns like smaller fish or subtle structure. Most experienced users recommend keeping it off or on “Low” for the best target separation.
  4. Noise Rejection:
    • What it does: Eliminates random background noise and interference.
    • Recommended Setting: Medium.
    • Adjustment: “Medium” is a good general setting. In very deep water (over 40 feet) or in areas with significant electronic interference, you might consider “High,” but be aware that too much noise rejection can also filter out legitimate, weaker fish returns.
  5. Depth Range:
    • What it does: Defines the maximum depth the sonar scans.
    • Recommended Setting: Manual.
    • Pro Tip: Always set your depth manually to just deeper than the bottom you’re targeting. Auto depth can cause the screen to “hunt” and flicker, especially over uneven bottom. Manually setting it optimizes the resolution for your specific depth.
  6. Forward Range:
    • What it does: Controls how far ahead of your boat the sonar scans in Forward mode.
    • Recommended Setting: Manual, 60-80 feet.
    • Pro Tip: A good rule of thumb is to set your forward range to 2-3 times the depth you’re fishing. For example, in 20 feet of water, a 60-foot forward range provides optimal visibility without overly compressing the screen. This allows you to see fish in the target zone clearly.
  7. Color Palettes:
    • What it does: Changes the color scheme of the display.
    • Pro Tip: Experiment with different color palettes (e.g., Aqua, Caribbean, Lava) to find what provides the best contrast and clarity for your eyes and the current lighting conditions. Some anglers find certain palettes make fish pop more effectively.

Bonus Optimization Tips:

  • Software Updates: Regularly check for and install the latest Garmin software updates for your chartplotter and LiveScope system. Garmin frequently releases updates that improve performance, add features, and fix bugs.
  • Stable Mount: A secure and stable transducer mount is paramount. Any wobble or instability in the mount will translate directly into a shaky and blurry image on your screen. Invest in a high-quality, rigid mounting system.
  • Cable Management: Properly route and secure your transducer cable to prevent tangles, wear, and interference. Avoid kinks or sharp bends.
  • Practice, Practice, Practice: The best way to master LiveScope is to spend time on the water with it. Learn to interpret what you’re seeing, how fish appear in different conditions, and how your adjustments affect the image. The more time you put in, the more intuitive it becomes.
  • Resetting Settings: If you ever get lost in your settings and your image becomes unmanageable, don’t hesitate to reset your sonar settings to default and start fresh.

Transducer Mounting Options: Getting the Right Angle

The placement and type of your LiveScope transducer mount significantly impact its effectiveness. Garmin offers various mounting options, and third-party solutions provide even more versatility.

  1. Trolling Motor Mount: This is by far the most common and versatile mounting option. The transducer is typically mounted on the shaft or barrel of your electric trolling motor, allowing you to easily pan and tilt the transducer to scan in various directions. This is ideal for active fishing where you’re constantly maneuvering and searching for fish.
    • Shaft Mount: Directly mounts to the trolling motor shaft, offering a lower profile. Can be used for Down and Forward views.
    • Barrel Mount: Mounts to the barrel of the trolling motor. Can be used for Down and Forward views.
    • Perspective Mode Mount: A specialized bracket that allows for quick transitions between Forward, Down, and Perspective views by simply adjusting the transducer’s orientation.
  2. Console Mount: For larger boats or those focusing on scanning large areas while moving at higher speeds, a dedicated LiveScope pole mounted near the console can be effective. This allows you to monitor the screen while operating the main motor, making it efficient for scouting. However, it can be less convenient for active casting.
  3. Stern/Transom Mount: While less common for LiveScope’s primary function, a transom mount can be used for more stationary applications or specific situations where a forward view is not the priority.

Important Considerations for Mounting:

  • Interference: Ensure your LiveScope transducer is mounted away from other transducers, propellers, or anything that could create acoustic or electrical interference.
  • Cable Routing: Proper cable routing is essential to prevent damage, especially with a rotating trolling motor. Leave enough slack for full rotation and secure the cable tightly to the shaft.
  • Ease of Adjustment: Choose a mount that allows for easy and quick adjustment of the transducer’s orientation, especially if you plan to switch between modes frequently.

The Future of Fishing: Embracing LiveScope

Garmin LiveScope has irrevocably changed the landscape of modern fishing. It’s more than just a piece of electronics; it’s a window into the underwater world, offering unparalleled insights into fish behavior and habitat. While there’s a learning curve, the rewards of mastering this technology are immense.

By understanding its core principles, strategically applying its various viewing modes, and diligently optimizing your settings, you’ll transform from a reactive angler to a proactive predator. You’ll not only find fish faster but also gain a deeper appreciation for the intricate dynamics of the aquatic ecosystem.

So, for all you anglers out there reading this on ReelSchematic.com, it’s time to embrace the revolution. Get out on the water, experiment with your Garmin LiveScope, and prepare to see fishing in a whole new light. The fish are waiting, and now, you can see them.

Posted on

Unlocking the Underwater World: A Comprehensive Guide to Humminbird MEGA Live for Anglers

For decades, anglers have relied on traditional sonar to paint a picture of the underwater world. We’ve become adept at interpreting arches, lines, and blobs, mentally constructing a three-dimensional representation of fish and structure below our boats. But imagine a technology that eliminates the guesswork, allowing you to see fish in real-time, observe their behavior, and even watch them react to your lure. This is the promise of Humminbird MEGA Live, and it’s revolutionizing the way we fish.

At ReelSchematic.com, we’re all about understanding and optimizing your fishing gear. And when it comes to cutting-edge electronics, Humminbird’s MEGA Live stands out as a game-changer. This detailed guide will delve into the intricacies of MEGA Live, from its core technology to practical applications, helping you unlock its full potential on the water.

What is Humminbird MEGA Live? The Eyes Beneath the Surface

At its heart, Humminbird MEGA Live is a forward-facing sonar system that provides live, real-time views of what’s happening beneath and around your boat. Unlike traditional 2D sonar or even Down and Side Imaging, which show historical data, MEGA Live is constantly scanning and updating, giving you an immediate, dynamic picture. It’s like having an underwater camera with incredible clarity and range, but instead of a video feed, you’re seeing high-resolution sonar returns.

The technology behind MEGA Live leverages Humminbird’s proprietary MEGA Imaging frequencies, which operate in the megahertz range. This ultra-high frequency allows for incredibly detailed images, showcasing fish, bait, and structure with unprecedented clarity and target separation. The latest iteration, MEGA Live 2, takes this even further with enhanced stability, reduced noise, and improved bait tracking.

Key Features and Benefits: Why Every Angler Needs MEGA Live

The advantages of integrating MEGA Live into your fishing arsenal are numerous and impactful:

  • Real-time Fish Tracking and Behavior: This is perhaps the most significant benefit. You’re no longer guessing where the fish are or what they’re doing. You can see individual fish, observe how they orient themselves to structure, and crucially, watch their reaction to your lure. This real-time feedback allows for immediate adjustments to your presentation – a subtle twitch, a change in retrieve speed, or even a different bait – all in response to how the fish are behaving.
  • Precision Bait Tracking: MEGA Live excels at displaying your lure in the sonar cone, even at significant distances. This means you can accurately present your bait to individual fish or specific pieces of cover, ensuring your offering is in the strike zone. If a fish ignores your bait, you’ll know instantly and can adapt.
  • Unmatched Clarity and Target Separation: Thanks to the MEGA Imaging frequencies, MEGA Live provides exceptional clarity, allowing you to differentiate between individual fish, bait balls, and various types of structure. You can distinguish between a small perch and a trophy bass, or discern a brush pile from a lone stump.
  • Three Versatile View Modes: MEGA Live offers three distinct viewing options to suit various fishing scenarios:
    • Forward Mode: The most commonly used mode, providing a real-time view in front of your boat. Ideal for casting to visible targets or scanning open water for suspended fish.
    • Down Mode: Gives you a clear, precise view directly beneath your boat, perfect for vertical jigging or inspecting structure directly below you.
    • Landscape Mode: Offers a wide, bird’s-eye perspective around your boat, excellent for quickly scouting large areas for fish and cover.
  • Optimized Color Palettes: MEGA Live 2 boasts 15 optimized color palettes, allowing you to customize your display for optimal visibility in different water conditions, light levels, and personal preferences. Experiment with options like “Doppler” or “Alabama Amber” to find what works best for your eyes and helps targets stand out.
  • Enhanced Stability and Reduced Noise: The improved design of MEGA Live 2 minimizes interference and provides a more stable, consistent image, even in choppy conditions. This translates to clearer returns and less clutter on your screen.
  • TargetBoost Feature (MEGA Live 2): This innovative feature enhances the brightness and contrast of suspended fish and bait, making them pop on the screen, particularly useful in open water situations where fish might be spread out.
  • Seamless Integration with Humminbird Ecosystem: MEGA Live seamlessly integrates with compatible Humminbird head units (APEX, XPLORE, and SOLIX G3 series), as well as Minn Kota trolling motors with the One-Boat Network. This creates a powerful, interconnected system for unparalleled boat control and fishing efficiency. The optional TargetLock accessory allows for independent control of the transducer and trolling motor, further enhancing precision.

Setting Up Your MEGA Live System: Getting Started

While the specific installation details will vary slightly depending on your boat and existing electronics, here’s a general overview of what to expect when setting up your Humminbird MEGA Live:

  1. Compatibility Check: First and foremost, ensure your Humminbird fish finder is compatible with MEGA Live. Currently, APEX, XPLORE, and SOLIX G3 models support MEGA Live. Older HELIX or SOLIX models are generally not compatible.
  2. Transducer Mounting: The MEGA Live transducer needs to be mounted in a location that provides an unobstructed view of the water. Common mounting options include:
    • Trolling Motor Mount: This is the most popular option, especially for bass boats. MEGA Live can be mounted on either side of Minn Kota Ultrex trolling motors, and also on Minn Kota Fortrex models.
    • Transom Mount: Suitable for some boat types, offering a rear-facing view.
    • Independent Pole Mount: For anglers who want maximum flexibility in directing the transducer, a dedicated pole mount allows for manual or motorized control.
  3. Wiring and Connections: The transducer connects to your compatible Humminbird fish finder via an Ethernet cable. Power is also supplied through this connection. For networked systems, an Ethernet Switch may be required. Always refer to the official Humminbird installation manual for detailed wiring diagrams and instructions.
  4. Software Updates: Ensure your Humminbird head unit has the latest firmware installed. This is crucial for optimal performance and to unlock all of MEGA Live’s features.
  5. Initial Setup and Settings: Once installed, you’ll need to go through the initial setup on your fish finder. This involves selecting the MEGA Live transducer, choosing your preferred view mode, and adjusting basic settings.

Pro Tip: While you can often get by with default settings, taking the time to experiment with sensitivity, contrast, range, and color palettes will significantly enhance your MEGA Live experience. Many anglers find the “green” or “Doppler” palettes to be highly effective for target identification.

Mastering MEGA Live on the Water: Techniques for Success

Owning MEGA Live is one thing; effectively using it to catch more fish is another. Here are some techniques and strategies to maximize your success:

  • Scanning and Locating Fish:
    • Wide Scans (Landscape Mode): Begin by using Landscape Mode to quickly scan large areas for schools of baitfish, isolated targets, or prominent structure. This helps you narrow down productive zones.
    • Targeted Scans (Forward Mode): Once you identify potential targets, switch to Forward Mode and focus your beam on those areas. Use your trolling motor or a dedicated pole to precisely point the transducer.
  • Understanding Fish Behavior:
    • Tracking Movement: Observe how fish are moving. Are they actively cruising, suspended and still, or darting in and out of cover? This provides clues about their mood and willingness to bite.
    • Reaction to Lure: This is where MEGA Live truly shines. Cast your lure into the sonar cone and watch how fish react. Do they approach it aggressively, shy away, or completely ignore it? This immediate feedback is invaluable for adjusting your retrieve, cadence, or even lure choice. If they’re tracking but not biting, try subtle twitches, pauses, or changes in speed.
  • Targeting Individual Fish:
    • Pinpoint Accuracy: When you see a specific fish, use MEGA Live to precisely cast your lure to it. Aim to land your bait just beyond the fish and retrieve it into its strike zone.
    • Vertical Presentations (Down Mode): If fish are suspended directly below you or holding tight to vertical cover, switch to Down Mode for precise vertical jigging or drop-shotting.
  • Decoding Structure:
    • Identifying Cover: MEGA Live’s clarity allows you to clearly identify brush piles, rock formations, submerged timber, and other fish-holding structures. You can see how fish relate to these features in real-time.
    • Casting to Edges and Transitions: Fish often position themselves on the edges of structure or where different types of cover meet. Use MEGA Live to identify these transition areas and cast accordingly.
  • Adapting to Conditions:
    • Shallow vs. Deep Water: Adjust your range and sensitivity settings based on water depth. In shallow water, a higher dynamic contrast might improve the image, while in deeper water, a lower contrast could be beneficial.
    • Water Clarity: In clear water, you’ll likely see farther and with more detail. In stained or dirty water, you may need to reduce your range and increase sensitivity.
    • Wind and Current: Understand how wind and current affect your boat and the movement of your lure within the sonar cone. Adjust your boat positioning and casting angles accordingly.

Integrating MEGA Live into Your Fishing Strategy

MEGA Live isn’t just a fancy fish finder; it’s a powerful tool that integrates with your overall fishing strategy.

  • Pre-fishing and Scouting: Use MEGA Live to quickly scout new areas, identify productive structures, and locate schools of fish before you even make a cast. This drastically cuts down on unproductive time.
  • Tournament Fishing: The real-time feedback and precision of MEGA Live can be a significant advantage in tournament situations, allowing anglers to quickly dial in on active fish and optimize their presentations.
  • Understanding Fish Patterns: By observing fish behavior across different conditions and locations, you’ll gain a deeper understanding of their patterns, leading to more consistent success.
  • Finesse and Reaction Baits: MEGA Live excels with both finesse techniques (like Ned rigs or tubes, where you can watch fish inspect and commit) and reaction baits (like jerkbaits, where you can see fish track and strike).

The Future of Fishing is Live

Humminbird MEGA Live, especially the enhanced MEGA Live 2, represents a significant leap forward in fishing technology. It transforms the way we perceive and interact with the underwater environment, giving anglers an unprecedented level of insight into fish behavior and lure presentation.

While there’s a learning curve to mastering any new technology, the rewards of investing time in understanding and utilizing MEGA Live are immense. From quickly locating hidden fish to fine-tuning your presentation in real-time, MEGA Live empowers anglers to be more efficient, more precise, and ultimately, more successful on the water. So, if you’re ready to see your highlight reels happen as they unfold, it’s time to experience the clarity and precision of Humminbird MEGA Live. Your fishing game will never be the same.

Posted on

The Pflueger Supreme Fly Reel: A Legacy of Excellence on the Water

For anglers who appreciate the perfect blend of tradition, performance, and durability, the Pflueger Supreme Fly Reel stands as a testament to a rich heritage in fishing tackle. While Pflueger is perhaps best known for its baitcasting and spinning reels, the Supreme fly reel series quietly carved out its own niche, offering a reliable and aesthetically pleasing option for fly fishers. At ReelSchematic.com, we believe in celebrating the tools that connect us to the water, and the Pflueger Supreme fly reel certainly deserves a closer look.

A Glimpse into Pflueger’s Legacy

Before delving into the specifics of the Supreme fly reel, it’s worth acknowledging the broader history of the Pflueger company. Founded in 1881 by Ernest A. Pflueger, the company initially focused on manufacturing artificial baits. Over the decades, Pflueger expanded its product line to include a wide array of fishing reels, earning a reputation for innovation and quality. Anglers across generations have relied on Pflueger products, and the Supreme name itself has been associated with top-tier performance in various reel categories. This legacy of excellence undoubtedly influenced the design and construction of their fly reel offerings.

The Pflueger Supreme Fly Reel: Design and Features

The Pflueger Supreme fly reel, while perhaps not as ubiquitous as some dedicated fly fishing brands, offers a compelling package for both novice and experienced anglers. Its design principles often reflect a pragmatic approach, focusing on reliable function and longevity.

Construction: Many iterations of the Pflueger Supreme fly reel feature a sturdy, yet lightweight, aluminum construction. This choice of material provides excellent corrosion resistance, a crucial factor in both freshwater and saltwater environments. The finish often varied, from polished chrome to anodized colors, appealing to a range of aesthetic preferences. The aim was always to create a reel that could withstand the rigors of regular use while remaining manageable on the fly rod.

Drag System: The heart of any fly reel is its drag system, and the Pflueger Supreme typically incorporated a smooth and dependable disc drag. While not always the most technologically advanced compared to some high-end contemporary models, these drag systems were designed for consistent performance. They provided ample stopping power for a variety of fish species, from trout to smallmouth bass, and allowed for fine adjustments to protect light tippets. The ability to smoothly pay out line under pressure is paramount in fly fishing, and the Supreme’s drag generally delivered on this front.

Arbor Design: Pflueger Supreme fly reels often featured a mid-arbor or large-arbor design, depending on the specific model and era of manufacture. A mid-arbor offers a good balance between line capacity and retrieve rate, while a large-arbor significantly increases the retrieve rate and reduces line memory, which is beneficial for longer casts and quicker line pickup. The choice of arbor size in the Supreme series catered to different fishing scenarios and angler preferences.

Convertibility: A practical feature often found in the Supreme fly reels is their easy convertibility from left-hand to right-hand retrieve. This user-friendly design element ensures that the reel can be adapted to any angler’s preference without complex modifications, making it a versatile choice for individuals or for sharing among fishing partners.

Aesthetics and Ergonomics: While performance is key, the aesthetics of a fly reel also contribute to the overall fishing experience. The Pflueger Supreme fly reels often possessed a classic, understated elegance. The handle knobs were typically well-designed for comfortable grip, even with wet hands, and the overall balance of the reel when paired with a fly rod was usually well-considered.

Fishing with the Pflueger Supreme Fly Reel

The true test of any fishing reel is its performance on the water. The Pflueger Supreme fly reel, depending on its specific model and line weight rating, is well-suited for a variety of fly fishing applications.

For Trout and Panfish: Smaller models of the Supreme, perhaps in a 3/4 or 5/6 weight, are excellent choices for targeting trout in streams and rivers, as well as panfish in lakes and ponds. Their reliable drag system allows for enjoyable fights with these often feisty species, and their capacity is ample for the typical runs encountered.

For Bass and Light Salmon/Steelhead: Larger Supreme models, in the 7/8 or 9/10 weight range, can handle more substantial fish. They are well-suited for bass fishing with streamers and poppers, and some anglers have successfully employed them for light salmon and steelhead applications where long runs are anticipated but extreme drag pressure is not consistently required.

Versatility for Various Techniques: Whether you’re presenting dry flies with delicate accuracy, stripping streamers through subsurface structures, or nymphing deep runs, the Pflueger Supreme fly reel provides a solid platform. Its smooth retrieve and consistent drag contribute to effective line management across a spectrum of fly fishing techniques.

Maintenance and Longevity

One of the hallmarks of well-designed fishing tackle is its ability to stand the test of time with proper care. The Pflueger Supreme fly reel, with its generally robust construction, is no exception. Regular maintenance is key to ensuring its continued performance:

  • Rinsing: After each use, especially in saltwater or murky conditions, a thorough rinse with fresh water is essential to remove salt, dirt, and debris.
  • Drying: Allow the reel to air dry completely before storing to prevent corrosion and mildew.
  • Lubrication: Periodically apply a light coat of reel oil to moving parts and grease to the drag washers as recommended by the manufacturer. This keeps the reel running smoothly and extends its lifespan.
  • Storage: Store the reel in a protective case or bag to prevent scratches and impacts.

With consistent, albeit minimal, maintenance, a Pflueger Supreme fly reel can provide many years, if not decades, of reliable service on the water.

Where Does the Pflueger Supreme Fly Reel Stand Today?

While new Pflueger fly reel models may incorporate more advanced materials and cutting-edge drag technologies, the vintage Pflueger Supreme fly reels continue to hold their appeal. They represent a blend of classic design and proven performance. For anglers looking for an affordable yet dependable fly reel, or for those who appreciate the nostalgia and craftsmanship of older gear, a well-maintained Pflueger Supreme is an excellent choice.

Furthermore, these reels often appear on the used market at very reasonable prices, making them an accessible entry point into fly fishing or a valuable addition to a seasoned angler’s collection. Their straightforward design also makes them relatively easy to service for those who enjoy a bit of DIY reel maintenance.

Conclusion: A Supreme Companion on Your Fly Fishing Journey

The Pflueger Supreme Fly Reel, though perhaps not always in the spotlight of the fly fishing world, has quietly earned its stripes as a dependable and enjoyable companion on countless fishing expeditions. Its legacy of quality, combined with practical design and robust construction, makes it a reel that delivers where it counts: on the water. Whether you’re casting to rising trout in a pristine mountain stream or battling a feisty bass in a warmwater lake, the Pflueger Supreme fly reel offers a connection to the rich history of fishing and a reliable tool to help you make lasting memories. At ReelSchematic.com, we celebrate such connections, and the Pflueger Supreme fly reel is a fine example of a reel that continues to inspire confidence and joy in anglers of all stripes.

Posted on

The Unyielding Heart: Fishing with the Hardy Fortuna Regent Fly Reel

At ReelSchematic.com, we often delve into the intricate mechanics and historical significance of fishing reels. But sometimes, a reel transcends mere engineering to become an extension of the angler’s will, a silent partner in the pursuit of the wild. Such is the case with the Hardy Fortuna Regent, a fly reel that embodies robust power, refined precision, and an almost mythical reliability. For the serious saltwater fly angler, or anyone tackling formidable freshwater species, the Fortuna Regent isn’t just a tool; it’s a statement.

The Pedigree of Power: What Makes the Fortuna Regent Stand Out?

The Hardy Fortuna Regent arrived on the scene with a clear mission: to tame the beasts of the aquatic world. It wasn’t designed for delicate dry fly presentations on a gentle chalkstream, but rather for stopping hard-running, powerful fish in their tracks. This is evident in every aspect of its construction and design.

1. The Drag System: A Hydraulic Hammer

The heart of any big-game fly reel is its drag system, and the Fortuna Regent boasts one that is legendary. It features a fully sealed, multi-pad disc drag system, often described as “hydraulic” in its smoothness and immense stopping power. Unlike some drag systems that can chatter or slip under extreme pressure, the Fortuna Regent’s drag engages flawlessly, delivering consistent, unyielding resistance.

  • Massive Surface Area: The large diameter of the drag plates provides an exceptional surface area for heat dissipation, crucial when a blistering run threatens to melt lesser drags.
  • Micro-Adjustments: Despite its raw power, the drag knob allows for incredibly fine adjustments, enabling anglers to dial in the precise amount of pressure needed, from a light tension for line management to a full lockdown for turning a charging tuna.
  • Sealed for Life: The “sealed for life” design ensures that saltwater, sand, and grime are kept out, maintaining the drag’s performance even in the harshest marine environments. This is a critical feature for any saltwater reel, minimizing maintenance and maximizing reliability.

2. Bulletproof Construction: Machined for the Marine Environment

Hardy has always been synonymous with quality, and the Fortuna Regent is no exception. It is precision machined from high-grade aluminum bar stock, creating a frame and spool that are incredibly rigid and resistant to torque.

  • Corrosion Resistance: Anodized for superior corrosion resistance, the reel stands up to the corrosive effects of saltwater, ensuring longevity and maintaining its aesthetic appeal even after years of use.
  • Solid Feel: Pick up a Fortuna Regent, and you immediately feel its substantiality. There’s no flex or wobble; it feels like a single, unbreakable unit, instilling confidence when battling a trophy fish.

3. Ergonomics and Practicality: Beyond Just Power

While power is paramount, the Fortuna Regent also incorporates thoughtful design elements that enhance the angler’s experience:

  • Large Arbor Design: The large arbor reduces line memory, aids in faster retrieve rates, and helps maintain a more consistent drag pressure as the line is peeled off.
  • Easy Spool Change: While built like a tank, the spool is still relatively easy to remove and change, allowing for quick adjustments to different line weights or backing capacities.
  • Ambush Handle: The large, comfortable handle provides excellent grip and leverage, crucial during extended fights with powerful fish.

On the Water: Taming the Titans

So, what does all this technical prowess translate to on the water? A truly exhilarating and effective fishing experience when targeting robust species.

For the Saltwater Warrior:

The Hardy Fortuna Regent is a natural fit for saltwater fly fishing. Imagine hooking into a powerful GT on a remote coral flat, or a screaming kingfish off the coast. The Regent’s drag system provides the immediate stopping power needed to prevent these fish from reaching structure or spooling you. Its robust construction shrugs off the corrosive effects of salt spray and the occasional dunking. Whether you’re chasing bonefish in the Bahamas, permit in Belize, or even light tuna offshore, the Fortuna Regent offers the peace of mind that your reel won’t be the weakest link.

Chasing Freshwater Giants:

Don’t relegate the Fortuna Regent solely to the saltwater realm. This reel is equally adept at battling freshwater giants. Think about targeting massive Chinook salmon on a powerful river, or hooking into a large sturgeon. Its ability to absorb blistering runs and apply immense pressure can turn a prolonged, nerve-wracking fight into a more controlled and ultimately successful landing. Even for musky or pike on large lakes, where explosive strikes and powerful surges are common, the Fortuna Regent provides the necessary backbone.

The Art of the Fight: Maximizing the Fortuna Regent’s Potential

Fishing with a Hardy Fortuna Regent is not just about raw power; it’s about leveraging that power effectively.

  • Trust the Drag: The most important lesson is to trust the drag. Set it appropriately for the breaking strain of your leader and let the reel do its job. Avoid the temptation to “palm” the spool excessively, as the reel’s drag is far more consistent and powerful than your hand.
  • Maintain Your Grip: The substantial handle is there for a reason. Keep a firm grip and allow the reel to absorb the shock of a powerful run.
  • Backing Matters: Given the power of the drag and the species you’re likely to target, ensure you have ample, high-quality backing. A long run can quickly empty a spool, and the Fortuna Regent’s large arbor is designed to accommodate plenty.
  • Balance is Key: While the Fortuna Regent is a substantial reel, it’s crucial to pair it with a fly rod that is equally capable of handling big fish. A balanced outfit ensures optimal casting performance and fighting leverage.

Beyond Production: A Legacy Reel

While Hardy has continued to innovate with subsequent models, the Fortuna Regent holds a special place in the hearts of many anglers. Its reputation was built on years of reliable performance in the toughest conditions. Many anglers still seek out used Fortuna Regents, knowing they are acquiring a reel built to last a lifetime and beyond. Its robust construction and proven drag system mean that even a well-used Regent can perform as well as a new reel, a testament to Hardy’s engineering prowess.

Conclusion: An Unyielding Ally

The Hardy Fortuna Regent fly reel is more than just a piece of fishing tackle; it’s an unyielding ally in the pursuit of powerful fish. Its immense stopping power, bulletproof construction, and thoughtful design make it a standout choice for serious anglers who demand uncompromising performance. If your angling aspirations involve taming the titans of the water, and you appreciate the peace of mind that comes with knowing your equipment is up to the task, the Hardy Fortuna Regent is a reel that deserves a prime spot in your arsenal. It’s a reel that doesn’t just hold line; it holds your trust, run after screaming run.

Posted on

The Art of Angling Perfected: Fishing with the Islander LX Series Fly Reel

For the discerning fly angler, the tools of the trade are not merely implements; they are extensions of passion, precision, and a deep respect for the pursuit. Among these, the fly reel stands as a silent sentinel, controlling the line, taming the fight, and ultimately dictating the success of an outing. And for those who demand nothing less than excellence, the Islander LX Series Fly Reel stands as a testament to craftsmanship, engineering, and a profound understanding of what makes a truly exceptional fishing experience.

ReelSchematic.com is dedicated to exploring the intricacies of fishing gear, and today, we delve deep into the heart of the Islander LX Series – a reel that consistently earns accolades for its robust construction, flawless drag system, and undeniable aesthetic appeal. This isn’t just a reel; it’s a partner in your angling adventures, capable of handling everything from delicate dry fly presentations to the brute force of an enraged steelhead.

A Legacy of Precision: The Islander Pedigree

Before we dissect the LX Series, it’s worth acknowledging the heritage from which it springs. Islander Precision Machining, based in British Columbia, Canada, has built a reputation over decades for producing some of the finest fishing reels in the world. Their commitment to precision machining, stringent quality control, and a “built to last a lifetime” philosophy resonates deeply with anglers who appreciate gear that performs flawlessly year after year. The LX Series embodies this legacy, showcasing the culmination of their expertise in a fly reel that is both beautiful and incredibly capable.

The LX Series: Engineering Marvel Meets Angling Finesse

At first glance, the Islander LX Series reels are striking. Their clean lines, meticulous anodized finishes, and purposeful design hint at the engineering prowess within. But true appreciation comes with handling and, more importantly, with fishing.

1. Unyielding Construction: Machined from Solid Bar Stock

The foundation of the LX Series’ legendary durability lies in its construction. Each reel is meticulously machined from solid aerospace-grade aluminum bar stock. This isn’t a cast product; it’s a precisely sculpted instrument. The advantages are manifold:

  • Superior Strength-to-Weight Ratio: The material and machining process result in a reel that is incredibly strong without being excessively heavy, ensuring comfortable handling throughout long days on the water.
  • Exceptional Rigidity: This monolithic construction virtually eliminates flex, even under extreme pressure, ensuring consistent drag performance and preventing frame distortion.
  • Corrosion Resistance: The high-grade aluminum, coupled with a robust anodized finish, provides excellent protection against the corrosive effects of fresh and saltwater environments.

2. The Heart of the Beast: The LX Drag System

The drag system is arguably the most critical component of any fly reel, and the Islander LX Series excels in this department. It features a fully sealed, multi-disc cork and stainless steel drag system. This design offers a multitude of benefits:

  • Silky Smooth Engagement: From the lightest setting for protecting fine tippets to full lockdown for stopping hard-charging fish, the drag engages with remarkable smoothness, eliminating jerks and surges that can break lines or leaders.
  • Infinite Adjustability: The large, easy-to-grip drag knob provides precise, incremental adjustments, allowing anglers to fine-tune the drag pressure on the fly, adapting to changing fishing conditions and fish behavior.
  • Thermal Stability: The multi-disc design effectively dissipates heat generated during long, powerful runs, preventing “fade” and ensuring consistent performance even under sustained pressure.
  • Sealed Protection: The fully sealed nature of the drag system prevents the ingress of water, dirt, and grit, ensuring reliable performance in all conditions and significantly reducing maintenance requirements. This is a crucial feature for anglers who brave challenging environments.

3. Ergonomics and User Experience: Thoughtful Design for the Angler

Beyond the core mechanics, the LX Series demonstrates Islander’s attention to the angler’s experience:

  • Large Arbor Design: The large arbor spools on LX reels facilitate faster line retrieve, reduce line memory, and provide consistent drag pressure throughout the fight. This is particularly beneficial when fighting fast-running fish or when needing to quickly pick up slack.
  • Oversized Handle: The ergonomically designed, oversized handle provides a comfortable and secure grip, even with wet hands or gloves, allowing for efficient cranking power.
  • Tool-Free Spool Removal: Changing spools is a breeze, requiring no tools, which is a blessing when you need to switch lines quickly to adapt to changing fishing conditions.
  • Convertible Retrieve: The LX Series is easily convertible from left-hand to right-hand retrieve, accommodating all anglers.
  • Audible Clicker: While the drag system is silent, the LX features a subtle, audible clicker on retrieve and outgoing line, providing satisfying feedback and aiding in line management.

Fishing with the Islander LX Series: A Practical Perspective

So, what does all this engineering translate to on the water? A truly exceptional fishing experience.

1. Delicate Presentations to Finicky Trout: For smaller models like the LX 3.2 or LX 3.4, the smooth drag and precise adjustability allow for the use of the finest tippets. When a wary trout sips a dry fly, the LX provides the confidence to protect that delicate connection, absorbing the initial shock and allowing for a controlled fight. The large arbor helps manage delicate fly lines, ensuring tangle-free casting.

2. Taming the Silver Bullet: Steelhead and Salmon: The larger LX models (LX 3.8, LX 4.0, LX 4.5) come into their own when pursuing powerful anadromous species. The unyielding frame and powerful, consistent drag system are paramount when a chrome-bright steelhead or a thundering Chinook salmon decides to make a run for the horizon. The LX’s ability to dissipate heat and maintain consistent pressure is invaluable in these high-stakes battles, allowing you to put maximum pressure on the fish without fear of drag fade or failure.

3. Saltwater Versatility: While often associated with freshwater, the sealed drag system and corrosion-resistant construction of the LX Series make it a formidable choice for many saltwater applications. From bonefish on the flats to smaller inshore species, the LX can handle the corrosive environment and the powerful runs that saltwater fish are known for. Its reliability in harsh conditions provides peace of mind when facing the challenges of the open water.

4. The Confidence Factor: Perhaps the most intangible, yet significant, benefit of fishing with an Islander LX is the confidence it instills. Knowing that your reel is engineered to the highest standards, that its drag will perform flawlessly when it matters most, allows you to focus entirely on the cast, the presentation, and the fight. It removes a layer of doubt, freeing you to fully immerse yourself in the moment.

Maintenance and Longevity

While the LX Series is designed for durability, a little care goes a long way in ensuring its lifetime performance.

  • Rinse After Use: Especially after saltwater exposure, a thorough rinse with fresh water is essential to remove salt crystals and debris.
  • Occasional Lubrication: While the sealed drag requires minimal attention, a light application of a high-quality reel lubricant to the handle and main shaft occasionally will keep things smooth. Refer to Islander’s recommendations for specific lubrication points.
  • Store Properly: Store your LX reel in a protective case or pouch to prevent scratches and dings.

Conclusion: An Investment in Angling Excellence

The Islander LX Series Fly Reel is more than just a piece of fishing equipment; it’s an investment in your passion. It represents a commitment to quality, a dedication to precision, and a profound understanding of the demands placed on a fly reel. For the angler who values reliability, flawless performance, and a reel that will stand the test of time and countless battles, the Islander LX Series stands as an undeniable choice. It’s a reel that inspires confidence, enhances the angling experience, and truly helps you perfect the art of the catch. So, spool up your favorite line, head to the water, and let the Islander LX Series be your trusted companion in every angling adventure.

Posted on

Click and Pawl: The Hardy Marquis LWT Fly Reel

In the world of fly fishing, few names carry the historical weight and reverence of Hardy. For over a century, the craftsmen from Alnwick, England, have produced reels that are not just tools, but heirlooms. They are objects of mechanical beauty, defined by a classic aesthetic and an unmistakable sound. Perhaps no reel embodies this heritage more completely while embracing modern refinement than the legendary Hardy Marquis LWT.

This is more than just a review; it’s a detailed exploration for ReelSchematic.com into what makes the Marquis LWT a living classic. We’ll delve into its storied past, break down its elegant mechanics, and explore why, in an age of silent, large-arbor super-reels, the audible charm of a click-and-pawl remains the top choice for discerning anglers around the globe.

A Legacy Reborn: The History of the Marquis

The story of the Marquis LWT (Lightweight) begins with its predecessor, the original Hardy Marquis. First introduced in the 1970s, the Marquis quickly became one of the most popular and dependable fly reels in the world. It was a workhorse, renowned for its rugged simplicity and reliability. Fished by countless anglers for everything from small brook trout to powerful Atlantic salmon, the Marquis was a fixture on rivers for decades before its production ceased in the late 1990s.

For years, original Marquis reels were coveted items on the second-hand market, a testament to their enduring design. The angling community’s demand did not go unnoticed. Recognizing the deep affection for this classic, Hardy made the landmark decision to bring it back.

In the mid-2010s, Hardy reintroduced the legend, but with key improvements. The new Marquis LWT series was not merely a replica; it was a respectful evolution. It retained the soul and aesthetic of the original but was updated with modern machining, refined tolerances, and improved performance, all while being proudly made in Alnwick, England.

Anatomy of a Classic: Design, Features, and Mechanics

At its core, the Hardy Marquis LWT is a masterclass in minimalist design. It eschews the complexities of modern disc drags for the classic, time-tested click-and-pawl system. This is not a reel for stopping a freight train; it’s a reel for engaging with the fish, offering just enough resistance to protect fine tippets while allowing the angler to use palming and rod work to control the fight.

Key Features:

  • Made in Alnwick, England: In a world of globalized manufacturing, this detail is paramount. Each Marquis LWT is machined, hand-polished, and assembled by skilled artisans at Hardy’s historic Alnwick facility, continuing an unbroken lineage of quality.
  • 6061 Bar Stock Aluminum Construction: The reel is machined from solid, high-grade bar stock aluminum. This provides superior strength, rigidity, and durability compared to die-cast methods, ensuring the reel can withstand the inevitable bumps and scrapes of a lifetime of fishing.
  • Ported, Classic Arbor Design: The extensive porting (drilled holes) on the frame and spool is a signature of the LWT design. This reduces the reel’s overall weight significantly without compromising structural integrity, making it a joy to pair with modern lightweight graphite or classic bamboo rods. Its classic arbor size is perfect for traditionalists and provides ample backing capacity.
  • The Click-and-Pawl Drag System: This is the heart and soul of the Marquis. A triangular metal “pawl” engages with a gear on the spool, creating an audible “click” on both the retrieve and when a fish takes line. The tension is adjustable via a simple regulator on the back of the reel, allowing the angler to set the desired level of over-spool prevention. The sound is iconic—a sharp, reassuring growl that is, for many, the quintessential sound of fly fishing.
  • Easy Left-to-Right Hand Conversion: The reel features a simple and robust design that allows the angler to easily switch the retrieve direction by flipping the pawls inside the reel.
  • High-Quality Anodized Finish: A deep, gunmetal grey or silver anodized finish protects the aluminum from corrosion and wear, ensuring the reel maintains its timeless beauty.

The On-the-Water Experience: More Than Just a Drag

Fishing with a Marquis LWT is a sensory experience. You feel the direct connection to the line as you strip it from the reel. You hear the satisfying click as you reel up your slack. And when a fish takes, you hear the music. The reel sings a song that speaks of tradition, control, and the raw energy of the fish.

The click-and-pawl system forces the angler to be more engaged in the fight. Without the heavy stopping power of a disc drag, you learn to use the bend of your rod, the angle of pressure, and the palm of your hand against the spool rim to manage a fish’s run. It’s a more tactile, intimate, and, for many, a more rewarding way to fish. It’s a partnership between the angler, the rod, the reel, and the fish.

This style of reel excels in trout and light salmon/grilse fishing. The drag is more than sufficient to prevent overruns on a blistering run from a rainbow trout and provides the subtle touch needed to protect a 6X or 7X tippet when fishing for picky spring creek residents.

Breaking Down the Series: Finding Your Perfect Marquis

The Hardy Marquis LWT is offered in a range of sizes to cover the vast majority of freshwater fishing scenarios.

ModelWeight (oz/g)Diameter (in/mm)Line Capacity (WF + yds)Ideal Application
Marquis LWT 2/32.5 / 712.75 / 70WF3 + 45yds (20lb)The ultimate small stream and brook trout reel. Perfect for rods 7’6″ and under.
Marquis LWT 43.2 / 912.95 / 75WF4 + 50yds (20lb)An excellent all-around choice for small-to-medium streams. Balances beautifully on 3 and 4-weight rods from 7′ to 8’6″.
Marquis LWT 53.4 / 963.14 / 80WF5 + 75yds (20lb)The quintessential trout reel. Perfectly at home on a 9′ 5-weight rod, our generation’s “do-it-all” trout setup.
Marquis LWT 63.8 / 1083.34 / 85WF6 + 80yds (20lb)A fantastic option for heavier trout fishing, light bass, or as a lightweight single-hand salmon or grilse reel.
Marquis LWT 74.1 / 1163.54 / 90WF7 + 110yds (20lb)Ideal for streamer fishing for large trout, bass, or light steelhead and sea trout applications.
Salmon No. 18.8 / 2493.74 / 95WF10 + 150yds (30lb)A step up in size and capacity, designed for two-handed Spey rods and targeting grilse and smaller salmon.
Salmon No. 29.9 / 2814.13 / 105WF11 + 200yds (30lb)The workhorse of the salmon lineup, perfect for summer and fall Atlantic salmon on larger rivers.
Salmon No. 311.6 / 3294.25 / 108WF12 + 250yds (30lb)The largest in the series, built for the biggest rivers, longest Spey rods, and the pursuit of monster salmon or steelhead.

The Final Word: Who is the Marquis LWT For?

The Hardy Marquis LWT is not for every angler. If your primary goal is to winch large saltwater fish from the depths or to halt a running steelhead with sheer mechanical force, a modern disc drag reel is likely a better choice.

But, if you are an angler who values tradition, who believes that the tackle you use is an integral part of the experience, and who seeks a more tactile connection to the fish you pursue, then the Marquis LWT is without peer. It is for the angler who appreciates the history of the sport and the sound of a reel singing under pressure. It’s a statement of quality, a commitment to heritage, and a joy to fish. In a world of fleeting trends, the Hardy Marquis LWT is a beautiful, audible reminder that some things are classic for a reason.

Posted on

The Sound of Tradition: The Hardy Perfect Fly Reel

In the world of fly fishing, few pieces of equipment evoke the same sense of history, craftsmanship, and soul as the Hardy Perfect. It is more than just a tool for holding line; it is a direct link to the sport’s elegant past and a testament to a design so brilliant, it has remained relevant for over 130 years. For many anglers, to fish with a Perfect is to connect with the very essence of fly fishing.

This in-depth guide from ReelSchematic.com will explore the history, mechanics, and the intangible experience of fishing with what is arguably the most iconic fly reel ever made.

A Legacy Cast in Alloy: Over a Century of Perfection

The story of the Hardy Perfect begins in Alnwick, England, in 1891. Patented by Forster Hardy, the reel was a revolutionary departure from the simple, friction-drag winches of the time. Its defining feature was an innovative ball-bearing race and a sophisticated “check” mechanism that protected delicate leaders and announced a running fish with a sound that would become legendary.

The initial design, with its rotating line guard and complex check, was just the beginning. The Perfect evolved continuously, with key design changes marking distinct eras for collectors and anglers:

  • The 1891 “Perfect”: The genesis, featuring a complex design that was soon simplified.
  • The 1905 “Perfect”: Introduced a more refined check system and a more robust build.
  • The 1912 Check: This is the mechanism that many consider the “classic” Perfect design. It simplified the regulator (drag adjustment) and produced an authoritative, roaring click that became the reel’s sonic signature.
  • The “Dwindling” Models (Post-WWII): Production shifted and materials changed, but the core design remained.
  • Modern Reissues: Recognizing the timeless appeal, Hardy has reissued several famous versions of the Perfect, including the Wide Spool and Taupō models, crafted in Alnwick to the same exacting standards as their predecessors. These modern Perfects blend classic design with contemporary materials and precision machining.

The Anatomy of an Icon: What Makes a Perfect “Perfect”?

At its core, the Hardy Perfect is a model of elegant simplicity. Unlike modern disc-drag reels with their complex systems of carbon fiber and cork, the Perfect operates on a beautifully mechanical click-and-pawl system.

Key Components:

  1. The Spool and Frame: Traditionally crafted from bar-stock aluminum, giving it strength without excessive weight. The spool is designed with a classic “narrow” or “wide” configuration depending on the model, affecting line capacity and retrieval rate.
  2. The Ivorine or Erinoid Handle: The classic off-white or polished black handle is one of the reel’s most recognizable features.
  3. The Brass Foot: A short, ribbed brass foot was the standard for decades, designed to fit snugly on bamboo and classic fiberglass rods. Modern reissues often use a bar-stock alloy foot for durability.
  4. The Check System (The “Drag”): This is the heart of the Perfect. It consists of:
    • The Pawl: A small, spring-loaded metal “tongue.”
    • The Gear: A toothed gear on the inside of the spool.
    • The Spring: A flat or “hairspring” that pushes the pawl against the gear.

When a fish takes line, the spool turns, and the pawl clicks over the teeth of the gear. This creates resistance and prevents the spool from overrunning (backlashing). The “drag” is adjusted by a tension regulator on the reel’s backplate, which physically moves the spring to apply more or less pressure on the pawl.

The Sound and the Feel: Fishing with a Click-and-Pawl

Fishing with a Hardy Perfect is a tactile and auditory experience that a sealed disc-drag reel simply cannot replicate.

The Sound: The song of a Hardy Perfect is unmistakable. It’s not a quiet, polite ticking; it’s a rich, mechanical, and authoritative roar. The sound changes with the speed of the fish’s run—starting as a series of distinct clicks and crescendoing into a blur of sound as a powerful trout or salmon peels line from the spool. This sound is your audible connection to the fish, a primal signal that the battle is on. For generations of anglers, this sound is the sound of fly fishing.

The Feel: A click-and-pawl reel has zero startup inertia. The moment a fish begins to pull, the reel gives line smoothly. However, unlike a disc drag that you “set and forget,” a Perfect requires the angler’s involvement. The tension provided by the check is meant to prevent overruns, not to stop a freight train. The real drag control comes from the angler’s hand.

This is where the art of “palming the rim” comes in. As a fish runs, the angler applies pressure to the spinning, exposed rim of the spool with their palm or fingers. This is a dynamic, sensitive way to apply drag:

  • Heavy Pressure: Cupping the palm firmly against the rim to slow a powerful run.
  • Light Pressure: Feathering the rim with your fingertips to subtly steer a fish away from a snag.

This active participation transforms the fight from a simple winching contest into a delicate dance of control and finesse. You feel every surge and head-shake directly through your fingertips.

Choosing and Balancing Your Perfect

Hardy Perfects come in a range of sizes, measured by their diameter in inches. Choosing the right one depends on your target species and rod.

  • 2 7/8″ to 3 1/8″: Ideal for trout fishing on smaller streams with 3- to 5-weight rods. These smaller reels are light and balance beautifully with classic bamboo or modern graphite rods.
  • 3 3/8″ to 3 5/8″: Excellent all-around trout sizes, perfect for 5- and 6-weight rods on medium to large rivers.
  • 3 7/8″ (The Taupō) and larger: These are the salmon and steelhead models. The famous 3 7/8″ Wide Spool “Taupō” Perfect was developed for the powerful wild rainbows of New Zealand’s Lake Taupō. These larger reels have the capacity for thicker fly lines, ample backing, and the strength to handle powerful, anadromous fish.

Balancing the Reel: A key consideration is the reel’s weight. A vintage brass-footed Perfect will be heavier than a modern reissue. The goal is to choose a reel that balances the rod near the front of the cork grip. This creates a setup that feels “alive” in the hand and reduces fatigue during a long day of casting. Pairing a heavy vintage Perfect with an ultra-light modern graphite rod can feel unbalanced; they often sing best when paired with a bamboo, fiberglass, or a more classic-action graphite rod.

The Final Word: Why Fish a Perfect in a Disc-Drag World?

In a world of sealed, maintenance-free, high-performance disc drags, why would an angler choose a 130-year-old design? The answer has little to do with raw stopping power and everything to do with the experience.

You don’t fish with a Hardy Perfect to be efficient; you fish with it to be engaged. You choose it for the satisfying weight in your hand, the smooth rotation of the ball bearings, and the mechanical symphony that erupts when a fish takes line. It forces you to be a more active participant in the fight, relying on your own sense of touch to control the fish.

Fishing with a Hardy Perfect is a deliberate choice to slow down, to appreciate the history of the sport, and to use a piece of equipment that is not only functional but also possesses a genuine, mechanical soul. It’s a nod to the past, a joy in the present, and a legacy that will continue to sing its perfect song on rivers for generations to come.

Posted on

The People’s Champion: The Amundson Trend X5 Mooching Reel

In the world of Pacific Northwest salmon fishing, the mooching reel is an icon. It’s a tool of finesse, a direct link between the angler and the fish, where feel and flawless performance are paramount. For decades, this market was dominated by a few high-priced, big-name reels. But from Richmond, British Columbia, a challenger has emerged, earning a fierce and loyal following not through legacy, but through sheer, uncompromising performance at an incredible value. That reel is the Amundson Trend X5.

This in-depth article for ReelSchematic.com will explore the reel that has become the workhorse for thousands of anglers. We’ll break down its construction, analyze its critically acclaimed drag system, and discuss why the Trend X5 has rightfully earned its reputation as the people’s champion of mooching reels.

The Art of Mooching: Why the Reel Matters

To understand the genius of the Trend X5, one must first respect the nuance of mooching. Unlike trolling, mooching is a hands-on, active technique. Anglers drift with the tide, using a long, soft-action rod to slowly raise and lower a cut-plug herring. The goal is a natural, wounded presentation that a prowling Chinook or Coho salmon can’t resist.

This intimate style of fishing places unique demands on the reel:

  • Zero Startup Inertia: The single most critical factor. When a 30-pound Tyee (a large Chinook) gently mouths a bait and turns, the drag must release line with zero hesitation. Any stickiness or “jerk” will instantly telegraph danger to the fish or, worse, tear the hooks out.
  • Smoothness Under Pressure: Salmon are famous for long, powerful, high-speed runs. The drag must remain silky smooth throughout the fight, absorbing head shakes and preventing break-offs.
  • Durability: The saltwater environment is brutal. A mooching reel is constantly exposed to corrosive salt spray and must be built to last.
  • Line Capacity & Retrieval: Anglers need enough line to reach deep and handle long runs. A large arbor is crucial for picking up line quickly when a fish runs toward the boat.

The Amundson Trend X5 was engineered from the ground up to excel in every one of these categories.

Anatomy of a Workhorse: The Trend X5 Deconstructed

The first impression of the Trend X5 is one of precision and quality that belies its price point. It feels solid, looks clean, and operates with a smoothness usually reserved for reels costing twice as much. This is no accident; it’s a result of smart design and quality materials.

Frame and Spool Construction: The entire reel—frame, spool, and reel foot—is fully CNC-machined from 6061-T6 aircraft-grade aluminum. This is not a cast or forged aluminum reel. The CNC machining process carves the components from a solid block of aluminum, resulting in incredible strength, tight tolerances, and perfect alignment. This rigid foundation ensures there is zero frame-twist when the reel is under the heavy load of a powerful fish.

The Powerplant: A Sealed Multi-Disc Carbon Fiber Drag: Herein lies the soul of the Trend X5. Amundson has implemented a sophisticated and, most importantly, fully sealed, waterproof drag system. This system utilizes multiple discs of carbon fiber, a material prized for its ability to dissipate heat and provide smooth, consistent pressure.

  • Why Sealed is a Game-Changer: By completely sealing the drag housing with gaskets, Amundson protects the critical drag washers from saltwater, grit, and grime. This is the key to its longevity and out-of-the-box smoothness, season after season. An unsealed drag will inevitably get contaminated, leading to the sticky, jerky performance that salmon anglers dread.
  • Performance on the Water: The result is a drag with virtually zero startup inertia. It’s the kind of smoothness that gives an angler the confidence to fish lighter leaders, knowing the reel will protect them. When a big salmon runs, the Trend X5 gives line effortlessly, with no violent jolts to the rod or terminal tackle.

Bearings and Internals: The smooth rotation of the spool is powered by 2+1 Japanese stainless steel ball bearings. The use of high-quality, corrosion-resistant bearings from Japan is a significant detail, ensuring a free-running spool for dropping gear to depth and a silky retrieve.

Ergonomics and Design: Amundson nailed the details that matter during a long day on the water:

  • Large Arbor Spool: The Trend X5 features a large arbor design that is heavily ported (machined with cutouts) to reduce weight without sacrificing strength. This large diameter allows for rapid line pickup, a crucial feature when trying to catch up to a fast-running fish.
  • Sculpted Handles: The dual, sculpted handles are comfortable and provide a secure grip, even with wet or cold hands.
  • Easy Retrieve Conversion: The reel can be quickly and easily converted from left-hand to right-hand retrieve by simply flipping a bearing.

The Lineup: Trend X5 vs. Trend XL 5

Amundson offers the reel in two sizes to cover all mooching and trolling applications.

FeatureAmundson Trend X5Amundson Trend XL 5
Diameter4.5″5.0″
Weight14.8 oz (420g)16.9 oz (480g)
Line Capacity30lb Mono / 300yds30lb Mono / 450yds
Bearings2+1 Stainless Steel2+1 Stainless Steel
Primary UseThe all-around standard for mooching and light trolling. Perfectly balanced on a 10’6″ mooching rod.Heavy-duty mooching, downrigger trolling, and for anglers who want maximum line capacity for deep drops or targeting giant salmon.

On the Water: The People’s Verdict

Talk to guides and serious anglers from Ucluelet to the Columbia River, and you’ll hear a common refrain: the Amundson Trend X5 is the best “bang for the buck” mooching reel on the market. It is constantly compared to reels like the Islander MR3—a reel often considered the pinnacle of mooching design but at a significantly higher price.

The consensus is that the Trend X5 delivers 9/10ths of the performance of the most elite reels, for less than half the cost. Its reputation as a durable, reliable workhorse is well-earned. Anglers praise its ability to handle screaming runs from 30+ pound Chinook in strong tides, with a drag that remains as smooth on the 100th run as it was on the first.

Final Thoughts: More Than Just a Reel

The Amundson Trend X5 is more than just a piece of fishing equipment; it represents a shift in the market. It proves that elite performance, precision machining, and saltwater durability don’t have to come with an inaccessible price tag. It allows more anglers to experience the effectiveness and joy of fishing with a high-quality, purpose-built tool.

For the angler looking to step up from an entry-level plastic reel, or for the seasoned veteran who needs a reliable backup or a new primary reel without breaking the bank, the Trend X5 is an outstanding choice. It’s a reel built for the rigors of the Pacific, designed by people who fish there, and embraced by the community it was built to serve. It is, without question, the people’s champion.

Posted on

The Heart of the Drift: The Daiwa M-One UTD Mooching Reel

For anglers plying the nutrient-rich, tide-swept waters of the Pacific Northwest, the art of mooching is more than just a technique—it’s a tradition. It’s a patient, deliberate dance between boat, bait, and salmon, requiring tackle that is both incredibly durable and subtly refined. In this specialized world, one reel has earned a legendary status for its simplicity, strength, and flawless performance: the Daiwa M-One UTD Mooching Reel.

This comprehensive guide from ReelSchematic.com will explore every facet of this iconic reel. We’ll break down its construction, demystify its acclaimed drag system, and delve into the techniques that make it the gold standard for mooching anglers from British Columbia to Northern California.

What is Mooching? Understanding the Technique

Before appreciating the tool, one must understand the craft. Mooching is a saltwater salmon fishing technique that relies on drifting with the current and tide, presenting a cut-plug or whole herring in the most natural way possible. Unlike trolling, where the boat’s motor provides the action, mooching lets the boat’s drift and the angler’s subtle rod movements impart a tantalizing, wounded spin to the bait.

This method demands a specific type of reel. It doesn’t need blazing fast retrieve speeds or complex casting mechanisms. Instead, a mooching reel must have:

  1. A Flawless Drag System: The initial take from a large Chinook or Coho salmon is often powerful and sudden. The drag must engage smoothly, without a hint of startup inertia, to prevent break-offs.
  2. Generous Line Capacity: Anglers often fish at various depths and need enough line to handle the long, powerful runs of a determined salmon.
  3. Robust, Corrosion-Resistant Construction: The saltwater environment is relentlessly harsh. A mooching reel must be built to withstand constant exposure to salt spray and the rigors of battle with powerful fish.
  4. Simplicity and Ergonomics: Mooching is a hands-on technique. The reel should be easy to palm, with a large, comfortable handle for cranking power.

The Daiwa M-One UTD was engineered to master these exact requirements.

Anatomy of a Legend: The Daiwa M-One UTD Series

At first glance, the Daiwa M-One is a picture of classic, no-frills design. It is, in essence, a large-arbor, single-action reel, not dissimilar in basic function to a large fly reel. However, its purpose-built features set it apart. The series primarily consists of two key models: the MO400-UTD and the slightly smaller MO300-UTD.

Core Features and Construction:

  • Frame and Spool: The M-One features a fully machined, one-piece aluminum frame. This provides a rigid, unyielding foundation that won’t flex or twist when under the strain of a big fish. The spool is also machined from solid bar-stock aluminum, ensuring perfect tolerances and balance.
  • Anodized Finish: To combat the corrosive saltwater environment, the entire reel is protected by a tough, attractive anodized finish. This is a critical feature for longevity.
  • Single-Action, Direct-Drive: There is no complex gear train. When you turn the handle one rotation, the spool turns one rotation. This direct-drive system offers the ultimate in feel and control. The angler is intimately connected to the fish, feeling every head shake and surge.
  • Oversized Handle: The large, comfortable handle provides the necessary leverage to gain line on a powerful fish, even when it’s bulldogging deep below the boat.
  • Left or Right-Hand Retrieve: The reels are designed to be easily converted for either left or right-hand retrieve, catering to any angler’s preference.

The Crown Jewel: Daiwa’s UTD (Ultimate Tournament Drag)

The “UTD” in the M-One’s name is not just a marketing acronym; it is the reel’s single most important feature. The Ultimate Tournament Drag system is a sealed, multi-disc system that combines specially impregnated carbon washers with high-quality stainless steel discs.

What makes the UTD so special for mooching?

  • Zero Startup Inertia: This is the critical factor. When a salmon grabs the bait and turns to run, the UTD engages instantly and seamlessly. There is no “jerk” or “stutter” as the drag starts to slip. This buttery-smooth transition protects light leaders and prevents the hook from tearing out of the salmon’s soft mouth.
  • Consistent, Fade-Free Pressure: As a salmon makes long, blistering runs, lesser drag systems can heat up, causing the drag pressure to fade or become inconsistent. The UTD’s carbon washers are designed to dissipate heat efficiently, maintaining the exact pressure you set from the beginning of the run to the end.
  • Sealed for Durability: The entire drag system is sealed with rubber gaskets, protecting the delicate internal components from saltwater intrusion. This ensures the drag performs flawlessly season after season with minimal maintenance.
  • Wide Range of Adjustment: The star-drag adjustment is precise, allowing anglers to dial in the perfect amount of pressure for their target species and leader strength, from just a few pounds for Coho to heavy-duty settings for big Chinook.

Fishing with the M-One UTD: Technique and Application

Using the M-One is an intuitive and rhythmic experience that lies at the heart of the mooching tradition.

The Setup:

  • Rod: The M-One pairs perfectly with a long, soft-action mooching rod, typically between 10’6″ and 11’6″. This long, parabolic rod acts as a shock absorber for the salmon’s powerful lunges and head shakes.
  • Line: The large capacity spool of the MO400-UTD can hold over 300 yards of 30lb monofilament. Most anglers use high-quality monofilament as their main line for its stretch and forgiveness, followed by a leader of fluorocarbon.

The Process:

  1. The Drop: After setting up the bait, the angler will freespool the line, often using their thumb to feather the spool. The goal is to lower the bait down through the water column to the depth where fish have been marked on the sounder. The single-action design gives the angler precise control over the descent.
  2. The Mooch: With the bait at the desired depth, the reel is engaged. The boat’s drift now takes over. The angler will periodically lift the rod tip in a long, slow motion and then drop it again. This makes the herring dart upwards and then flutter back down, mimicking a wounded baitfish—an irresistible target for a hungry salmon.
  3. The Bite: A salmon bite can range from a subtle “tick” on the line to a violent grab that rips the rod tip down. This is where the M-One’s direct drive shines; the angler feels everything.
  4. The Fight: Once the fish is on, the battle is a true one-to-one connection. The angler uses the smooth UTD drag and the long mooching rod to tire the fish. Gaining line is a matter of “pumping and reeling”—lifting the rod to pull the fish closer, then reeling down to take up the slack line. The large arbor of the M-One helps to retrieve line quickly during this process.

M-One UTD Specifications at a Glance

ModelActionGear RatioBearingsLine Cap. (Mono)WeightDrag Max
MO400-UTDSingle1.0:11BB, 1RB30lb/310yd, 40lb/240yd17.6 oz15.4 lbs
MO300-UTDSingle1.0:11BB, 1RB20lb/300yd, 25lb/230yd16.9 oz15.4 lbs

The Verdict: A Modern Classic for the Purist

In an era of high-speed, multi-geared, lever-drag reels, the Daiwa M-One UTD stands as a proud testament to the effectiveness of purpose-built simplicity. It is not a reel designed to do everything; it is a reel designed to do one thing perfectly: mooch for salmon.

For the angler who appreciates the tactile connection to their quarry and demands a drag system that is nothing short of flawless, the M-One UTD is not just a choice; it is the definitive tool for the craft. Its rugged construction ensures it will be a faithful companion for decades, while its peerless drag provides the confidence needed to land the fish of a lifetime. It is the heart of the drift, a modern classic that continues to define excellence in one of fishing’s most respected traditions.

Posted on

The Islander TR3: A Masterclass in Mooching Mastery

For anglers plying the nutrient-rich, tide-swept waters of the Pacific Northwest, the art of mooching is a time-honored tradition. It’s a technique of finesse, patience, and intimate connection to the gear, where the subtle take of a trophy Chinook salmon is felt through the line, the rod, and the reel itself. In the world of mooching, one reel has consistently stood as the benchmark for performance, durability, and elegance: the Islander TR3.

This is not just a tool; for many, it’s an heirloom. Built on Vancouver Island, British Columbia—the very heartland of salmon fishing—the TR3 is a testament to precision Canadian manufacturing and a deep understanding of what a mooching reel should be. For ReelSchematic.com, we’re diving deep into the Islander TR3, exploring its legacy, its meticulous construction, and why it remains the gold standard for this unique and effective style of fishing.

What is Mooching? Understanding the Technique

Before we can appreciate the TR3, we must understand the technique it was born to perfect. Mooching is a deceptively simple yet incredibly effective method for targeting salmon. At its core, it involves fishing a cut-plug or whole herring on a weighted leader, typically with a banana-style weight, from a slowly drifting or “mooching” boat.

The goal is to present the bait in the most natural way possible, allowing it to spin and flutter enticingly as it moves through the water column. Unlike trolling with downriggers, where the line is clipped in, mooching is a hands-on affair. The angler holds the rod, feeling every bump, every nibble, and every nuance of the drift. The reel is in freespool, with the angler’s thumb acting as the primary drag and line control. When a salmon takes the bait, it’s a direct, electric connection. This is where the design of the mooching reel becomes paramount.

The Islander Philosophy: Precision and Durability

Islander Reels, a division of JK-Fabryka, has been machining high-end fishing reels and components near Victoria, B.C., for decades. Their philosophy is simple: build it right, build it once, and build it to last a lifetime. This isn’t a company focused on mass production; it’s a workshop focused on precision.

The TR3 is the flagship of their mooching line. Every component, from the frame to the spool to the drag knob, is CNC-machined from solid blocks of aerospace-grade aluminum. This results in a reel with virtually zero flex, incredible strength, and tolerances measured in the thousandths of an inch. When you hold a TR3, you immediately feel the quality. There are no plastic parts, no stamped-out components—just solid, beautifully finished metal.

Anatomy of a Legend: A Schematic of the TR3

At its heart, the TR3 is a large-arbor, single-action reel. But its brilliance lies in the details.

Key Specifications:

  • Diameter: 4.5 inches
  • Weight: 15.0 oz
  • Spool Width: 0.95 inches
  • Capacity: 350 yards of 30lb monofilament
  • Retrieve: Left or right-hand (factory set, but can be converted)

1. The Frame and Spool: A Foundation of Strength

The TR3’s one-piece frame is the reel’s backbone. Machining it from a single block of aluminum ensures perfect alignment and prevents any torquing or flexing when a powerful salmon makes a desperate, line-peeling run. The large arbor design of the spool is critical. It allows for rapid line retrieval—a crucial feature when a fish suddenly runs towards the boat—and minimizes line memory, keeping your monofilament in top condition.

The spool is secured with a simple yet foolproof quick-release system, allowing for easy cleaning and maintenance without tools.

2. The Drag System: Butter-Smooth Power

While the angler’s thumb does much of the work in freespool, the TR3’s main drag system is what tames the fish once the reel is engaged. Islander employs a large, sealed drag system utilizing carbon fiber discs. Carbon fiber is prized for its ability to dissipate heat and provide smooth, consistent pressure without the “startup inertia” that can plague lesser drag systems. Startup inertia is the initial resistance a drag has before it begins to slip smoothly; a high-inertia drag can lead to snapped leaders on a powerful hookset or initial run.

The TR3’s drag is famously smooth. It transitions seamlessly from zero to its maximum setting with a satisfying, incremental click from the large, knurled drag knob on the backplate. This allows for precise, on-the-fly adjustments during a long fight. Whether you need to gently palm the spool for a bit of extra pressure or clamp down on a sounding fish, the drag is predictable and utterly reliable.

3. The Freespool Clutch: The Moocher’s Soul

The hallmark of the TR3 is its freespool clutch system. A polished brass lever on the back of the reel allows the angler to instantly disengage the spool from the drag system. This is the essence of mooching. With the lever engaged, the spool spins freely, backwards and forwards, with only the lightest touch of your thumb on the spool’s rim preventing a backlash.

This allows for:

  • Perfect Depth Control: You can instantly drop your bait to the exact depth where you’re marking fish on the sounder.
  • The Natural “Drop Back”: When a salmon picks up the bait, it often mouths it for a moment. A skilled moocher will feed the fish line by letting the spool run free, ensuring the salmon fully takes the bait before setting the hook.
  • Instant Engagement: The moment you set the hook, a simple quarter-turn of the handle instantly re-engages the drag system. The transition is flawless and immediate, putting you in full control of the fight.

4. The Handles and Finish

The TR3 features sculpted, contoured handles that provide a comfortable and secure grip, even with wet or cold hands. They are mounted on robust stainless steel spindles that won’t bend or break. The reel’s finish is a durable, corrosion-resistant anodization, available in a variety of classic colors like black, silver, and gold, as well as occasional custom runs. This protects the aluminum from the harsh saltwater environment and gives the reel its signature, lustrous look.

Fishing the TR3: The On-the-Water Experience

Fishing with an Islander TR3 is a tactile experience. You rig your cut-plug herring, drop it overboard, and click the freespool lever. Your thumb becomes the conductor of the orchestra. You feel the rhythmic thud of the banana weight as you work the gear. You feel the spin of the herring through the rod blank.

When the take comes, it’s unmistakable. It might be a subtle “thump-thump,” or it might be a violent grab that rips line from under your thumb. This is the moment of truth. You point the rod tip towards the fish, give it a few feet of slack to ensure it has the bait, and then, with a smooth, powerful lift of the rod and a simultaneous turn of the handle, the reel engages.

The fight is on. The TR3’s clicker sings its classic, authoritative song as a chrome-bright Coho or a monster Tyee peels line off the spool. The smoothness of the drag inspires confidence, allowing you to focus on fighting the fish, not the gear. Every run is met with consistent pressure, and every turn of the handle retrieves line quickly and efficiently. This is what you paid for—flawless performance when it matters most.

Maintenance and Legacy

An Islander TR3 is an investment, and with minimal care, it will last generations. After each saltwater outing, a thorough rinse with fresh water is essential. The quick-release spool makes this easy. A few drops of quality oil on the handle spindles and a light application of grease on the main spindle once or twice a season is all that’s required. The sealed drag system is designed to be maintenance-free for years.

Many anglers on the Pacific coast are fishing with TR3s that are many years old, and they perform just as flawlessly as the day they were bought. They become part of the family’s fishing story, passed down from parent to child, each scratch and mark a memory of a fish fought and landed.

The Verdict: Is the TR3 Worth It?

In a market with less expensive alternatives, is the premium price of an Islander TR3 justified? For the serious mooching angler, the answer is an unequivocal yes.

You are not just buying a fishing reel. You are buying:

  • Unmatched Durability: A reel machined from solid stock that will not fail.
  • Flawless Performance: A drag and freespool system that works perfectly every time.
  • Precision Engineering: The confidence that comes from using a tool built without compromise.
  • North American Craftsmanship: Supporting a company that builds its products locally to the highest possible standard.

The Islander TR3 is more than just a piece of equipment; it’s the heart of the mooching system. It is a beautiful, functional piece of industrial art that connects the angler to the fish in the purest way possible. For those who understand and cherish the art of mooching, there is simply no substitute.

Posted on

The Islander MR3: A Masterpiece of Mooching and a West Coast Legend

On the rugged, salt-sprayed coast of British Columbia, where mist-shrouded islands guard salmon-rich waters, a specific style of angling was born out of necessity and refined into an art form. This is the world of mooching, a technique predicated on finesse, patience, and a direct, intimate connection between angler and fish. At the very heart of this tradition lies a piece of equipment that is as much a precision instrument as it is a fishing reel: the Islander MR3.

For ReelSchematic.com, we are taking a deep dive into the world of the Islander MR3, a reel that has earned more than just a place in the tackle box—it has earned a legacy. This is a story of impeccable craftsmanship, a unique angling philosophy, and the pursuit of Pacific salmon.

What is Mooching? Understanding the Method Behind the Machine

Before we can appreciate the MR3, we must first understand mooching. Unlike trolling with downriggers, where the line is clipped to a heavy weight far from the rod, mooching is a hands-on, direct-drive experience. Anglers use a long, sensitive rod and a reel with no drag system in the traditional sense. A weight, typically a few ounces, is tied to the mainline, with a leader and cut-plug herring trailing behind.

The boat is positioned up-current or up-wind of the target zone and allowed to drift. The angler slowly lowers the bait to the desired depth, often using the reel’s free-spool to carefully “motor-mooch” by engaging and disengaging the reel to create an enticing, fluttering action with the bait.

The take is often subtle—a slight tick, a change in weight, or a gentle pull. This is where the connection becomes critical. With no drag to buffer the hook-set, the angler relies on palming the reel spool with their hand to apply pressure, absorb the initial run, and fight the fish. It is a pure, unadulterated angling experience, and it requires a reel built for the job.

Enter the Islander MR3: History and Design Philosophy

Crafted in Saanichton, British Columbia, by Islander Reels, the MR3 (Mooching Reel 3) is the culmination of decades of refinement. Islander has been machining high-quality reels since 1991, and their commitment to precision and durability is legendary. The MR3 wasn’t just built to accommodate mooching; it was designed to perfect it.

The philosophy behind the MR3 is one of absolute reliability and flawless function. In the demanding world of saltwater angling, where corrosion is a constant threat and powerful Chinook (King) salmon can expose any weakness in gear, failure is not an option.

Key Design Features of the MR3:

  • CNC Machining: Every major component of the MR3 is precision-machined from solid blocks of aerospace-grade aluminum. This results in incredible strength, perfect tolerances, and a lightweight yet rigid frame that will not flex under the strain of a big fish.
  • The “Drag”: Palming the Spool: The most defining feature of the MR3 is its large, exposed, and impeccably smooth spool rim. This is the drag system. The polished, contoured surface is designed for the angler’s hand. By applying pressure with the palm or fingers, the angler becomes the drag, capable of micro-adjustments in real-time based on the fish’s behavior.
  • Sculpted Spool: The large arbor design of the MR3 spool allows for rapid line retrieval—a critical feature when a salmon screams towards the boat. It retrieves line at an impressive rate, helping anglers keep pressure on the fish.
  • The Clicker: The MR3 features a robust, audible clicker that engages in free-spool. This isn’t just for show. It helps prevent line overruns (backlash) and gives a clear audible signal when a fish takes the bait and moves off. The sound of an MR3 clicker screaming is the stuff of West Coast dreams.
  • Silky Smooth Bushing: Instead of bearings, the MR3 utilizes a high-performance oil-impregnated bronze bushing system. This design choice is deliberate. Bushings are incredibly durable, require minimal maintenance, and are virtually impervious to the harsh saltwater environment, offering a lifetime of smooth, reliable performance.
  • Simple, Bulletproof Internals: Taking apart an MR3 reveals a surprising simplicity. There are no complex drag stacks or dozens of tiny parts. This simplicity is its strength. Fewer moving parts mean fewer potential points of failure.
  • Ergonomics and Balance: From the contoured frame to the large, comfortable handle grips, every aspect of the MR3 is designed for a long day on the water. It balances perfectly on a 10.5-foot mooching rod, feeling like a natural extension of the angler’s arm.

Technical Specifications at a Glance

  • Diameter: 4.6 inches
  • Spool Width: 0.95 inches
  • Weight: 15.2 ounces
  • Capacity: 300 yards of 25lb monofilament
  • Retrieve: Right-hand and Left-hand models available
  • Bearings: Oil-impregnated bronze bushing
  • Finish: Anodized for corrosion resistance, available in various colors.

The Art of Fishing the MR3

Using an Islander MR3 is a tactile experience that engages all the senses. Here’s how a typical sequence unfolds on the water:

  1. The Drop: With a cut-plug herring rigged, the angler places the reel in free-spool. The clicker is engaged. With a thumb on the spool, the line is paid out in a controlled drop. Anglers will often “count pulls” (pulling line from the reel in arm’s-length increments) to reach a specific depth where salmon are marking on the sounder.
  2. The Mooch: Once at depth, the reel is engaged. The angler can now work the bait. By intermittently kicking the boat’s motor in and out of gear or by using the reel’s free-spool feature to drop the bait back, the herring flutters and spins seductively. This is the “mooch.”
  3. The Bite: A salmon bite on a mooching setup can range from a violent strike to a subtle “mushy” feeling as the fish swims with the bait. This is where the angler’s focus is paramount. The direct connection through the line and reel allows the detection of the slightest anomaly.
  4. The Hook-Set: There is no “rearing back.” The hook-set is a firm, sweeping lift of the rod as the angler turns the handle to drive the hook home. At this exact moment, the palming hand is ready.
  5. The Fight: This is the ultimate test of skill. As the salmon makes its first powerful run, the angler feathers the spool rim, applying just enough pressure to slow the fish without breaking the leader. Too little pressure, and the fish might spit the hook; too much, and the line will part. The screaming clicker provides the soundtrack to this battle. Every head shake, every change in direction is felt directly in the palm of the hand. The large arbor spool comes into play when the salmon runs towards the boat, allowing the angler to reel frantically to gather slack line and stay connected.

Why the Islander MR3 is a Legend

In an age of high-tech composite drag systems and multi-speed reels, the Islander MR3 endures as a beloved icon for several key reasons:

  • Unmatched Durability: These reels are often passed down through generations. Their robust build and simple design mean they can withstand decades of hard use with minimal maintenance. An annual cleaning and re-oiling are typically all that’s required.
  • The Pure Experience: The MR3 offers a connection to the fish that is simply unmatched by a conventional reel. The angler is an active participant in the fight, not just a winch operator. It’s a challenging but incredibly rewarding way to fish.
  • Aesthetics and Pride of Ownership: Let’s be honest—the MR3 is a beautiful piece of machinery. The flawless finish, the precise clicker sound, and the knowledge that it was built by craftsmen in British Columbia give it a soul that mass-produced reels lack. Owning an Islander is a statement of appreciation for quality.
  • Effectiveness: For the specific application of mooching, the MR3 is not just a traditional choice; it is arguably the most effective tool for the job. It is purpose-built and performs its intended function flawlessly.

The Final Verdict

The Islander MR3 is more than just a reel. It is a commitment to a style of fishing that values skill and connection over automation. It is a bridge to the rich history of West Coast salmon angling, built with a forward-thinking dedication to precision manufacturing. For the angler looking to engage with their quarry on the most intimate of terms, to feel every pulse and surge of the fight, and to own a piece of equipment that will never let them down, the Islander MR3 is not just an option—it is the destination. It is, without a doubt, a masterpiece of mooching.

Posted on

The Art of the Direct Connection: An Introduction into Mooching Reels

In a world of high-speed gear ratios, complex drag systems, and space-age materials, there exists a reel that is a testament to the elegant beauty of simplicity. It’s a tool that fosters a direct, tactile connection between angler and fish, where every head shake and blistering run is felt in the palm of your hand. This is the world of the mooching reel, a classic design born from the rich salmon fisheries of the Pacific Northwest that continues to offer one of the most engaging and effective ways to fish.

For the uninitiated, a mooching reel might look like an oversized fly reel or a simple line spooler. But for those in the know, its large arbor and distinct single-action design represent the purest form of angling. This is a detailed guide for ReelSchematic.com on everything you need to know about these fascinating and incredibly effective reels.

What is a Mooching Reel? The 1:1 Connection

At its core, a mooching reel is a direct-drive, single-action reel. This is the most critical concept to understand.

  • Single Action: For every complete turn of the handle, the spool makes exactly one revolution. This is a 1:1 gear ratio. There are no gears to multiply your retrieve speed.
  • Direct Drive: The handle is directly connected to the spool. When a fish pulls line, the handle spins backward just as fast. This creates an unparalleled connection to the fight, but also requires a unique approach to angling.

Beyond the 1:1 ratio, several key features define a mooching reel:

  • Large Arbor: They have a very large diameter spool. This helps in retrieving line faster (as each crank pulls in a larger circumference of line) and reduces line memory or coiling.
  • Exposed Palming Rim: The outer edge of the spool is exposed and smooth, designed to be cupped or “palmed” by the angler’s hand. This is the reel’s secondary, and arguably most important, drag system.
  • Simple, Reliable Drag: The mechanical drag system, typically adjusted by a knob in the center of the spool, is not designed for brute stopping power. Its primary job is to prevent spool overrun (backlash) when dropping your bait and to provide a light, consistent baseline of tension.
  • The Clicker: A simple on/off switch engages a pawl that “clicks” as the spool turns. This is not for fighting the fish but serves two purposes: it adds a bit of tension to prevent overrun on the drop and provides an audible signal when a fish takes line.

A Rich History Forged in the Pacific Northwest

The mooching reel is not a modern invention. Its roots are deeply embedded in the commercial and recreational salmon fisheries of British Columbia and Washington State, dating back to the early 20th century. Salmon anglers needed a simple, robust tool to present baits naturally in the currents.

The term “mooching” itself refers to the technique of slowly trolling or drifting with the current, presenting a cut-plug herring or anchovy in a way that “mooches” or begs for a strike. The technique required a reel that could precisely control the bait’s depth, often involving free-spooling line in small increments to find salmon suspended in the water column.

Early reels were made by small, local machine shops. They were simple, often heavy, but incredibly durable. Legendary brands like Hardy produced early models like the “Hardy Longstone” that were adopted by West Coast salmon anglers. Over time, North American manufacturers refined the design, leading to iconic brands like Islander Reels from British Columbia and offerings from giants like Shimano and Daiwa, who recognized the effectiveness of this regional technique.

The Anatomy of a Modern Mooching Reel

While the core principles remain, modern mooching reels benefit from advanced materials and precision engineering.

  • The Frame: The reel’s body is typically machined from a solid block of aircraft-grade aluminum. This one-piece construction provides incredible rigidity and strength, preventing any flex when fighting a powerful Chinook salmon.
  • The Spool: Also machined from aluminum, the spool is designed to be lightweight yet strong, with a large arbor to maximize line retrieval and minimize line memory.
  • The Drag System: Modern reels have far superior drag systems compared to their predecessors. While still not the main tool for fighting fish, they use materials like carbon fiber to provide smooth, consistent, and easily adjustable pressure. This is crucial for setting the initial tension correctly.
  • The Handle: Handles are often ergonomically designed for comfort during long fights. Some models feature single, large handles, while others use dual, counter-balanced handles.
  • Bearings: High-quality, corrosion-resistant ball bearings ensure the spool turns with fluid smoothness, which is essential for detecting subtle bites.

The Technique: How to Fish with a Mooching Reel

Fishing with a mooching reel is an active, hands-on experience. You don’t just cast and retrieve; you work the currents and depths, becoming a part of the underwater ecosystem.

The Setup

  • The Rod: A classic mooching rod is long (typically 10 to 12 feet) with a very soft, parabolic action. This “noodle rod” acts as a giant shock absorber, protecting the light leaders used and compensating for the reel’s lack of a sophisticated drag.
  • The Line: Most anglers use 20-30 lb monofilament. Its stretch is forgiving and helps absorb the shock of a strike.
  • The Rig: The classic mooching rig consists of a sliding banana weight or cannonball sinker on the mainline, followed by a bead chain swivel. To this, you attach a 4- to 8-foot leader of lighter monofilament or fluorocarbon, terminating in a tandem hook setup to properly rig a baitfish.

The Process

  1. Baiting Up: The goal is to make your cut-plug herring or anchovy spin with a tight “corkscrew” roll. This is achieved by cutting the head at an angle and threading the hooks through the body. A perfect roll is key to attracting salmon.
  2. The Drop: Position your boat up-current or up-wind from your target zone. With the clicker on, put the reel in free-spool and let your bait descend. Many anglers use a “pull-stop” method, pulling out a set length of line (e.g., two feet) and pausing, allowing the bait to flutter and spin as it sinks. This is how you “fish the drop” through the entire water column.
  3. The Mooch: Once at your desired depth, engage the reel. Now you simply drift with the tide or use a trolling motor to create a slow, natural presentation, typically 1-2 mph. Raise and lower your rod tip, or periodically drop another few feet of line, to give the bait an enticing, wounded action.
  4. The Bite: This is where the 1:1 connection shines. A bite is often not a jarring slam but a subtle “thump-thump” or a sudden weightlessness. With no gears in the way, you feel everything.
  5. The Fight: This is the moment of truth. When a big Chinook or Coho salmon takes off, the handle will spin backward at a terrifying speed. DO NOT try to grab the handle! Let the fish run. This is where palming comes in.
    • Palming the Rim: As the fish runs, you gently apply pressure to the exposed rim of the spool with the palm of your hand. This is your drag. You can feather it with incredible precision, applying more pressure as the fish slows and backing off when it surges. Your palm becomes the drag system, dissipating heat and controlling the fight.
    • The Pump and Wind: When the fish stops running, you use the long rod to “pump” it towards you, lifting the rod tip, and then quickly reeling with the single-action handle as you lower the rod tip to gain line. It’s a rhythmic, time-honoured dance.

Why Choose a Mooching Reel?

In an age of high-tech alternatives, why stick with such a seemingly archaic design?

Advantages:

  • Unmatched Feel: The direct-drive system offers the most tactile fishing experience possible. You feel every nuance of the fight.
  • Precision Depth Control: The free-spool drop allows for meticulous and precise bait presentation at any depth.
  • Durability: Their simple construction with few moving parts makes them incredibly robust and reliable. There are fewer things to break.
  • Line Twist Reduction: The large arbor and straight-off-the-spool line path significantly reduce line twist compared to spinning reels.
  • The Fun Factor: Successfully landing a large, powerful fish on a mooching reel is one of the most rewarding experiences in angling. It is a true test of skill.

Disadvantages:

  • Slow Retrieve: The 1:1 ratio is slow. Checking your bait from 100 feet down takes time and effort.
  • Learning Curve: Properly fighting a fish, especially palming the reel without getting your knuckles rapped by the spinning handle, takes practice.
  • Limited Application: Mooching reels are specialized tools, primarily designed for the specific technique of mooching. They are not versatile for casting or other methods.

Key Brands and Models

  • Shimano: The Shimano Moocher Plus GT is a modern classic, incorporating graphite construction and a waterproof dartanium drag. It’s a reliable workhorse for many anglers.
  • Daiwa: The Daiwa M-One UTD series offers similar performance with an Ultimate Tournament Drag (UTD) system, providing smooth and consistent baseline tension.
  • Islander: For those seeking the pinnacle of performance and craftsmanship, the Islander MR3 is a precision-machined masterpiece. Made in Canada, it’s considered by many to be the gold standard.
  • Abel: Known for their high-end fly reels, Abel also produces mooching reels that are a testament to quality, with flawless machining and powerful, smooth drags.
  • Amundson: Offering great value and performance, the Amundson TMX 5 is a popular choice for both new and experienced mooching anglers.

The Final Word

The mooching reel is more than just a piece of fishing tackle; it’s a connection to a rich history and a commitment to a more intimate style of fishing. It forces the angler to be patient, focused, and in tune with their quarry. While high-speed reels have their place, the deliberate, rhythmic dance of mooching offers a satisfaction that is hard to replicate. If you’re looking to challenge yourself and experience the fight in its purest form, spool up a mooching reel, rig up a herring, and feel the direct connection for yourself.

Posted on

Power Up Your Pursuit: Shimano’s Electric Reel Series

Offshore and deep-sea angling has been revolutionized by a single piece of technology: the electric reel. For anglers plumbing the abyssal depths for swordfish, battling monster tuna, or simply seeking an edge in efficiency, electric reels have become indispensable tools. At the forefront of this technological wave is Shimano, a name synonymous with quality and innovation in the fishing world. Shimano’s electric reel lineup, a testament to their engineering prowess, offers a comprehensive range of options catering to various techniques, target species, and budgets.

This in-depth guide for ReelSchematic.com will explore the entirety of Shimano’s electric reel series, from the powerhouse Beastmaster to the versatile Forcemaster and the accessible Plays. We will delve into the cutting-edge technology that drives these reels, break down the specifications of each model, and help you determine which Shimano electric reel is the perfect companion for your next offshore adventure.

The Genesis of Power: A Nod to Dendou-Maru

Before the current trifecta of electric reel series, there was the Dendou-Maru. This was Shimano’s pioneering line of electric reels, with early models like the TITANOS Dendou-Maru ED 6000 appearing in the late 1980s. These reels laid the groundwork for what was to come, introducing features like digital depth counters and programmable functions that were revolutionary at the time. The Dendou-Maru series established Shimano’s commitment to integrating advanced electronics with robust reel design, a philosophy that continues to this day.

Core Shimano Electric Reel Technologies

Understanding Shimano’s electric reels begins with understanding the innovative technologies they are built upon. These features are the heart and soul of their performance, providing the power, durability, and user-friendly experience that anglers have come to expect.

  • GigaMax Motor: Found in the top-tier Beastmaster series, the GigaMax is a brushless DC motor that delivers exceptional torque, high-speed winding, and incredible durability. Its brushless design means fewer wearing parts, leading to a longer lifespan and more efficient power delivery.
  • Muteki Motor: The Muteki motor, a powerful brushed DC motor, is the workhorse found in many Forcemaster and Plays models. It provides a fantastic blend of power and speed, capable of handling a wide range of deep-water applications.
  • HAGANE Body: The HAGANE Body is a testament to Shimano’s commitment to rigidity and durability. By using high-rigidity metals like aluminum, the HAGANE Body eliminates reel flex under heavy loads, ensuring that all the angler’s and motor’s power is translated directly into winding force.
  • Heat Free System II: Battling large fish from the depths generates significant heat in the drag system and motor. The Heat Free System II incorporates vents in the reel’s side plate, allowing heat to dissipate and maintaining optimal performance during long, grueling fights.
  • Thermo Adjust Drag: This smart feature works in conjunction with the Heat Free System. If the drag starts to slip excessively, which can cause heat buildup, the Thermo Adjust Drag will automatically reduce the motor speed to prevent overheating and protect the drag system.
  • Cross Carbon Drag: This drag system utilizes carbon washers to provide smooth, powerful, and consistent drag pressure. It’s capable of handling the long, powerful runs of pelagic giants and the stubborn tug-of-war with bottom dwellers.
  • e-Exciting Drag Sound: Instead of a traditional mechanical clicker, Shimano has implemented an electronic drag sound. This provides clear, audible feedback when a fish is taking line, with the sound intensity often corresponding to the speed of the run.
  • Fine Dot LCD: Clarity of information is crucial when fishing at depth. Shimano’s Fine Dot LCD screens are bright, clear, and easy to read even in direct sunlight, displaying critical data like depth, line out, and program modes.
  • CI4+: This is a Shimano-exclusive carbon-infused material that is lighter and more rigid than conventional materials. It’s often used in components like handle knobs to reduce weight without sacrificing strength.
  • S A-RB (Shielded Anti-Rust Bearings): These bearings are put through a special process to make them highly corrosion-resistant. They also feature shields on both sides to reduce the possibility of salt, sand, or dirt from impeding their rotation.

The Lineup: A Series-by-Series Breakdown

Shimano has structured its electric reel offerings into three distinct series, each with its own set of models and intended applications.

1. Beastmaster Series: The Apex Predator

The Beastmaster series represents the pinnacle of Shimano’s electric reel technology. These reels are built with one primary purpose: to dominate the largest and most powerful inhabitants of the deep. Featuring the formidable GigaMax motor and the most robust construction, the Beastmaster is the choice for serious deep-droppers, swordfish specialists, and those targeting grander-class tuna.

A key distinction within this series is the “MD” (Monster Drive) designation, which signifies an even higher level of power and durability.

Notable Beastmaster Models:

ModelMax Drag (kg/lbs)Gear RatioWeight (g/oz)Braid Capacity (PE/m)Key FeaturesPrimary Application
Beastmaster MD 1200043 / 942.4:12300 / 81.1PE8-1200, PE10-900NEW GIGA-MAX MOTOR, 43kg Drag, Enhanced Heat DissipationExtreme Deep Dropping, Giant Tuna, Swordfish
Beastmaster 9000B25 / 553.1:11485 / 52.4PE6-1100, PE8-900GigaMax Motor, HAGANE Body, Thermo Adjust DragDeep Dropping, Kite Fishing for large pelagics, Daytime Swordfish
Beastmaster MD 600043 / 942.4:12070 / 73PE6-830, PE8-600NEW GIGA-MAX MOTOR, Reinforced Gear SystemHeavy Deep Dropping for Grouper and Tilefish, Tuna
Beastmaster 3000EJ20 / 443.9:1810 / 28.6PE5-350, PE6-300GigaMax Motor, EJ Mode (Electric Jigging)Electric Jigging for Tuna, Amberjack, and other powerful pelagics
Beastmaster 2000EJ15 / 335.1:1690 / 24.3PE3-500, PE4-400GigaMax Motor, EJ Mode, One-Pitch Distance DisplayLighter Electric Jigging applications

2. Forcemaster Series: The Versatile Workhorse

The Forcemaster series is arguably the most versatile of Shimano’s electric reel offerings. These reels strike a perfect balance between power, speed, and affordability. Equipped with the powerful Muteki motor, Forcemaster reels are capable of tackling a wide array of offshore and deep-sea challenges. From deep-dropping for tilefish and grouper to kite fishing for sailfish, there is a Forcemaster model designed for the task.

The Forcemaster lineup includes a variety of sizes, from the compact 600 series to the formidable 9000. The smaller models, such as the 600, often come in different handle configurations (e.g., DH for double handle) and left-hand retrieve options (model number ending in 1).

Notable Forcemaster Models:

ModelMax Drag (kg/lbs)Gear RatioWeight (g/oz)Braid Capacity (PE/m)Key FeaturesPrimary Application
Forcemaster 9000A25 / 553.1:11515 / 53.4PE6-1260, PE8-1030Muteki Motor, HAGANE Body, Heat Free System IIDeep Dropping, Kite Fishing for Sailfish and Tuna
Forcemaster 600030 / 663.1:11390 / 49PE8-600, PE10-500Muteki Motor, HAGANE Body, Enhanced DragHeavy bottom fishing, targeting large Grouper and Snapper
Forcemaster 300020 / 443.9:1825 / 29.1PE5-400, PE6-350Muteki Motor, Cross Carbon DragGeneral purpose deep dropping and bottom fishing
Forcemaster 600/601/DH10 / 226.5:1490 / 17.3PE2-300, PE3-200Muteki Motor+, Fall Lever, Speed ClutchLight deep dropping, Tenya, Tai Rubber, Squid
Forcemaster 200/201/DH6 / 13.28.2:1395 / 13.9PE0.8-400, PE1-330MUTEKI MOTOR+, TouchDrive, Speed ClutchUltra-light electric applications, shallow water jigging

3. Plays Series: The Gateway to Power

The Plays series is designed to make the world of electric reel fishing more accessible to a broader range of anglers. While being the most budget-friendly of the three series, the Plays reels do not skimp on performance. They feature robust motors, often the Muteki, and a host of Shimano’s core technologies. The Plays series is an excellent choice for anglers looking to get into deep-water fishing for the first time or for those who need a reliable electric reel for less demanding applications.

Recent updates to the Plays series, such as the introduction of new 3000 and 4000 models in 2024, have further enhanced their capabilities with features like the HAGANE Body.

Notable Plays Models:

ModelMax Drag (kg/lbs)Gear RatioWeight (g/oz)Braid Capacity (PE/m)Key FeaturesPrimary Application
Plays 4000 (2024)15 / 333.2:11245 / 43.9PE6-500, PE8-300HAGANE Body, Powerful MotorDeep-water bottom fishing for species like Alfonsino and Rockfish
Plays 3000 (2024)15 / 333.9:1685 / 24.2PE5-350, PE6-300Muteki Motor, HAGANE Body, Fire Mach SystemMid-depth bottom fishing for Kingfish, Amberjack, Grouper
Plays 800/100010 / 225.1:1615 / 21.7PE3-400, PE4-300 (1000)Muteki Motor, Super Free SpoolLight to medium deep dropping and bottom fishing
Plays 6005 / 115.5:1470 / 16.6PE2-300, PE3-200Heat Free System, Super Slow RetrieveLight game electric fishing, targeting smaller deep-water species

Choosing Your Weapon: Matching the Reel to the Mission

With such a diverse lineup, selecting the right Shimano electric reel can seem daunting. Here’s a quick guide to help you narrow down your choices based on your target species and fishing style:

  • For the Deep-Drop Specialist (Tilefish, Grouper, Snapper): Your primary concerns are power and line capacity. The Beastmaster series, particularly the 9000B or MD 6000, is the top choice for its immense winding power and durability. The Forcemaster 9000A and 6000 are also excellent and highly capable options.
  • For the Swordfish Hunter: Daytime swordfishing requires significant line capacity and the power to lift these gladiators from the depths. The Beastmaster MD 12000 or 9000B are the go-to reels for this demanding application.
  • For the Kite Fishing Enthusiast (Sailfish, Tuna): Kite fishing requires a reel with a fast retrieval speed to quickly bring in the kite and baits. The Forcemaster 9000A is a popular and effective choice due to its balance of speed and power. The Beastmaster 9000B also excels in this role.
  • For the Electric Jigging Pioneer (Tuna, Amberjack): The specialized Beastmaster EJ models (3000EJ, 2000EJ) are purpose-built for this technique, offering programmable jigging modes and the power to handle aggressive strikes and fights.
  • For the Light-Tackle and Inshore Angler: If you’re exploring the benefits of electric reels for lighter applications like deep-water fluke, sea bass, or squid, the Forcemaster 600 or Plays 600/800 offer a compact and lightweight solution with ample power.

The Final Word

Shimano’s electric reel series offers a masterclass in engineering, providing anglers with the power, technology, and reliability to conquer the challenges of deep-water and big-game fishing. Whether you are a seasoned professional demanding the ultimate in performance with a Beastmaster, a versatile angler in need of a Forcemaster’s all-around capabilities, or an enthusiast taking your first step into power-assisted fishing with a Plays model, Shimano has a reel that will elevate your experience on the water. By understanding the technology and carefully considering your fishing needs, you can confidently select a Shimano electric reel that will serve as a trusted partner in your pursuit of the fish of a lifetime.

Posted on

Power Up Your Pursuit: Daiwa Dendoh Electric Reel Series

From the abyssal depths where monster grouper and swordfish roam to the demanding techniques of kite fishing and deep-dropping, modern angling presents challenges that often push human endurance to its limits. For the dedicated angler looking to conquer these frontiers, Daiwa’s Dendoh series of electric reels has become an indispensable ally. This comprehensive guide will explore the full spectrum of Daiwa’s electric reel offerings, from the workhorse Tanacom to the pinnacle of performance in the Seaborg, and the versatile Leobritz, providing a detailed look at the technology and applications that have made the Dendoh name synonymous with power and precision.

The “Dendoh,” translating from Japanese as “electric,” represents a paradigm shift in how anglers approach deep-water fishing. These sophisticated tools are not about removing the sport from fishing but rather about enhancing the angler’s capabilities. By taking on the arduous task of retrieving heavy weights from extreme depths, Daiwa’s electric reels allow anglers to focus on the thrill of the fight, presentation of the bait, and the strategic nuances of their craft.

The Core of Dendoh: A Technological Revolution

Across the Dendoh series, a suite of proprietary Daiwa technologies forms the foundation of their exceptional performance. Understanding these features is key to appreciating the advantages each model offers.

The Power Lever® and Jog Power Lever: At the heart of the user experience is Daiwa’s intuitive Power Lever®. This simple, thumb-operated lever allows for instant and variable control over the reel’s winding speed and power. Pushing the lever forward engages the retrieve, with the speed increasing the further it’s advanced. This allows for precise adjustments on the fly, whether you’re slowly inching a bait into position or rapidly bringing up a rig to check for bait. The more advanced Jog Power Lever, often found on the Seaborg and Leobritz models, offers even more nuanced, one-handed control, perfect for the active techniques of jigging and kite fishing.

Digital Line Counter: Gone are the days of color-coded line and mental calculations. Every Dendoh reel features a bright, easy-to-read digital display that provides a precise readout of the line let out. This is a game-changer for targeting suspended fish or consistently dropping to a productive spot on a wreck or ledge.

Programmable Auto Stop: This intelligent feature allows the angler to program the reel to automatically stop retrieving when the lure or rig reaches a preset distance from the surface. This prevents a heavy sinker from crashing into the rod tip, a common and costly mistake in deep-water fishing.

Sealed Electronics: Daiwa’s Dendoh reels are built to withstand the harsh saltwater environment. Their electronics are housed in a sealed compartment, protecting the sensitive components from saltwater intrusion and allowing for a thorough freshwater washdown after each use.

Powerful Motors: Megatorque and BRITZ: The driving force behind these reels are Daiwa’s custom-designed electric motors. The Megatorque motor, found in the high-end Seaborg and some Tanacom models, is a brute of a power plant, delivering incredible torque and winding power for battling the largest of deep-water denizens. The BRITZ motor, featured in the Leobritz series, is a powerful brushed motor that delivers instant power in a more compact and lightweight package, ideal for active fishing styles.

The Dendoh Lineup: A Reel for Every Deep-Water Endeavor

Daiwa’s Dendoh series is not a one-size-fits-all solution. Instead, it comprises three distinct families of reels, each tailored to specific angling applications and budgets.

The Tanacom Series: The Workhorse of the Deep

The Tanacom series has earned a reputation as the go-to electric reel for a broad range of anglers, from serious recreational fishermen to charter captains. Offering a fantastic blend of power, features, and affordability, the Tanacom is a true workhorse.

  • Tanacom 750: A popular choice for its balance of size and power, the Tanacom 750 is a versatile performer. It’s well-suited for deep-dropping for snapper, grouper, and tilefish, and is also a favorite among kite fishermen for its ability to quickly retrieve kites after a strike.
  • Tanacom 800: A newer addition to the lineup, the Tanacom 800 bridges the gap between the 750 and the larger 1000, offering increased line capacity and power in a relatively compact frame.
  • Tanacom 1000 & 1200: When the depths get serious and the targets are true giants, the Tanacom 1000 and the even larger 1200 step up to the plate. With immense line capacity and significant winding power, these reels are built for the toughest deep-dropping applications, capable of pulling trophy-sized fish from the abyss.

The Leobritz Series: Lightweight Power and Finesse

The Leobritz series is designed for the angler who values a more hands-on, active approach. These reels are noticeably more compact and lightweight than their Tanacom and Seaborg counterparts, making them comfortable to hold and fish with for extended periods.

  • Leobritz 300J & 300JL: These compact powerhouses are a dream for deep-water jiggers. The “J” in their designation stands for jigging, and they come equipped with a host of programmable jigging functions that can replicate the rhythmic action of mechanical jigging with the press of a button. The “L” denotes a left-hand retrieve model. The new 2024 Leobritz 300JL continues to refine this concept with enhanced features and an even more ergonomic design.
  • Leobritz S500J & S500JP: Offering a larger line capacity and more power than the 300 size, the 500 models are versatile reels that can handle both deep-dropping for medium-sized gamefish and power-assisted jigging. The “P” in the S500JP indicates a focus on power.

The Seaborg Series: The Pinnacle of Electric Reel Technology

For the angler who demands the absolute best, the Seaborg series represents the zenith of Daiwa’s electric reel engineering. Manufactured in Japan with the finest materials and packed with the most advanced technology, the Seaborgs are the ultimate tools for the most demanding deep-water applications.

  • Seaborg 300J & 500MJ: These reels are the epitome of compact power. The “MJ” signifies “Mega Power” and “Mega Speed,” a testament to their incredible performance. They are favored by anglers targeting powerful pelagics and bottom dwellers who require both speed to pick up slack line and brute force to turn a fish’s head.
  • Seaborg 800MJ & 1200MJ: These are the heavy lifters of the Seaborg family, designed for the most extreme deep-water challenges. From battling giant swordfish in the canyons to deep-dropping for the largest grouper and tilefish, the 800MJ and 1200MJ offer uncompromising power and performance.
  • Seaborg G1800M-RJ: The newest and most powerful addition to the Dendoh lineup, the G1800M-RJ is a true monster of a reel. With a redesigned, more powerful Megatorque-G motor and an impressive drag system, this reel is built for the angler targeting the absolute biggest and baddest fish in the ocean. The “RJ” stands for Remote Jog, a feature that allows the angler to control the reel remotely, a significant advantage in various fishing scenarios.

Making the Right Choice: Which Dendoh is for You?

With such a diverse lineup, selecting the right Dendoh reel can seem daunting. Here’s a simplified breakdown to guide your decision:

  • For the dedicated deep-dropper and kite fisherman who needs a reliable and powerful reel without breaking the bank, the Tanacom series is the clear choice. The specific model will depend on your target depth and the size of the fish you pursue.
  • For the active angler who enjoys deep-water jigging or wants a more lightweight and manageable electric reel for bottom fishing, the Leobritz series offers the perfect blend of power and finesse.
  • For the serious angler who demands the ultimate in performance, technology, and power for tackling the most challenging deep-water scenarios, the Seaborg series is the only answer.

The Future of Deep-Water Angling

The Daiwa Dendoh series of electric reels has fundamentally changed the landscape of deep-water fishing. They have made previously inaccessible fisheries and techniques available to a wider range of anglers and have empowered them to pursue their passion with greater efficiency and success. As technology continues to evolve, we can expect Daiwa to remain at the forefront of innovation, pushing the boundaries of what’s possible in the world of electric reels and continuing to power the pursuits of anglers around the globe.

Posted on

The Downrigger Line Dilemma: Braided Line vs. Stainless Steel Cable

For the dedicated trolling angler, the downrigger is an indispensable tool, a gateway to the deep, temperature-controlled zones where trophy fish lurk. It offers unparalleled depth control, allowing for the precise placement of lures. At the heart of this system is the line connecting the reel to the cannonball—a component that has seen significant debate and evolution over the years. The choice between traditional stainless steel cable and modern braided superlines is a critical one, with each material offering a distinct set of advantages and disadvantages. This detailed guide will explore the properties, performance, and practical considerations of both options to help you make the best choice for your fishing style.

The Original: Tried-and-True Stainless Steel Cable

For decades, stainless steel cable was the only option for downriggers, and it remains a popular and reliable choice for many anglers today. Typically made from 304-grade stainless steel, this twisted wire cable is known for its sheer toughness and durability.

The Advantages of Stainless Steel Cable:

  • Exceptional Durability: Stainless steel cable is highly resistant to abrasion and can withstand years of use and abuse. It can handle accidental contact with rocks, propellers, and other underwater obstacles far better than braided line.
  • Ease of Use: Cable is relatively stiff, making it less prone to tangles on the spool or when setting lines. It’s also easy to attach to cannonballs using standard crimps and swivels, a familiar process for most anglers.
  • The “Hum” Factor: As it moves through the water, stainless steel cable produces a distinct humming or vibrating sound. There are two schools of thought on this: some seasoned anglers swear this hum acts as a fish attractant, drawing curious salmon and trout in for a closer look at the lure spread.
  • Cost-Effective: Generally, a spool of stainless steel downrigger cable is less expensive upfront than a high-quality braided equivalent.

The Disadvantages of Stainless Steel Cable:

  • Significant Blowback: This is the single biggest drawback of steel cable. Due to its larger diameter and texture, it creates significant drag in the water. This drag causes the cannonball to be pushed back and up from its true vertical position, a phenomenon known as “blowback.” At deep depths or higher trolling speeds, your 100-foot counter reading might mean your cannonball is actually only 80 feet down and 50 feet behind the boat. This makes precise lure placement a challenge.
  • Potential for Kinks: While durable, steel cable can be permanently damaged by kinking. A bad kink creates a weak spot that can lead to a lost cannonball and release clip.
  • Maintenance Requirements: To prevent rust and corrosion, especially in saltwater, steel cable requires regular rinsing with fresh water and periodic inspection for broken strands or “meathooks” that can easily cut hands.
  • Electrical Charge (The Black Box Theory): Some theories suggest that downrigger cables can carry a slight electrical charge from the boat’s zinc anodes and electrical system. This has led to the development of “black box” technology designed to control this voltage, as an unnatural charge could potentially repel fish.

The Modern Challenger: High-Performance Braided Line

The advent of braided superlines, made from materials like Spectra and Dyneema, has revolutionized many aspects of fishing, and downrigging is no exception. These high-strength, thin-diameter lines offer a compelling alternative to traditional cable.

The Advantages of Braided Line:

  • Minimal Blowback: This is the primary reason anglers switch to braid. Its incredibly thin diameter for its strength (150-200 lb test braid can be as thin as 30 lb monofilament) cuts through the water with minimal resistance. This means your cannonball runs much closer to true vertical, giving you far more accurate depth placement and a better understanding of where your lures are.
  • Silence and Stealth: Braid is completely silent as it moves through the water. For anglers who believe the cable “hum” spooks wary fish, this is a major advantage, allowing for a stealthier presentation.
  • No Kinks or Rust: Braided line will not kink, rust, or develop dangerous “meathooks” like steel cable. It also doesn’t hold an electrical charge, eliminating the need to consider a black box.
  • Increased Spool Capacity: Due to its thin diameter, you can often fit more line on your downrigger spool, which can be an advantage when fishing in extremely deep water.

The Disadvantages of Braided Line:

  • Lower Abrasion Resistance: Braid’s biggest weakness is its susceptibility to being cut. Contact with sharp rocks, zebra mussels, or a boat propeller will likely sever the line, resulting in the loss of your entire setup.
  • Rigging Complexity: Attaching braid to a downrigger ball requires specific knots and techniques to ensure it doesn’t slip. A common and effective method is to use a large, high-quality stainless steel coastlock swivel. The braid is tied to the fixed ring of the swivel using a strong knot like a Palomar or Uni knot, and the snap end is clipped to the cannonball. Some anglers also add a rubber snubber in-line to absorb shock.
  • Can “Flea” Up: Over time, the line can become fuzzy or develop “fleas” from the constant friction of the pulley wheels and retrieve process. While this is often just cosmetic, it requires regular inspection.
  • Handling and Safety: A 150-pound test braided line under extreme tension can be dangerous. It can easily cut through skin if it wraps around a finger during a snag. Gloves should always be worn when handling a snagged braid downrigger line.

Head-to-Head Comparison

FeatureStainless Steel CableBraided Line
Blowback/DragHighVery Low
Depth AccuracyPoor, requires compensationExcellent, nearly vertical
NoiseProduces a “hum”Silent
DurabilityHigh abrasion resistanceLow abrasion resistance
KinkingProne to permanent kinksWill not kink
MaintenanceRequires freshwater rinse, rust inspectionInspect for frays, re-tie knots
RiggingSimple crimps and swivelsRequires specific, strong knots
Safety“Meathooks” can cut handsCan cut deeply under tension
CostLower upfront costHigher upfront cost

Which Should You Choose?

The decision ultimately comes down to your priorities as an angler:

  • Choose Stainless Steel Cable if: You are a budget-conscious angler, you frequently fish in areas with sharp, rocky bottoms or other underwater hazards, or you subscribe to the theory that the cable’s hum attracts fish. It is a reliable, workhorse option that has caught fish for generations.
  • Choose Braided Line if: Your primary goal is precision depth control. If you are a technical troller who wants to know exactly where your lures are running in the water column, the minimal blowback of braid is a game-changer. It is the superior choice for deep-water applications and for those who believe a stealthy, silent approach is best.

Regardless of your choice, proper maintenance and regular inspection are key to preventing the loss of expensive downrigger equipment. By understanding the distinct characteristics of both stainless steel cable and braided line, you can confidently spool up your downriggers and get back to what matters most: fishing the deep with precision and confidence.

The Downrigger Line Dilemma: Choosing Between Traditional Stainless Steel Cable and Modern Braided Line

For the serious troller, the downrigger is the ultimate tool for precise depth control, allowing anglers to place their lures exactly where the fish are. It’s a simple yet ingenious device, but the connection between the downrigger and the heavy cannonball weight is a critical component that directly impacts performance, maintenance, and safety. For decades, the standard has been stainless steel cable, a reliable and robust choice. However, the rise of modern superlines has introduced a compelling alternative: heavy-pound-test braided line.

The choice is no longer automatic. Each material comes with a distinct set of advantages and disadvantages. Is the time-tested tradition of steel the right choice, or do the technological advancements of braid warrant a switch? This detailed guide will walk you through every aspect of this critical decision, empowering you to spool up your downriggers with the material best suited for your fishing style.

The Standard Bearer: The Case for Stainless Steel Cable

Walk down any marina dock, and you’ll find the vast majority of downriggers spooled with stainless steel cable. It’s the original, the workhorse, and for many anglers, it remains the go-to choice for several compelling reasons.

The Advantages of Steel Cable:

  • Extreme Durability: Stainless steel is incredibly tough. It stands up well to the nicks, scuffs, and abrasion that can occur when weights occasionally drag along the bottom or bump against the boat.
  • Proven Reliability: It’s a known quantity. Anglers have trusted steel cable for generations. Its properties are well-understood, and the methods for rigging and repair are standardized.
  • Ease of Termination: Rigging a cannonball to steel cable is straightforward using crimps and swivels, a skill easily learned and executed with basic tools.

The Disadvantages and Dangers of Steel Cable:

  • Significant Blowback: This is the primary performance drawback. The larger diameter and textured surface of the twisted cable create significant drag in the water. This causes the downrigger ball to trail back at an angle, known as blowback. At deeper depths or faster trolling speeds, a counter reading of 100 feet might mean your weight is only at a true depth of 85 feet, compromising depth accuracy.
  • The “Hum” and Electrolysis: When trolling, steel cable vibrates, creating an audible “hum” that travels through the water. The debate on whether this hum attracts or spooks fish is endless. Some Great Lakes salmon anglers swear by it as an attractant, while many ocean and freshwater anglers believe it spooks wary fish. Furthermore, the cable can carry a positive electrical charge from the boat into the water, a phenomenon known as electrolysis, which many believe repels fish. This has led to an entire market of “black box” devices designed to control this voltage.
  • Kinking and “Meathooks”: Cable is prone to kinking if not handled carefully. A kink creates a weak spot that can lead to failure. More dangerously, as the cable wears, individual strands can break, creating sharp, needle-like wires often called “meathooks.” These can easily inflict painful and deep cuts on unsuspecting hands.
  • Maintenance and Rust: Despite being “stainless,” the cable is not entirely immune to corrosion, especially in saltwater environments. It requires regular freshwater rinses and inspection for rust and broken strands.

The Modern Challenger: The Advantages of Braided Line

Utilizing the same technology found in modern fishing lines, downrigger braid is typically a high-pound-test (150-250 lb) microfilament line. Anglers who make the switch often become fervent converts, citing a host of performance benefits.

The Advantages of Braided Line:

  • Minimal Blowback: This is braid’s greatest advantage. Its incredibly thin diameter for its strength and its smoother surface allow it to slice through the water with far less resistance than cable. This results in significantly less blowback, meaning the depth on your counter is much closer to the true depth of your weight. This allows for more precise lure presentation and the ability to use lighter weights to reach the same depths.
  • Stealth and Silence: Braid is completely silent in the water. It eliminates the hum associated with cable, offering a more stealthy approach that is crucial for spooky or line-shy fish. It also completely eliminates the issue of electrolysis, as it is non-conductive.
  • Ease of Handling: Braid is supple and doesn’t kink. It’s easier on the hands (though can still cause a friction burn if grabbed at high speed) and far more forgiving to spool.
  • Longevity: High-quality downrigger braid is impervious to rust and highly resistant to UV degradation, offering a very long service life if properly maintained.

The Disadvantages of Braided Line:

  • Rigging Nuances: You cannot use crimps on braided line. It requires specific knots or terminal connection kits to securely attach the downrigger ball. While not difficult, it is a different process than rigging cable.
  • Abrasion Resistance: While tough, braid is a bundle of fine fibers. A significant scrape against a sharp rock or reef could potentially sever the line more easily than steel cable. To combat this, many anglers will rig a heavier, more abrasion-resistant leader of monofilament or cordage for the last few feet of the line.
  • Potential for Dig-in: If not spooled under sufficient tension, the fine diameter of braid can “dig in” to the underlying wraps on the spool, causing a jam.

Head-to-Head Comparison

FeatureStainless Steel CableBraided LineThe Verdict
BlowbackHighVery LowBraid is the clear winner for depth accuracy.
StealthNoisy (hums), creates electrical fieldSilent, no electrolysisBraid offers a much stealthier presentation.
DurabilityHigh abrasion resistance, but kinks and rustsExcellent longevity, no kinks or rust, but susceptible to sharp cutsTie. Depends on the primary hazard: abrasion or long-term wear.
MaintenanceRequires regular rinsing, inspection for “meathooks” and rustRequires rinsing, occasional re-tying of terminal knotBraid is generally lower maintenance.
RiggingSimple crimps and swivelsRequires specific knots and terminal tackleCable is slightly more straightforward for beginners.
Safety“Meathooks” pose a significant cutting hazardLow risk of cuts, but friction burns are possibleBraid is significantly safer for day-to-day handling.

Practical Rigging and Final Considerations

Rigging Stainless Steel Cable: This typically involves creating a loop at the terminal end using a crimping sleeve. A thimble is often placed inside the loop to prevent chafing. This loop is then attached to a heavy-duty coastlock swivel, which in turn clips to the downrigger ball. A rubber snubber is highly recommended between the swivel and the ball to absorb shock.

Rigging Braided Line: The most common method is to use a large, high-quality coastlock swivel and attach the braid using a strong, reliable knot like a 10-20 turn Uni Knot or a Palomar Knot. It is crucial to test your knots thoroughly. Some manufacturers, like Scotty, also provide terminal fastening kits specifically designed for their braided line. Adding a 5-10 foot section of heavier monofilament or tuna cord at the end can provide extra abrasion resistance and a thicker section for release clips to grab onto.

Making Your Choice

  • For the Casual Angler: If you fish shallower waters (<100 feet) and are on a tighter budget, traditional stainless steel cable is a perfectly adequate and reliable choice. Its durability provides peace of mind.
  • For the Serious Troller: If you demand precision, fish in deep water, target line-shy species, or simply want the latest in performance, the switch to high-quality downrigger braid is one of the best upgrades you can make. The reduction in blowback and the increase in stealth can make a significant difference in your catch rate.

Ultimately, the line on your downrigger is a vital link in your trolling system. By understanding the distinct characteristics of both stainless steel cable and modern braided line, you can make an informed decision that enhances your efficiency, confidence, and success on the water.

Posted on

Mastering the Depths: A Comprehensive Guide to Fishing with Electric Downriggers

For anglers looking to target fish suspended deep in the water column, few tools are as revolutionary or as effective as the electric downrigger. This sophisticated piece of equipment unlocks the ability to present your lure at a precise, repeatable depth, hour after hour, transforming the often-frustrating guesswork of deep-water trolling into a science. Whether you’re chasing salmon in the Great Lakes, lake trout in the Canadian Shield, or walleye in deep reservoirs, understanding how to properly use an electric downrigger will fundamentally change your approach and dramatically increase your success.

This comprehensive guide will walk you through everything from the fundamental principles to advanced, professional-level tactics for using electric downriggers.

Why Use a Downrigger? The Core Advantages

Before diving into the “how,” it’s crucial to understand the “why.” What makes a downrigger so effective?

  1. Unmatched Depth Precision: This is the number one benefit. A downrigger allows you to place your lure exactly where the fish are, whether they’re holding 57 feet down over a 200-foot bottom or suspended 15 feet off a deep weed edge. Your fish finder shows you the target; the downrigger lets you hit it.
  2. Use of Light Tackle: Unlike methods that use heavy inline weights, dipsey divers, or lead-core line, the downrigger separates the weight from your fishing line. This means you can fight the fish directly on your chosen light-action rod and reel, enjoying the full sport of the battle without heavy gear interfering.
  3. Stealthy and Natural Presentation: Your lure is connected to the main line only by a thin, nearly invisible fishing line. The heavy weight and steel cable are several feet away, minimizing the hardware that could spook wary fish.
  4. Versatility of Lures: You can troll virtually any type of lure at any depth, from lightweight spoons and plugs to large flasher-and-fly combinations, without worrying about whether the lure can dive to the target depth on its own.

Anatomy of an Electric Downrigger

Understanding the components is the first step to mastering the machine.

  • The Base/Mount: This is what secures the downrigger to the boat’s gunwale. Swivel bases are highly recommended as they allow you to rotate the downrigger inboard for easier rigging and docking.
  • The Boom: The arm that extends out over the water. Booms come in various lengths, from short 24-inch models to long, telescoping arms over 60 inches. Longer booms provide better separation for your lines, reducing tangles, especially when turning.
  • The Motor & Spool: The heart of the electric system. A powerful 12-volt motor drives the spool, which holds 200 to 400 feet of stainless-steel cable. The electric motor allows for effortless retrieval of the heavy cannonball weight with the push of a button.
  • The Line Counter: A crucial mechanical counter that shows precisely how much cable you have deployed. This is how you achieve repeatable depth accuracy.
  • The Downrigger Weight (Cannonball): A hydrodynamic lead weight, typically ranging from 6 to 15 pounds. Heavier weights track more vertically under the boat (less “blowback”) and are necessary for deeper water or faster trolling speeds. Many modern weights are finned for better stability and are coated in vinyl to protect the boat’s hull.
  • The Line Release Clip: This is the critical link. The release clip attaches to the cannonball or cable and holds your fishing line, taking it down to the target depth. When a fish strikes, the tension pops the line free from the clip, and you are free to fight the fish on your rod and reel.

Setting Up for Success: Rigging and Deployment

Here is the step-by-step process for getting your line in the water and fishing effectively.

Step 1: Get the Lure Out Before you do anything with the downrigger, let your lure out behind the boat. This distance, known as the “lead” or “drop back,” is crucial. A standard starting point is 20-100 feet. Shorter leads give the lure more action from the boat’s turns, while longer leads provide a stealthier presentation.

Step 2: Attach the Line to the Release Clip With your lure at the desired distance behind the boat, grab your fishing line and open the line release clip. Most common clips are the “pinch-pad” style. Secure the line between the pads with just enough tension to hold it firmly. You want it to release on the strike, but not prematurely. Pro-Tip: To get a feel for the right tension, have a friend pull on the line to simulate a strike.

Step 3: Deploy the Cannonball Place the release clip on the downrigger cable just above the cannonball. Using the downrigger’s controls, begin lowering the weight into the water. Keep a thumb on your fishing reel’s spool to prevent backlash as the cannonball pulls line from it.

Step 4: Zero the Counter and Send it Down Once the cannonball is just below the surface and pulling line smoothly, reset your line counter to zero. Now, use the “down” button to send the weight to your target depth as indicated by your fish finder. If you marked fish at 65 feet, send it to 65 feet.

Step 5: Set the Rod Place your rod in a dedicated rod holder. Reel in any slack line until the rod has a moderate bend or “load” in it. This pre-loaded tension helps drive the hook home and ensures a clean release from the clip when a fish strikes.

Key Concepts for Precision Trolling

Understanding Blowback: Blowback is the horizontal distance your downrigger weight trails behind the boat due to the drag of the water. It’s a critical concept because your lure is not directly below your boat. The faster you troll and the lighter your weight, the more blowback you will have. For example, at 3 mph with a 10lb weight, your lure might actually be 15-20 feet higher in the water column than your line counter indicates. Using a heavier weight minimizes blowback. Many modern fish finders have features that help calculate the true depth of your downrigger ball.

The Fish Finder is Your Eyes: An electric downrigger and a quality fish finder are a powerful team. Use your sonar to:

  • Mark Fish: Identify the exact depth where fish are holding.
  • Identify the Thermocline: Find this temperature transition layer where baitfish and predators often congregate.
  • Follow Structure: Troll along underwater points, drop-offs, and humps with precision, keeping your lure in the strike zone continuously.

The Strike and the Fight: A downrigger strike is unmistakable. Your pre-loaded rod will suddenly snap straight up as the line releases from the clip. This is your signal to grab the rod—the fish is on! There is no need for a dramatic hookset; the forward motion of the boat and the loaded rod have already done the work. Simply start reeling to maintain pressure and enjoy the fight. While you’re fighting the fish, it’s good practice to use the “up” button on your downrigger to bring the cannonball back to the surface to avoid potential tangles.

Advanced Downrigger Tactics

Once you’ve mastered the basics, you can employ these professional strategies.

Stacking Lines: This technique allows you to fish two lures on a single downrigger cable, testing two different depths simultaneously.

  1. Deploy your first lure and send the downrigger down to your deepest target depth (e.g., 80 feet).
  2. Rig a second rod and lure. Attach a “stacker” release clip directly to the downrigger cable.
  3. Stop the downrigger at your shallower target depth (e.g., 50 feet). Clip your second line into the stacker release, let out your desired lead, and then continue lowering the downrigger back to 80 feet.
  4. You are now fishing one lure at 80 feet and a second lure at 50 feet on the same downrigger.

Running “Cheaters”: A “cheater” or “slider” is a second, lighter lure added to your main fishing line between the rod tip and the downrigger release. A simple rubber band or a special lightweight release clip is used to attach a short (4-6 foot) leader with a lure to the main line. When you deploy your main line, the cheater slides down and will run somewhere between the surface and your main lure, creating an additional offering higher in the water column.

Fishing with electric downriggers is a dynamic and engaging process. It’s a system that marries technology with angling intuition, allowing you to explore the water column with unparalleled control. By investing the time to learn the equipment and the strategies, you will unlock a new level of fishing success and gain access to fish that were once out of reach.