- The Trophy Tyee Mooching Reel
- The Anatomy of a Classic: A Technical Breakdown of the Shimano Moocher Plus Reel
- The People’s Champion: The Amundson Trend X5 Mooching Reel
- The Heart of the Drift: The Daiwa M-One UTD Mooching Reel
- The Islander TR3: A Masterclass in Mooching Mastery
- The Islander MR3: A Masterpiece of Mooching and a West Coast Legend
- The Art of the Direct Connection: An Introduction into Mooching Reels
For anglers plying the nutrient-rich, tide-swept waters of the Pacific Northwest, the art of mooching is more than just a technique—it’s a tradition. It’s a patient, deliberate dance between boat, bait, and salmon, requiring tackle that is both incredibly durable and subtly refined. In this specialized world, one reel has earned a legendary status for its simplicity, strength, and flawless performance: the Daiwa M-One UTD Mooching Reel.
This comprehensive guide from ReelSchematic.com will explore every facet of this iconic reel. We’ll break down its construction, demystify its acclaimed drag system, and delve into the techniques that make it the gold standard for mooching anglers from British Columbia to Northern California.
What is Mooching? Understanding the Technique
Before appreciating the tool, one must understand the craft. Mooching is a saltwater salmon fishing technique that relies on drifting with the current and tide, presenting a cut-plug or whole herring in the most natural way possible. Unlike trolling, where the boat’s motor provides the action, mooching lets the boat’s drift and the angler’s subtle rod movements impart a tantalizing, wounded spin to the bait.
This method demands a specific type of reel. It doesn’t need blazing fast retrieve speeds or complex casting mechanisms. Instead, a mooching reel must have:
- A Flawless Drag System: The initial take from a large Chinook or Coho salmon is often powerful and sudden. The drag must engage smoothly, without a hint of startup inertia, to prevent break-offs.
- Generous Line Capacity: Anglers often fish at various depths and need enough line to handle the long, powerful runs of a determined salmon.
- Robust, Corrosion-Resistant Construction: The saltwater environment is relentlessly harsh. A mooching reel must be built to withstand constant exposure to salt spray and the rigors of battle with powerful fish.
- Simplicity and Ergonomics: Mooching is a hands-on technique. The reel should be easy to palm, with a large, comfortable handle for cranking power.
The Daiwa M-One UTD was engineered to master these exact requirements.
Anatomy of a Legend: The Daiwa M-One UTD Series
At first glance, the Daiwa M-One is a picture of classic, no-frills design. It is, in essence, a large-arbor, single-action reel, not dissimilar in basic function to a large fly reel. However, its purpose-built features set it apart. The series primarily consists of two key models: the MO400-UTD and the slightly smaller MO300-UTD.
Core Features and Construction:
- Frame and Spool: The M-One features a fully machined, one-piece aluminum frame. This provides a rigid, unyielding foundation that won’t flex or twist when under the strain of a big fish. The spool is also machined from solid bar-stock aluminum, ensuring perfect tolerances and balance.
- Anodized Finish: To combat the corrosive saltwater environment, the entire reel is protected by a tough, attractive anodized finish. This is a critical feature for longevity.
- Single-Action, Direct-Drive: There is no complex gear train. When you turn the handle one rotation, the spool turns one rotation. This direct-drive system offers the ultimate in feel and control. The angler is intimately connected to the fish, feeling every head shake and surge.
- Oversized Handle: The large, comfortable handle provides the necessary leverage to gain line on a powerful fish, even when it’s bulldogging deep below the boat.
- Left or Right-Hand Retrieve: The reels are designed to be easily converted for either left or right-hand retrieve, catering to any angler’s preference.
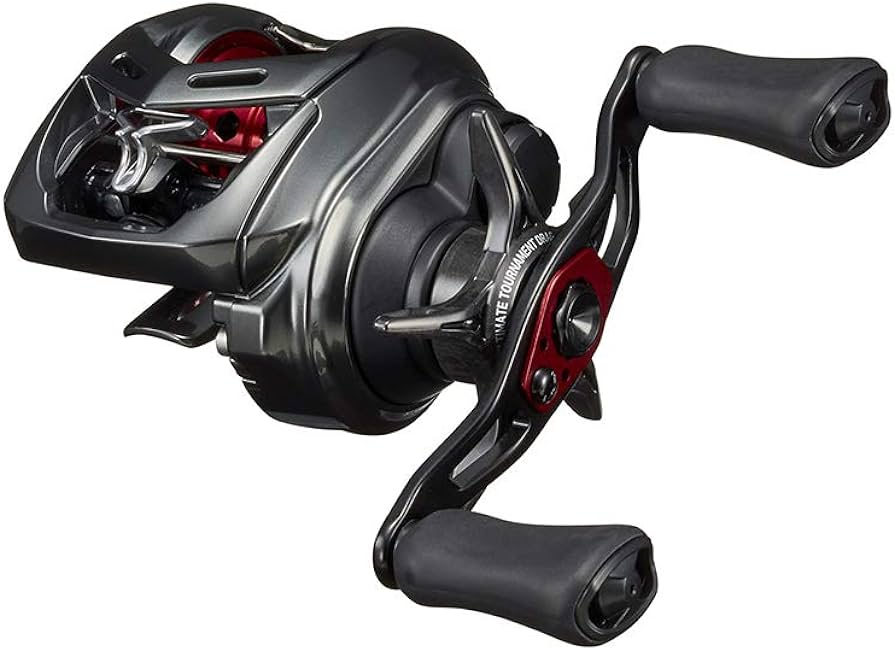
The Crown Jewel: Daiwa’s UTD (Ultimate Tournament Drag)
The “UTD” in the M-One’s name is not just a marketing acronym; it is the reel’s single most important feature. The Ultimate Tournament Drag system is a sealed, multi-disc system that combines specially impregnated carbon washers with high-quality stainless steel discs.
What makes the UTD so special for mooching?
- Zero Startup Inertia: This is the critical factor. When a salmon grabs the bait and turns to run, the UTD engages instantly and seamlessly. There is no “jerk” or “stutter” as the drag starts to slip. This buttery-smooth transition protects light leaders and prevents the hook from tearing out of the salmon’s soft mouth.
- Consistent, Fade-Free Pressure: As a salmon makes long, blistering runs, lesser drag systems can heat up, causing the drag pressure to fade or become inconsistent. The UTD’s carbon washers are designed to dissipate heat efficiently, maintaining the exact pressure you set from the beginning of the run to the end.
- Sealed for Durability: The entire drag system is sealed with rubber gaskets, protecting the delicate internal components from saltwater intrusion. This ensures the drag performs flawlessly season after season with minimal maintenance.
- Wide Range of Adjustment: The star-drag adjustment is precise, allowing anglers to dial in the perfect amount of pressure for their target species and leader strength, from just a few pounds for Coho to heavy-duty settings for big Chinook.
Fishing with the M-One UTD: Technique and Application
Using the M-One is an intuitive and rhythmic experience that lies at the heart of the mooching tradition.
The Setup:
- Rod: The M-One pairs perfectly with a long, soft-action mooching rod, typically between 10’6″ and 11’6″. This long, parabolic rod acts as a shock absorber for the salmon’s powerful lunges and head shakes.
- Line: The large capacity spool of the MO400-UTD can hold over 300 yards of 30lb monofilament. Most anglers use high-quality monofilament as their main line for its stretch and forgiveness, followed by a leader of fluorocarbon.
The Process:
- The Drop: After setting up the bait, the angler will freespool the line, often using their thumb to feather the spool. The goal is to lower the bait down through the water column to the depth where fish have been marked on the sounder. The single-action design gives the angler precise control over the descent.
- The Mooch: With the bait at the desired depth, the reel is engaged. The boat’s drift now takes over. The angler will periodically lift the rod tip in a long, slow motion and then drop it again. This makes the herring dart upwards and then flutter back down, mimicking a wounded baitfish—an irresistible target for a hungry salmon.
- The Bite: A salmon bite can range from a subtle “tick” on the line to a violent grab that rips the rod tip down. This is where the M-One’s direct drive shines; the angler feels everything.
- The Fight: Once the fish is on, the battle is a true one-to-one connection. The angler uses the smooth UTD drag and the long mooching rod to tire the fish. Gaining line is a matter of “pumping and reeling”—lifting the rod to pull the fish closer, then reeling down to take up the slack line. The large arbor of the M-One helps to retrieve line quickly during this process.
M-One UTD Specifications at a Glance
| Model | Action | Gear Ratio | Bearings | Line Cap. (Mono) | Weight | Drag Max |
|---|---|---|---|---|---|---|
| MO400-UTD | Single | 1.0:1 | 1BB, 1RB | 30lb/310yd, 40lb/240yd | 17.6 oz | 15.4 lbs |
| MO300-UTD | Single | 1.0:1 | 1BB, 1RB | 20lb/300yd, 25lb/230yd | 16.9 oz | 15.4 lbs |
The Verdict: A Modern Classic for the Purist
In an era of high-speed, multi-geared, lever-drag reels, the Daiwa M-One UTD stands as a proud testament to the effectiveness of purpose-built simplicity. It is not a reel designed to do everything; it is a reel designed to do one thing perfectly: mooch for salmon.
For the angler who appreciates the tactile connection to their quarry and demands a drag system that is nothing short of flawless, the M-One UTD is not just a choice; it is the definitive tool for the craft. Its rugged construction ensures it will be a faithful companion for decades, while its peerless drag provides the confidence needed to land the fish of a lifetime. It is the heart of the drift, a modern classic that continues to define excellence in one of fishing’s most respected traditions.